Wise gardeners allow for potential problems with their veggie growing, sowing more seeds than they probably need. But that means when things go well and you avoid mishaps, you're rewarded with a dauntingly large harvest.
Nowhere is this more true than with tomatoes. A row of healthy vines can provide more fresh produce than even the most committed tomato fan can enjoy in a season. This is where preserving comes in, spreading your crop's bounty across the year's less productive months.
There are three main ways of preserving tomatoes: freezing, bottling, and drying. None of them will keep your fruits in vine-fresh condition - that's impossible - but all of them are well worth trying.
Important Note: Whichever preservation method you use, always choose firm, ripe, undamaged tomatoes. Damaged fruits can easily harbour contaminants that risk spoiling an entire preserved batch.
1) Preserving Tomatoes by Freezing - The Simple Way
Freezing tomatoes is by far the most straightforward way of preserving them for later use in cooked dishes. Very little preparation is necessary.
However, the freezing and defrosting process reduces the fruits to a pulpy mush, and so they're best reserved for use in soups, stews, and sauces.
Here's what to do.
- Sort through your tomatoes, removing any damaged fruits.
- Optionally blanch and peel the tomatoes by cutting a skin-deep cross in the base of each fruit, plunging them into boiling water for ten to twenty seconds, then removing and allowing to cool. The skins should then peel off easily.
- For larger tomatoes, cut into halves or quarters and remove the stem. Smaller cherry tomatoes can generally be left whole.
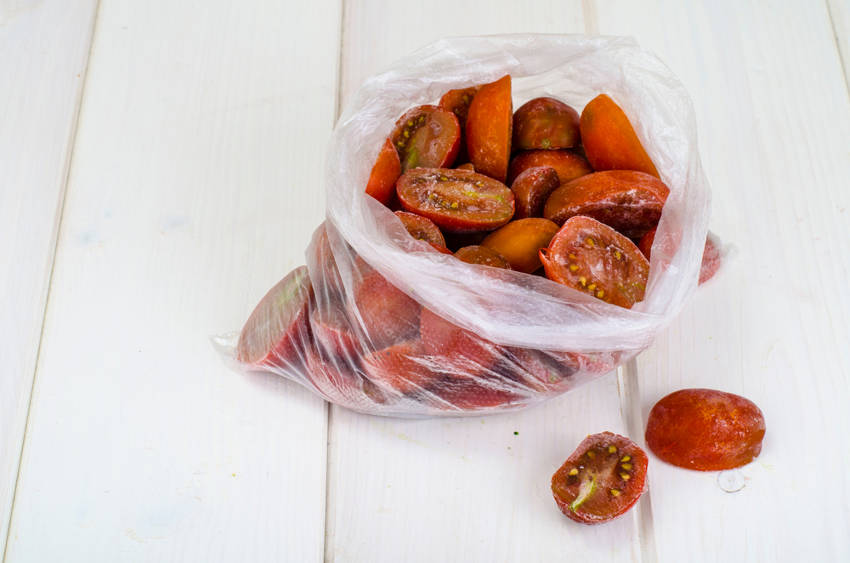
- Lay the tomatoes out on a flat freezer-proof sheet, in a single layer and not touching, and place in your freezer.
- Once they're fully frozen, transfer your tomatoes to sealable plastic bags and return to the freezer where they'll keep for six months or more.
Freezing a Sauce or Passata
While the simple freezing method works well, it takes up a lot of space. If the bulk of your tomatoes are destined for a liquid cooked dish anyway, why not cook and reduce them first, so you can pack more into your freezer?
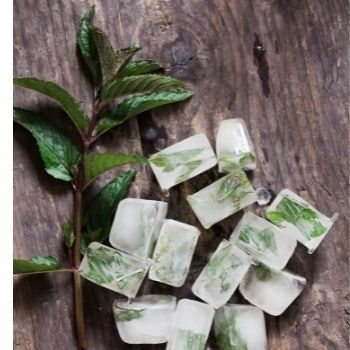
For this freezing method, simply make a tomato sauce by sweating your fruits down in a little oil, along with optional herbs, garlic, or other flavourings of your choice.
Once the tomatoes have reduced to your liking, liquidise the sauce or pass it through a sieve to remove seeds and skin fragments.
The results can be frozen, portioned out in plastic containers, ready to be thawed and added direct to liquid dishes as they cook.

2) Bottling Tomatoes Using a Pressure Canner
Bottling is an age-old method of preserving all kinds of foods, tomatoes included. Also known as canning, the process creates what you'd recognise as tinned tomatoes from the supermarket shelves - but of course, using homegrown produce, the results will be infinitely better.
It takes a little more effort than simple freezing, but it's an excellent way of preserving a large glut, and the results are highly versatile.
The essential technique is to cook the tomatoes in an airtight container for an extended period, effectively sterilising them, so that they can be stored almost indefinitely outside of the fridge.
Traditionally, bottling was done by cooking the filled jars in boiling water before sealing. However, by doing this there's a small but real risk of introducing the botulism toxin to your tomatoes with potentially disastrous results.
Because of this danger, food safety organisations recommend using a pressure canner to bring the bottling method into the modern age.
Pressure canners are sealable cooking units which are capable of reaching high temperatures under pressure. To kill off botulism and other nasties, you should aim for a sustained temperature of 115°C or more.
It's important to note that an ordinary domestic pressure cooker may not be capable of reaching this temperature, so always use a dedicated pressure canner for safety's sake.
Pressure canners come with detailed instructions for safe operation, and these should be followed carefully, but the basic method is as follows.
- You'll need sturdy glass jars with close-fitting, rubber-sealed lids of the screw-topped or clipper variety. Buy these specially - empty jam jars or similar may not be strong enough to withstand the pressure.
- Choose firmer, fleshier varieties of tomato if possible, although any type will be fine.
- As with the freezing method, cut a small cross in the base of each tomato, and blanch in boiling water for ten to twenty seconds. Remove and peel.
- Boil your opened jars for ten minutes to completely sterilise them. Remove and leave to cool a little.
- Separately, boil any detachable rubber seals for five minutes to soften them.
- Once the jars are cool enough to handle, pack them tightly with tomatoes. You can leave the fruits whole, halve them, or chop them more finely as you prefer.
- Add a large squirt of lemon juice to each jar, aiming for roughly 5ml of juice per litre jar. This extra acid helps protect against spoiling.
- Depending on how juicy your tomatoes are, top up with boiling water to submerge them fully, leaving a couple of centimetres' space below the rim.
- Wipe each jar's rim with a clean cloth to ensure a good seal, and close the lids. It's essential that the seal is watertight.
- Place the wire rack into the base of the canner, and fill with water to the manufacturer's recommended level.
- Gently lower the jars into the canner, leaving a small space between each one.
- Turn on the heat and close the canner lid. Once the water begins to boil, leave the steam vent open for ten minutes, or for as long as the manufacturer recommends. This will ensure an even temperature throughout the pan and its contents before pressurisation.
- Close the steam vent to allow the pressure to build up. Once the correct pressure is shown on the gauge, begin timing, and process for at least ten minutes.
- It's essential to maintain the correct pressure throughout the process. If it falls below the minimum value, increase the heat, and reset your timer to the beginning once full pressure is restored.
- After processing, turn off the heat to let the canner cool down and depressurise. Refer to the manufacturer's instructions for the exact method of doing this safely.
- Remove the jars, and allow them to cool. Check that the lids are tight (they may loosen slightly as they cool), and then store away from direct light and heat. Bottled tomatoes last indefinitely, although the quality will slowly deteriorate after 18 months or so.
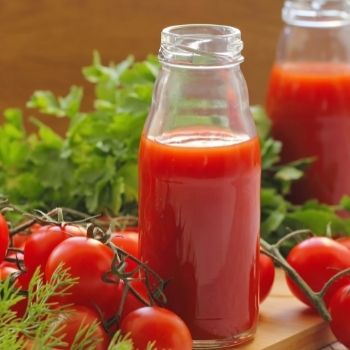
Tip: You can also use the bottling method for pre-made sauces or passata, saving larder space and giving you an instant pasta dinner that beats any shop-bought concoction.
Using Bottled Tomatoes
If you've ever bought tinned tomatoes, you'll know what to do with the homemade variety. They make a great base for sauces and stews of all kinds. However, bear in mind that they're likely to have a more concentrated tomato flavour than commercial tins, so don't waste them as a background filler ingredient.
.jpg)
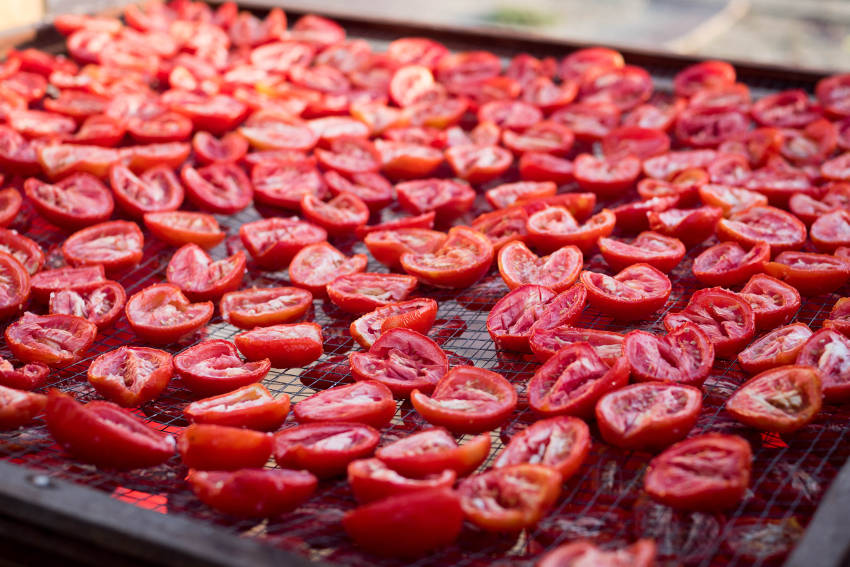
3) Preserving Tomatoes by Drying
Sun-dried tomatoes are a delicacy of Mediterranean cuisine. While they're traditionally made using rows of rooftop drying racks, it's much more convenient to use an ordinary domestic oven. It takes a little time, but it's easier than you may think.
- Start the oven on a very low heat, roughly 100°C.
- Weigh your tomatoes. For every kilogram, measure out 50ml of red or white wine vinegar and keep to the side.
- Line a baking tray with foil or baking paper and place a wire rack on top.
- Halve the tomatoes and remove the stem. Also take out the wet pulp and seeds, which you can strain and use the juices later in a soup or stock.
- Arrange the tomato halves on the rack, in a single layer and without touching.
- Sprinkle a few grains of sea salt onto each half to help draw out the moisture
- After a quarter of an hour, the salt will have started to do its work. Turn the tomatoes over, and put the tray into the oven.
- Leave to slowly dry for six to twelve hours, depending on the size of the tomatoes. You can speed things up by leaving the oven door slightly ajar or by turning on the oven fan.
- If you can, turn the tomatoes over halfway through the drying time, but don't worry if you're not around to do this.
- The tomatoes are ready when they're dry to the touch but not crispy. They should still have a little give, but shouldn't bleed any liquid when pressed firmly.
- Leave to cool, still on the rack, in an airy place.
- Once cool, transfer to a large bowl and sprinkle generously with some of the vinegar. Stir briefly to coat each tomato, cover, and leave to stand for a quarter of an hour.
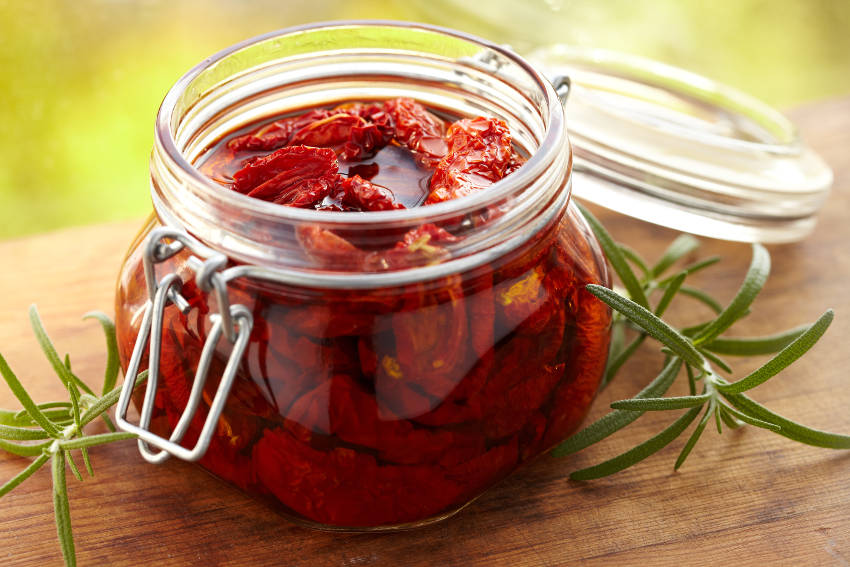
- Transfer the tomatoes to sterilised jars and completely dry jars, packing them down fairly tightly. Leave a centimetre or two free at the top.
- Divide the remaining vinegar and pour into each jar, before topping up with oil to completely cover the contents.
- Agitate each jar to remove any trapped air, then seal tightly, and store in a cool, dark place for up to four months.
- Refrigerate once opened, and use within six weeks. As you use the tomatoes, refill the jar with a little more oil if needed to ensure the rest stay submerged.
-- Mandatory Warning #2:
As with bottled tomatoes, there's a tiny risk of dried tomatoes developing toxins while they sit in the oil. So long as you dry the tomatoes well and remove all moisture from the jars, the risk is basically non-existent. But again, don't be tempted to take any shortcuts during the preserving process.
The Traditional Sun-Dried Method
Traditionalists living in a hot climate could try making true sun-dried tomatoes without an oven. It will take days or weeks rather than hours, and you run the risk of sharing your harvest with the local wildlife.
Nonetheless, the method is straightforward. Cut your tomatoes in half and lay them out on a wire rack or mesh which allows the juices to drain. Cover with fine netting or muslin cloth, and leave in a sunny, dry, airy location. Check for dryness each day, turning the tomatoes over if they're not yet ready. Depending on the conditions, the process should take between four days and two weeks.
Using Dried Tomatoes
Drying tomatoes changes their flavour quite impressively. They'll be sweeter, richer, and more intense. Try chopping and sprinkling them into a substantial salad, or use as a pizza topping.
They can also be partially rehydrated by soaking briefly in warm water, making them a great addition to a platter of mixed starters.
Once you've finished a jar, don't waste the remaining oil. It makes an excellent base for a salad dressing, or can be dribbled over noodles and other hot dishes for an extra hit of flavour.
Whether you freeze, bottle, or dry your tomatoes, preserving is a thrifty way of making the most of a generous harvest. And the results will be a class above any product you'll find on the supermarket shelves.