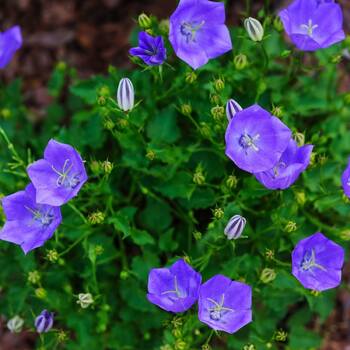
How to Grow Campanula Seeds
Grow Guide #2350
Family: Campanulaceae
Binomial name: Campanula sp.
Life Cycle: Biennial or Perennial
This 'How to Grow' guide details everything a home gardener needs to know to plant, grow and care for Campanula (Campanula sp.).
When to Sow Campanula Seeds
Campanula can be grown year-round in most climates. Avoid planting in extremely hot or cold weather which can affect germination and growth. Use the table below to identify the best time of year to sow campanula in your climate.
| JAN | FEB | MAR | APR | MAY | JUN | JUL | AUG | SEP | OCT | NOV | DEC | |
|---|---|---|---|---|---|---|---|---|---|---|---|---|
| Cool | ||||||||||||
| Temperate | ||||||||||||
| Sub-Tropical | ||||||||||||
| Tropical | ||||||||||||
| Arid |
Preparation
Depending on the variety, Campanula plants can be biennial or perennial. If growing a perennial species, choose a permanent position where plants can grow undisturbed by regular digging or disturbance.
Campanula plants commonly self-seed in the garden. Self-seeding plants drop seeds onto the soil at the end of the season that may germinate and grow without help the following season. Choose a position where new plants will be welcome. If you do not want campanula to become established in your garden, deadhead plants before they can drop seed or grow them in containers.
Campanula plants are best grown in full sun or part shade. Choose a location that will receive at least 3 hours of full sun each day.
Campanula plants need a well drained soil enriched with plenty of organic matter. Prepare soil by weeding it thoroughly, digging it over to loosen it and adding aged animal manure or compost. Keep the area free of weeds until planting. Learn more about preparing soil for planting here.
Campanula plants can be grown in containers. If possible choose a variety that’s recommended for container growing. Use a good quality potting mix and make sure your container is large enough for mature plants; a minimum of 10 litres is recommended for campanula. During the growing season, keep in mind that container grown plants may need additional fertiliser to encourage healthy growth.
How to Sow Campanula Seeds
Campanula seeds do not require any treatment (eg soaking, stratification) before sowing.
Campanula seeds can be sown directly into the garden OR seedlings can be raised in trays or other containers and transplanted to the garden once established.
Sow Direct
- Sow seeds directly in the garden 3mm deep and 30-40cm apart.
- Keep soil moist but never wet or dry.
- Seeds should germinate in around 14-21 days at a soil temperature of 18-22°C.
- Young seedlings will need protection from pests, pets and weather until they are established.
Raise Seedlings
- Fill trays, punnets or jiffy pots with a good quality seed-raising mix, or use soil starter pellets.
- Sow seeds 3mm deep.
- Keep soil moist but never wet or dry.
- Seeds should germinate in around 14-21 days at a soil temperature of 18-22°C.
- Transplant seedlings to the garden once they have their first true leaves and are large enough to handle (usually 5-10cm tall).
- Plant out, spacing plants 30-40cm apart.
Tip: Campanula seeds can also be sown in the less formal ‘scatter seed’ method. Simply roughen the soil, scatter seeds evenly over the surface, then smooth the soil over lightly to cover the seeds.
Tip: Campanula seeds are quite small. Handle them carefully to avoid them blowing away or being washed away. Mix seeds with sand or fine potting mix prior to sowing or use a seed dispenser, damp toothpick or tweezers to help space them evenly. Press lightly into the surface after sowing so that the seeds make good contact with the soil. Take extra care to make sure seeds and seedlings don’t dry out. Read more about sowing small seeds here.
How to Grow Campanula
Campanula plants may need watering during the growing season. Water when the soil is dry about 5cm below the surface (test this by scratching away a little soil with your finger). Water deeply in the early morning or late afternoon. Avoid watering the leaves of plants to avoid fungal diseases. Learn more about watering here.
If soil was well prepared no extra fertiliser should be necessary. In poor soil or to give your plants an extra boost, application of a high-potassium fertiliser or one formulated for flowering plants can be beneficial:
- Apply slow release fertiliser at the recommended rate when transplanting or when seedlings are 5-10cm tall.
- Apply liquid fertiliser at the recommended rate and frequency while plants are fruiting or flowering.
Campanula plants should flower in approximately 160 days. In cool climates, plants will flower in their second year.
Deadhead campanula flowers regularly during the growing season. Using sharp secateurs or snips cut fading or dead flowers off just above a set of leaves. Removing old flowers regularly will encourage plants to produce more flowers. Learn more about deadheading flowering plants here.
When plants have finished flowering prune them back to neaten them and encourage strong new growth. Using sharp secateurs or snips, cut individual stems just above a set of lower leaves.
Campanula plants may die back in cold weather. Cut plants back just above ground level in late autumn, or prune off dead foliage when new leaves emerge in spring.
Common Problems when Growing Campanula
Like all plants, campanula is susceptible to some pests, diseases and other problems. Below is a list of the most common problems gardeners encounter when growing campanula plants:
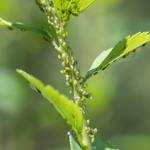 Aphids are small (2-4mm long) sap-sucking insects that congregate on the new shoots or the undersides of leaves. They can cause leaves to wilt or become discoloured, and also excrete honeydew which can attract ants and other insect pests. To manage aphids, remove them by spraying with a garden hose, apply a soap or alcohol spray, or encourage predatory insects to your garden. Read more about aphids here.
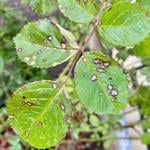 Bacterial leaf spot is a disease that causes irregularly shaped brown spots on all above-ground parts of a plant. The spots at first appear to be wet but become dry and scab-like over time. Leaves and flowers can fall prematurely. Water plants at soil level (not on the leaves), dispose of fallen leaves and fruit and practice crop rotation.
 Grey mould (Botrytis sp.) is a fungal disease that causes flowers to become mouldy and fruit to rot. Spores are transported by wind and can survive in soil or on green waste. The fungus spreads most in cool, damp weather. Prune off affected flowers and fruit, water plants at soil level (not on leaves) and if necessary spray with an appropriate fungicide or homemade spray.
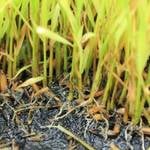 Damping off is caused by a fungal growth that transfers from the soil to seeds or tender seedlings. Seeds may appear not to germinate, or young plants start to rot when they emerge from the soil and become soft and mushy at the base before dying. Use new potting mix if raising seedlings, do not water foliage and avoid waterlogged soil. Read more about damping off here.
.jpg) Powdery mildew is caused by fungal spores reproducing on the leaves of plants. First showing as white spots on leaves, affected areas can spread quickly to cover the entire leaf surface. While rarely fatal, powdery mildew can reduce yields. Water plants at soil level (not on leaves) to prevent spreading spores, allow good air flow between plants, remove affected leaves and if necessary spray with an appropriate fungicide or homemade spray. Read more here about powdery mildew here.
Powdery mildew is caused by fungal spores reproducing on the leaves of plants. First showing as white spots on leaves, affected areas can spread quickly to cover the entire leaf surface. While rarely fatal, powdery mildew can reduce yields. Water plants at soil level (not on leaves) to prevent spreading spores, allow good air flow between plants, remove affected leaves and if necessary spray with an appropriate fungicide or homemade spray. Read more here about powdery mildew here. Root rot is a disease caused by soil-borne fungi found in wet soil. Plants may be slow to establish, have yellowing or wilted foliage and have soft, brown tissue around the base of the stem and roots. Root rot is often fatal; remove and dispose of affected plants. Reducing soil moisture, adding organic matter to the soil and making sure mulch doesn't touch the stems of plants may help avoid root rot.
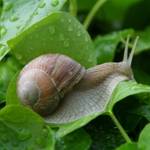 Slugs and snails are molluscs that feed on tender leaves and shoots, mostly at night, leaving slimy trails behind them. Control them by removing their hiding places, keeping free range poultry, collecting them by torchlight or by placing traps. Read more about slugs and snails here.
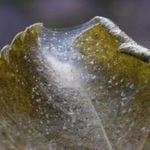 Spider mites (Tetranychus urticae), also known as two spotted mites, are sap-sucking arachnids that cause dry, wilted or discoloured leaves. The undersides of leaves may feel dry and a little like fine sandpaper. Prune plants to allow good air flow or spray with eco-oil or wettable sulphur. Learn more about managing spider mites here.
 Thrips are black, beige or white flying insects (<1.5mm) with larvae that suck tissue from leaves and petals, leaving behind very small white or transparent markings. While not usually causing serious damage, the marks affect the look of flowers and foliage and thrips can also transfer pathogens from one plant to another. Wash thrips from affected plants using a garden hose, encourage predatory mites and lacewings with companion planting, or spray with soap, eco-oil or neem oil.


.png)


