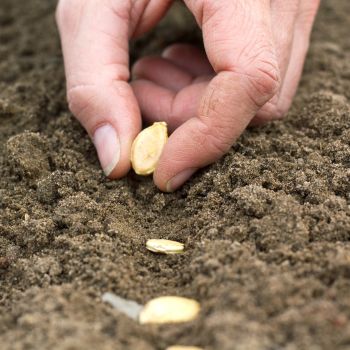
Sowing seeds is certainly the thriftiest way of growing new plants. With prolific reproducers like lettuce or wild flowers, you can get hundreds of seedlings from a single low-cost packet.
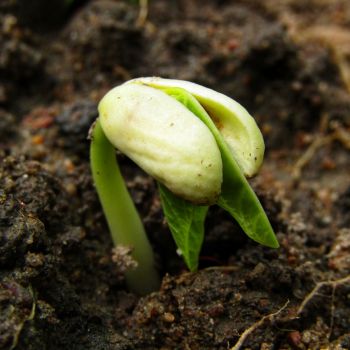
But once you move beyond fast-growing tender annuals, it can take plenty of time and patience to develop a thriving, adult plant. And with the inevitable failures and disappointments along the way, growing healthy perennial plants from seed isn't always as straightforward as you'd hope.
But if you already have older perennials growing healthily, using vegetative propagation techniques to create new individuals is a good solution. You'll still need time and patience, but vegetative propagation is a cost-effective and reliable way of gaining new plants for your garden.
What is Vegetative Propagation?
Vegetative propagation is effectively a method of cloning your garden's most successful perennials. It produces healthy new plants with identical characteristics to the original, while skipping over the fragile seedling stage of development.
The most widely known vegetative propagation method is to take stem cuttings. This works by cutting off part of an existing plant and encouraging it to grow roots, eventually forming a complete new plant if all goes to plan.
Stem cuttings can work very well, but it's a little hit and miss. Rooting can be unreliable unless conditions are ideal, and you won't know whether or not you've been successful for a couple of months or more. This can make the cuttings technique frustrating for a beginner.
However, there's a more reliable technique known as layering. It usually takes a little longer and involves some preparation, but for a lot of larger plants it's an ideal solution.
Propagation by Layering
Many plants naturally sprawl across the ground, setting down new root systems as they go. Strawberries show perhaps the best-known example of this behaviour, with the trailers they send out eventually forming fully independent plants. However, it's a trait that's innate to most plants, even if it takes a little persuasion to bring it out.
Layering takes advantage of this natural willingness to root, and there are two main variations on the theme. Ground layering is where new roots are encouraged to grow under the soil's surface. With air layering, as the name suggests, all the action takes place above ground.
The beauty of both types of layering is that they produce strong new plants which enjoy the resources of the parent as they develop. Once they're large enough to cope alone, they can be cut away and begin life on their own.
Which Plants Are Suitable for Layering?
In general terms, woody perennials with long side stems are suitable for layering. For ground layering, some of the stems should be low and flexible enough to touch the ground. For air layering, stronger and thicker stems are better to avoid damaging the parent plant.
Some of the most popular garden plants you can layer include azaleas, camellias, spirea bushes, rhododendrons, and magnolia.
Healthy woody herbs such as thyme, rosemary, and lavender can also be layered successfully, especially more mature plants which are starting to lose their shape and becoming overly woody and bare.
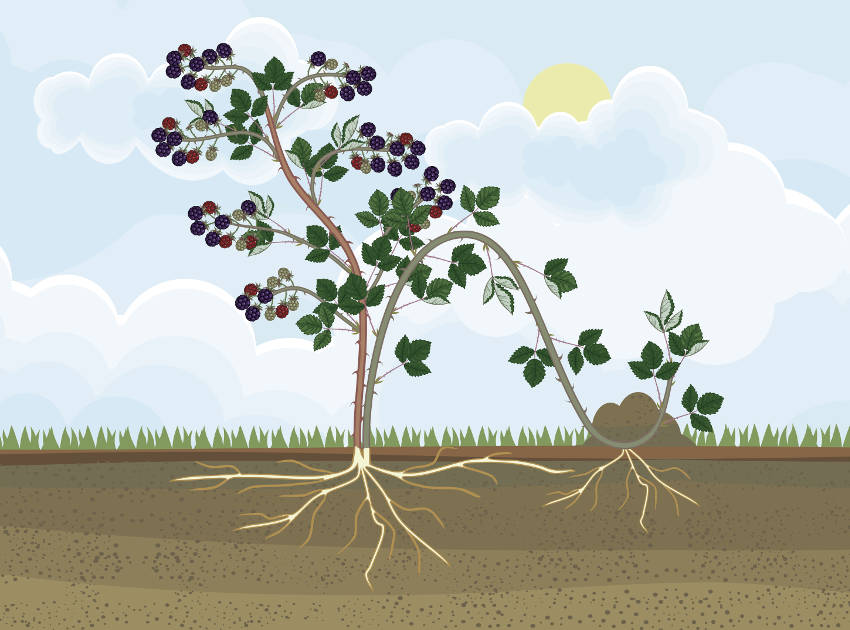
The Ground Layering Technique
Also known as stem layering, ground layering is the most straightforward of the two techniques. Here's what to do.
- Choose a suitable stem or branch which can be bent down to touch the ground. There should be a point where last year's growth meets the new, tender growth.
- Strip off the leaves around the junction between the two years' growth, while leaving plenty of foliage on the growing tip.
- Scrape off a little bark spanning the junction, or for thicker stems, make a diagonal cut no more than half way through it using a sharp knife. Either way, expose some of the fresh green material under the surface.
- Optionally, dust the wound with a little hormone rooting powder, although this isn't strictly necessary with ground layering.
- If needed, prop the cut open with a matchstick to stop it falling closed and healing too quickly.
- Bend the stem down to the ground, and bury the wound at least 10cm deep into the earth. If your soil is particularly heavy, dig a small hole and fill with a lighter compost before burying.
- Weigh the branch down with a stone or pin it to keep it in place, and leave a marker so you can recognise the spot.
New roots should develop from the damaged area in around three months. However, it's prudent to allow a full growing season so that a healthy root system can develop. Once this has happened, the rooted stem can be cut off from the parent plant, and the newly propagated individual either left in place to grow or carefully transplanted to a new location.
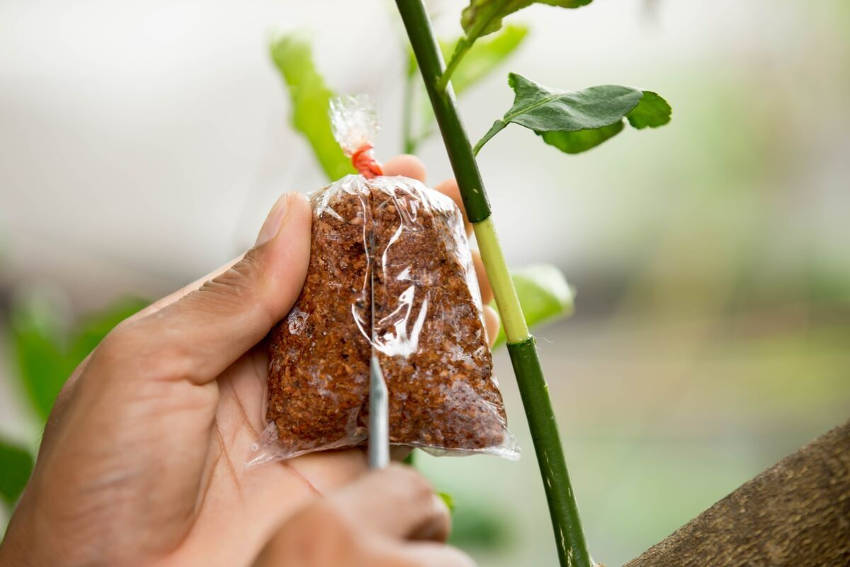
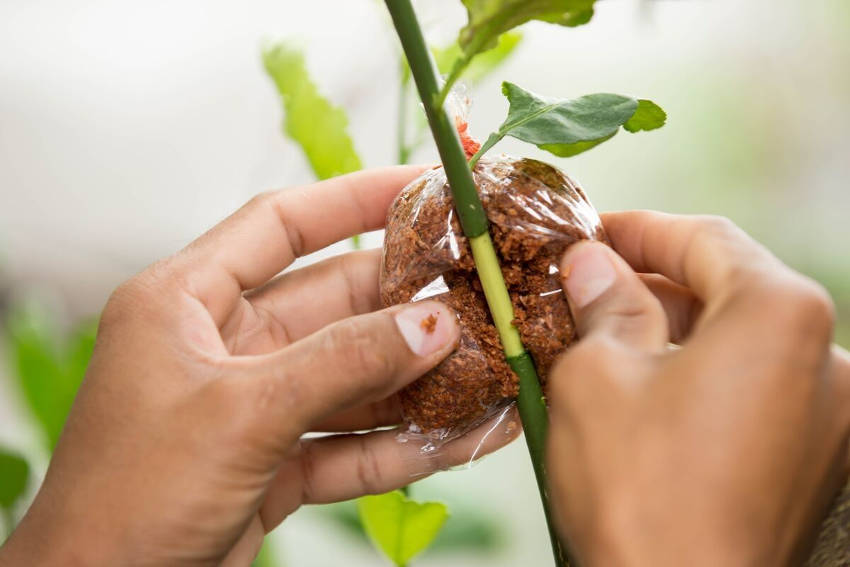
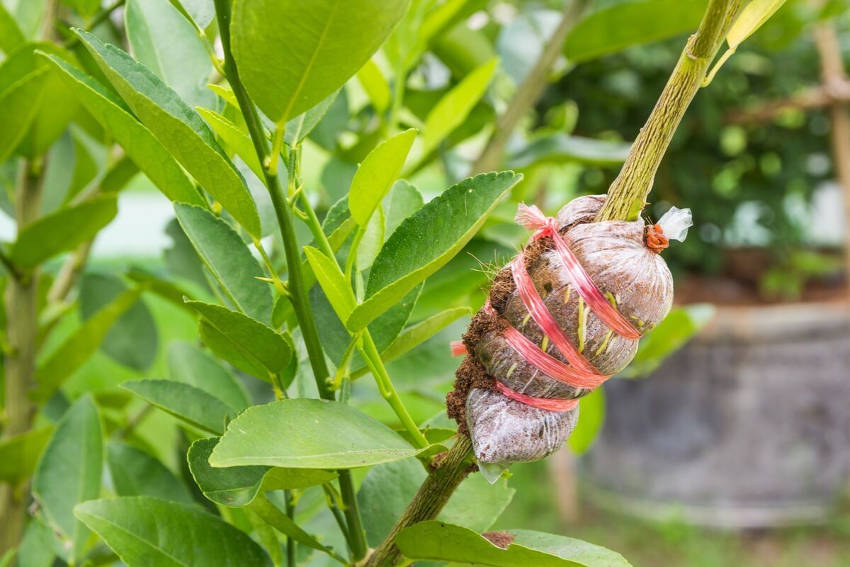
The Air Layering Technique
However, taller shrubs with sturdier, less flexible branches may not be suitable for ground layering. For these plants, air layering is a finessed version of the same principle.
- As before, find a suitable branch with a junction between old and new growth, and make a cut or deep scrape to expose the sappy growth underneath.
- With air layering, it's advisable to always add rooting powder to speed up the root development.
- Again, wedge open the wound with a matchstick.
- Surround the wounded part of the branch with peat moss, coir, or similar organic material. You should aim for a cricket ball-sized clump.
- Moisten the clump well without soaking it, and wrap it tightly in clear plastic. Seal well and secure with string to keep the moisture in while keeping heavy rain out.
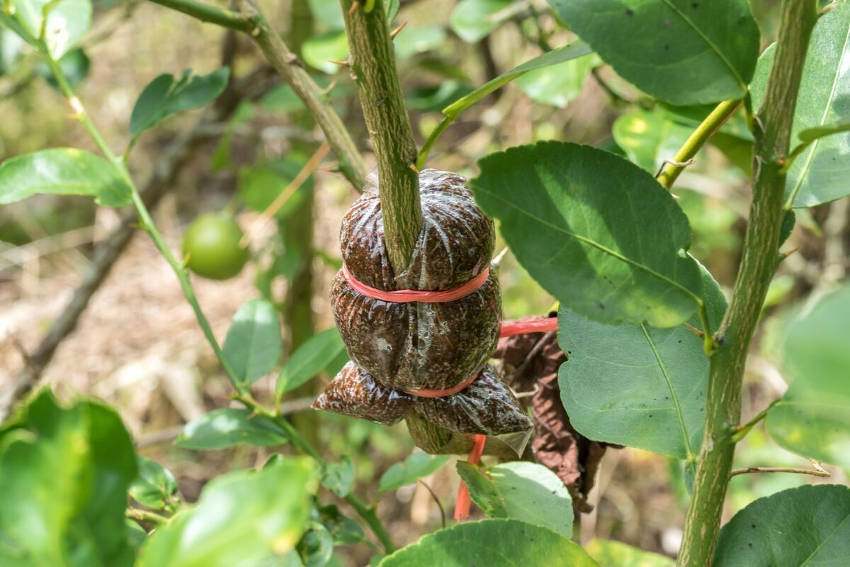
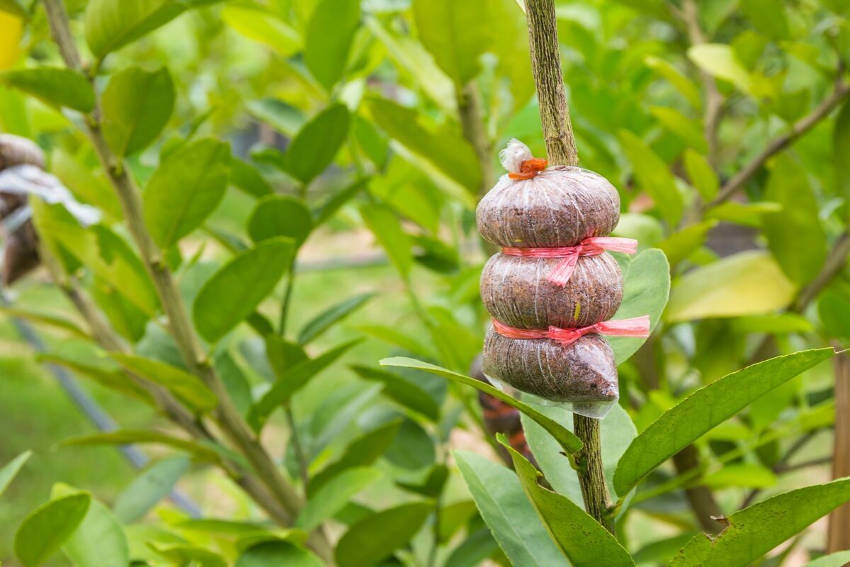
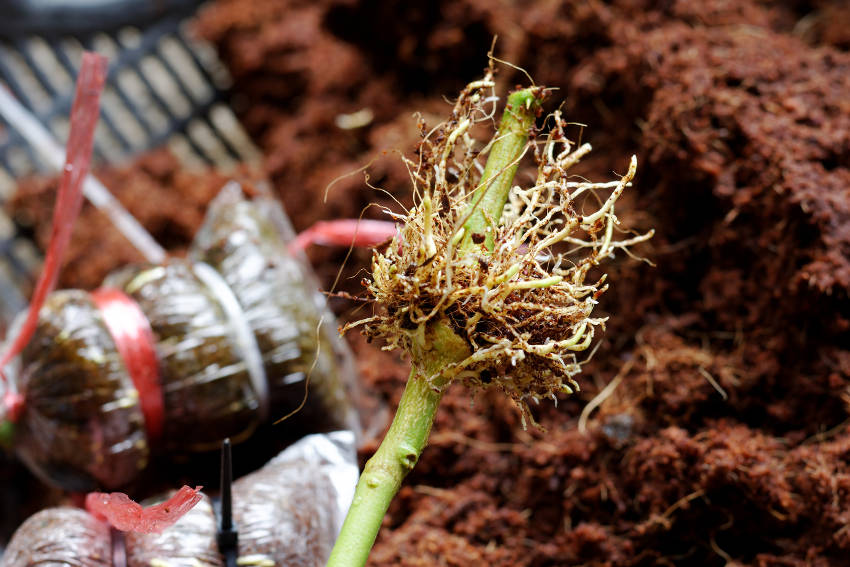
After around three months you should see roots start to poke through the moss or coir. At this point, cut the branch from the parent below the rooting clump, remove the plastic, and plant the root-bearing ball firmly in a container or its final destination.
Tips, Tricks, and Precautions
Although layering is a fairly foolproof technique, there are a few ways to improve on the basics.
- The best time for layering is in late winter or early spring, when growth naturally springs back into action. The longer you can leave the child plant attached to the parent, the healthier it will be.
- Adding honey to the cut stem can help ward off infection, thanks to its antibacterial qualities, as well has helping the rooting powder to stick.
- With air layering, if the peat moss bundle will be in direct sunlight, wrapping the plastic in a layer of kitchen foil will help prevent the tender young roots from scorching as they emerge.
- When transplanting the child, prune back the foliage fairly hard so that the root system has less above-ground material to support as it becomes established.
- Rooted stems from both types of layering can benefit from a period in a container before final transplanting, giving the root systems time to develop in gentle conditions.
- Once the layered stem has been cut, the remaining stem on the parent plant may take a month or two to resume growing. Don't panic that you've harmed the parent, but at the same time don't overstress any single plant by layering too many stems at once.
If you've never tried propagation before, or if taking stem cuttings hasn't been a huge success, then layering is worth a try. It's not quick, but it's an effective way of producing high-quality new additions to your garden for next to no cost.