Successful growing starts with great soil, but you can't leave a garden's soil to look after itself.
In a quest to improve their soil's texture and nutrient content, most gardeners turn to composting at some point, and few ever turn back.
Committed composters often use informal heaps or neat and tidy bins to transform organic waste into high-quality soil. Both of these work very well, and are a valuable addition to any gardener's repertoire of growing techniques.
But there's another, less widely known method: in-ground composting, or more informally, "dig and drop".
What is Dig and Drop Composting?
The essential idea of dig and drop composting is to bypass the heap altogether, burying garden and kitchen waste straight into the soil. Nature then does the work of turning it into a rich and fertile growing medium, exactly where it's most valuable, with no further effort needed from the gardener.
This style of composting offers several advantages compared to the more familiar heaps or bins.
- In-ground composting delivers nutrients directly to the roots of your plants. It's much easier and more efficient than top dressing or annually digging over your beds to incorporate organic matter.
- There's no need to set aside a valuable sunny spot for an unsightly, untidy, and possibly foul-smelling compost heap.
- You don't need to buy a compost bin or build improvised containers of your own.
- There's no need to worry about turning and aerating your heap, nor keeping it moist.
- In-ground techniques are far more forgiving of the mix of materials you compost. They also don't demand careful layering to achieve results.
- You don't need any activators or other aids to get the composting process started.
- In-ground composting attracts far fewer flies, rodents, and other pests.
- The unobtrusive dig and drop method also gets around any restrictions imposed by local councils, residents' associations, or other compost-intolerant bodies.
Trench Composting
Trench composting is one popular version of the in-ground method. It involves digging a trench around 30cm deep, and half-filling it with compostable material. After tamping down and refilling the trench with soil, it's left to decompose. Seeds and small plants can then be planted along the trench and will benefit from the composting materials under the soil.
This form of in-ground composting is ideal for larger gardens, or for feeding annual vegetable beds which are dug over each year. It's less well suited to smaller plots with little space to spare, or those containing perennial plants which need to be left undisturbed.
However, there's another form of dig and drop composting that's a little more versatile. It's known as the compost hole method, and it's suitable for almost any kind of garden.
How Compost Holes Work
Rather than digging a long trench to handle large amounts of organic material at a time, compost holes work on a smaller and more frequent scale. By burying your compost materials in holes rather than trenches, you can work around established plants, and also compost smaller amounts of material more often. Here's how to do it.
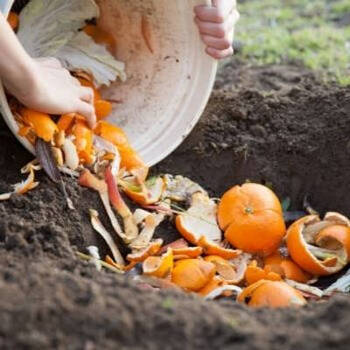
- First, collect your composting material together. You can use the same materials as for other composting methods, such as raw kitchen scraps, garden thinnings and prunings, waste cardboard, and so on.
With this method, you'll be handling relatively small amounts of material at a time, such as a few days' worth of kitchen scraps or the results of a single pruning session. - Although compost holes work fine with unprepared materials, the process lacks the heat of an active compost heap and decomposition can take substantially longer. If this is an issue, you can speed things up by shredding your waste first.
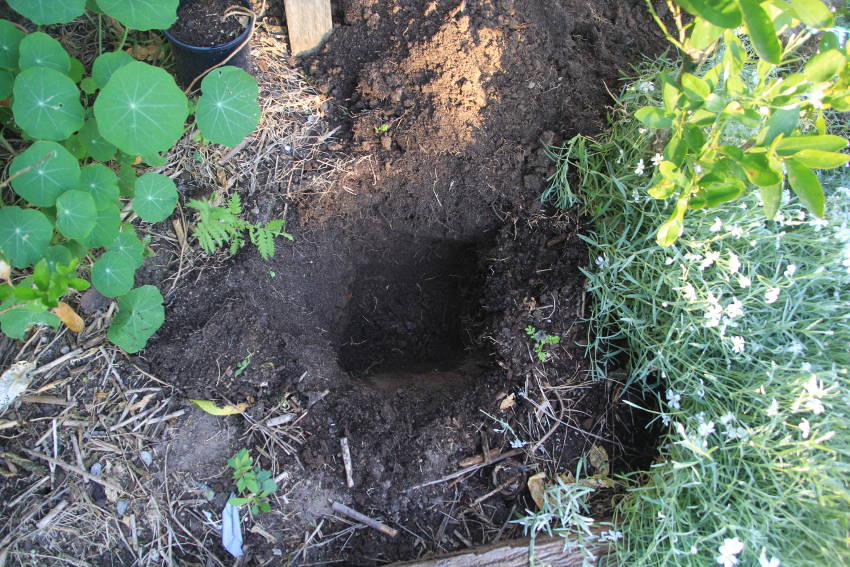
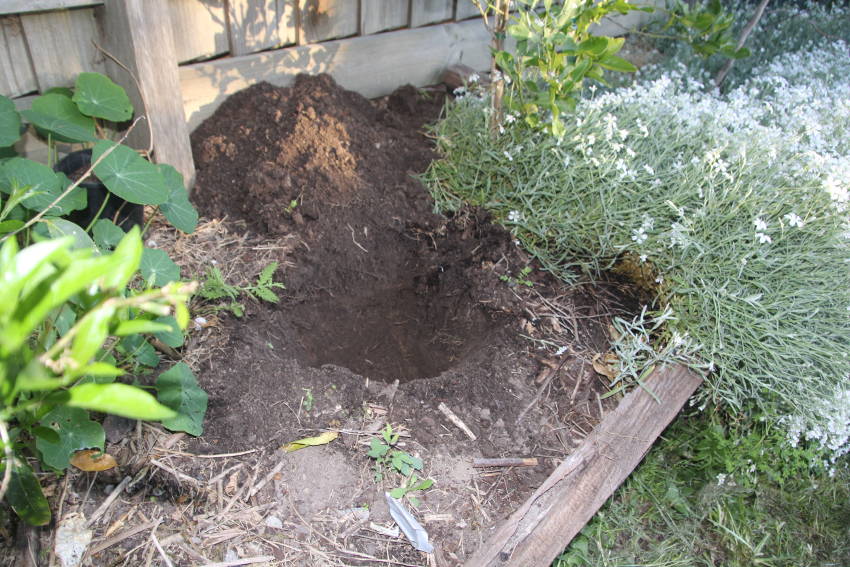
- Next, pick your spot for the compost hole. You'll need to dig to a depth of around 30cm, with the hole wide enough to spread your compost materials no more than 10cm deep. Take care not to disturb the root systems of nearby plants, remembering that these can spread a considerable distance outward from the plant's crown.
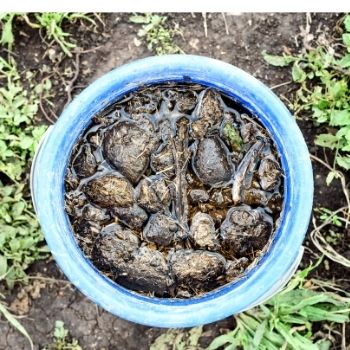
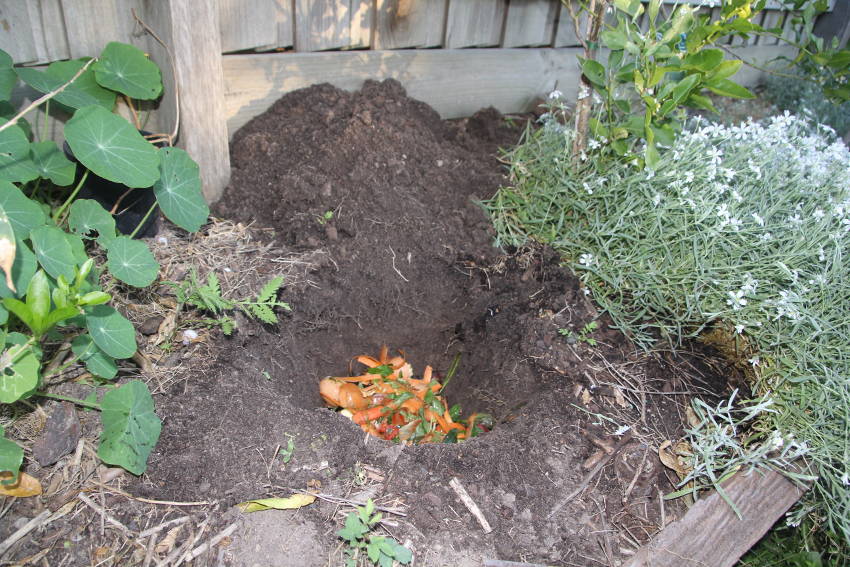
- Add your waste materials, tamping down lightly but not compacting them too solidly. Now would be a good time to add a thin layer of rotted manure or active, semi-completed compost to help the process get started.
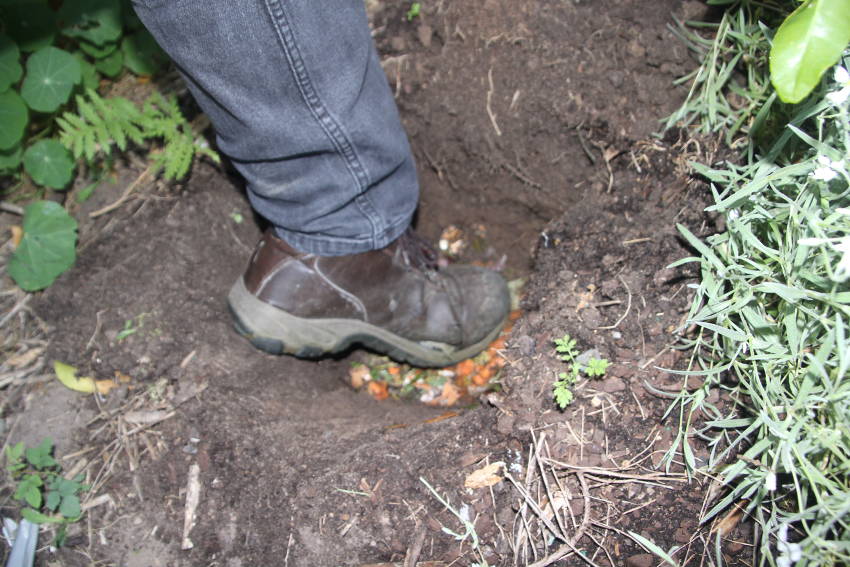
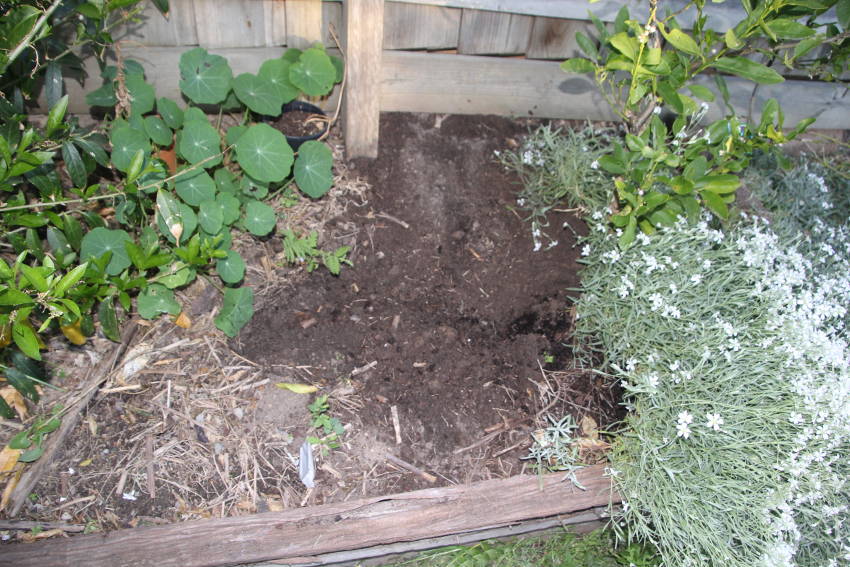
- Fill the hole with the dug-out soil, pressing down hard enough to prevent obvious soil subsidence but without excluding too much air.
- If the ground is dry, give it a generous watering and cover with an organic mulch to seal moisture in.
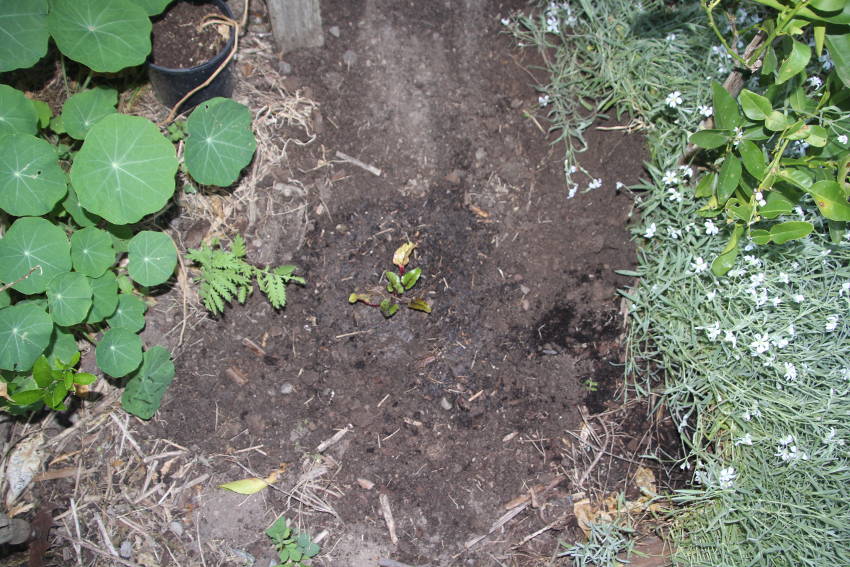
- Seeds or small plants can be planted over the hole straight away. However, wait a month or two before adding larger plants or shrubs with deeper root systems, giving the composting process time to start breaking down larger fragments of material.
- Over time, spread the holes around your garden to improve the soil quality across the whole area. You can speed the process up by using the "two-hole twist". This means digging two or more holes at once, and using the extracted soil from one to refill the other. This helps even out soil quality garden-wide with little extra effort.
Issues to Watch Out For
Compost holes are a straightforward and quick method of composting, but there are a few issues to bear in mind.
- Although pest problems are reduced with in-ground composting, you should still avoid adding cooked foods, meat, and dairy products to your holes. Not only will these materials attract larger pests who love to dig holes of their own, but they'll take an age to decompose without the accelerating heat of a heap.
- Don't be tempted to bury even small amounts of waste less than 30cm deep. Any shallower than this, and small rodents will be happy to dig for their dinner. Just as importantly, there are fewer worms in the upper layers of soil, and so the composting will take much longer without their attentions.
- Be extra careful not to add diseased plant cuttings to a compost hole. Without the heating effects of a heap, fungal and other infections won't be neutralised, and you'll just be spreading the problem to new parts of your garden.
- Likewise, be careful not to add the roots, seeds, or cuttings of invasive plants to your compost holes. This will give already vigorous plants an even easier start in life by providing them with their own food store.
If you don't have the time, space, or inclination to maintain a traditional compost heap, dig and drop is a great way to put kitchen and garden waste to good use. And with both trench and hole methods equally effective, it's a technique gardeners on any scale can use to give their soil an essential helping hand.
Step 1: Dig a hole
Step 2: Drop in you kitchen and garden waste
Step 3: Compact down
.JPG)
Step 4: Refill hole with soil
Step 5: Plant a seed or seedling on top (optional)