Asparagus is a long-lived perennial vegetable that’s been praised for its unique taste since ancient times by the Romans, the Greeks and the Pharaohs. In season for only six or seven short weeks from the middle of spring to early summer, asparagus is easy to grow once it’s established in your garden.
Some growers pickle and freeze asparagus to enjoy it year round. However, I think it is worth waiting for the green spears to eat when it's fresh as a welcome taste of spring.
Although it will become a long-term fixture in your garden, you will need to wait three years for your first taste if growing plants from seed. After that, asparagus will produce spears for 25 to 30 years, making it worth the wait for the tender blanched stems. The advantages of growing from seed include cost savings and access to varieties that may only be available as seed.
First Things First! Choose Your Seeds
There are many varieties of asparagus to choose from. These recommended varieties are heirlooms that growers have been cultivating for over a century.
- Argenteuil: Originally grown in France, this heirloom variety has long, thick green spears with purple tops and an excellent flavour. Plants mature early and the spears can be harvested after two years if grown from seed. Stems can also be blanched to produce white spears. This variety is often canned in vinegar in delicatessens to eat all year round.
- Mary Washington: An absolute favorite of American growers, these spears have that classic gourmet asparagus taste. Great taste is not the only thing this variety has to offer. It is resistant to asparagus rust and it crops for a long period, with long, straight spears to add culinary delight to your kitchen.
- Connover’s Colossal: This asparagus is a huge favorite worldwide. It is an heirloom variety dating from 1873 and you can pick thick, green spears with a slightly darker brown shade at the tips. This variety adores sandy soil so if that’s your soil type choose these. Experienced growers also recommend this variety for its excellent freezing quality.
Before You Plant
Only the best for asparagus! Think of it as an honored guest in your garden, which if pampered will produce fabulous produce. Give it full sun, and avoid planting next to bushes, shrubs or trees which may compete with or shade your asparagus.
The best soil for asparagus is rich and crumbly with plenty of organic humus. Asparagus also enjoys good drainage and the most nutritious soil you can provide. Asparagus plants will happily provide you with asparagus for the next 20 years, so put the effort in now and make sure that all perennial weed roots are removed before you transplant your seedlings. If your soil is clay, then try adding some coarse sand and compost to help the asparagus to thrive. If your soil is sandy, enrich it with organic matter and choose Connover’s Colossus seeds. You still need to top dress with manure once a year.
How to Sow Asparagus Seeds
Sow the small seeds in spring or indoors (or in a greenhouse) six weeks before your last expected frost. Sow seeds 10mm deep in trays or punnets. Growers usually recommend one seed per cell. In my experience, that is difficult as the seeds are so tiny and the germination rate can be slow, so it’s fine to put several in one cell to hedge your bets and thin seedlings later.
Asparagus will germinate in 14-21 days at a soil temperature of 23-27°C. Do not overwater the punnets because the seeds will not grow in cold, waterlogged soil. They like good drainage. I grew my first asparagus seeds in a greenhouse in winter and they are still producing asparagus spears.
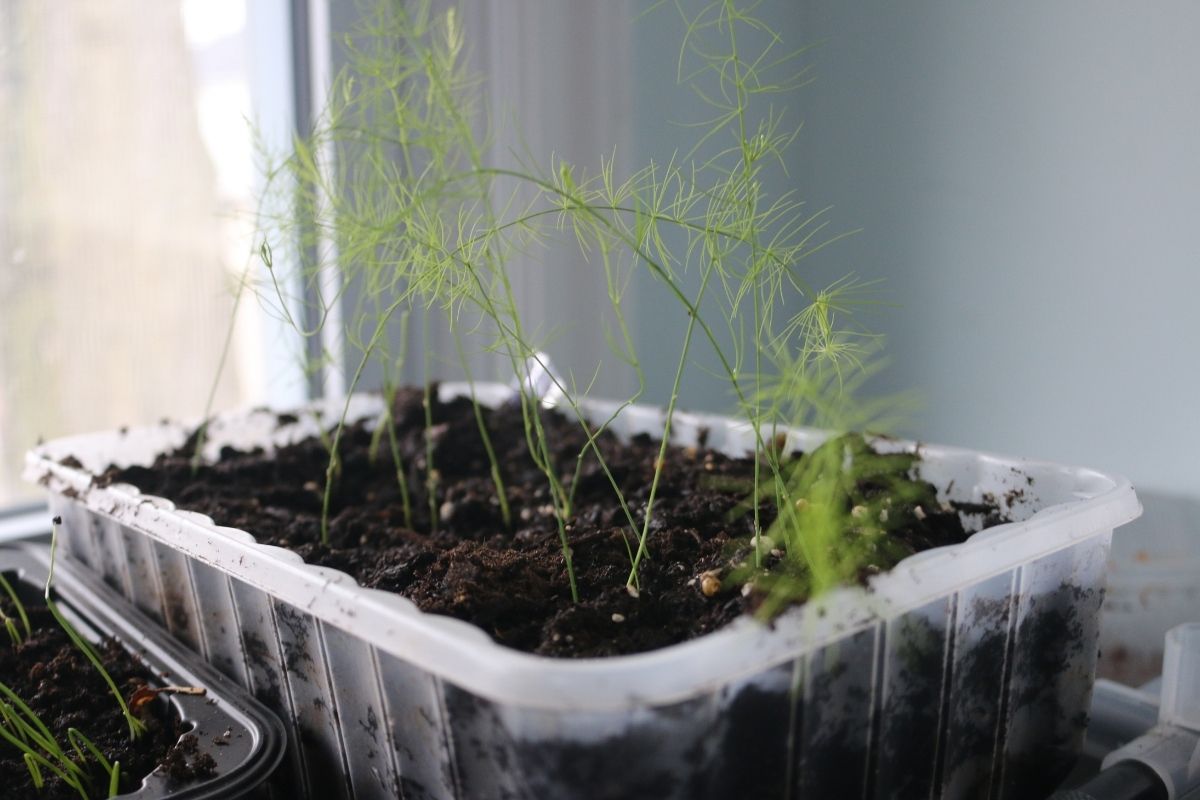
When the spring arrives, your new plants are ready to be re-potted. Soak the whole pot in water to loosen the roots. Plants are very delicate at this stage, with tiny feathery leaves which resemble the adult plants on a much smaller scale. Give them a bigger pot with lots of fresh potting mix, placing them in individual pots from now on and this will count as year 1 in the cycle. Make plant labels with the year planted because you need to wait 3 years and a label will help you keep track of your plants. You can plant these seedlings into the ground in the first spring, but you will use a lot of valuable growing space. Because they are unproductive for a couple of years I recommend keeping year 1 crowns in pots, at least until the following autumn.
While Seeds are Germinating
Get the permanent asparagus bed ready in advance.
- Dig a trench about 30 cm deep and allow 30cm spacing for each plant. Dig out all perennial weeds like dandelions, which have long taproots.
- Dig in a bucketful of well-rotted manure for each plant. Blood and bone is another good choice, and some growers use wood ash collected from a stove. This all provides lots of nutrition for hungry asparagus plants.
- After fertilizing, leave the bed for a week or two, covered with plastic or tarpaulin if possible. This will attract all the slugs and snails that might nibble on your plants, but it will also warm up the ground for your new asparagus seedlings. You can leave this covering over the ground all winter if you are planting in spring.
- Before you plant, remember to remove all these collected pests to your compost bin.
Transplanting Your Seedlings
Asparagus growers often disagree on when to begin harvesting, when to stop harvesting, and also when to transplant seedlings. My advice is to transplant your potted asparagus seedlings into their permanent asparagus bed as year 1 crowns in summer or as year 2 crowns in late spring or summer. The advantages of planting year 2 crowns is that your asparagus bed will be weeded and prepared and crowns are less likely to be devoured by slugs and snails. You can also use the valuable space in your growing area over the intervening winter to plant green manure, which you then dig in to add fertility before your seedlings are planted.
New seedlings must be planted six weeks after the last frost if planted in spring or at least six weeks before the expected first frost if planting in autumn. If there is any danger of frost, don’t plant yet. The minimum temperature for planting year 1 or year 2 crowns is above 10°C, but a higher temperature gives your plants a better start, so remove the covering over the bed once the night time air temperature is closer to 15°C.
Make a tiny hole slightly bigger than the rootball of the plant and drop the asparagus seedling in gently. Cover the delicate roots with soil and water in well. Ensure there is pest protection – decoy plants, beer traps, eggshells or other control methods for slugs and snails. Make no mistake, they can destroy two years growing in one night! Finally, top dress the soil with compost but do not weed too vigorously in the coming months. The roots of asparagus are easily damaged.
Caring for Your Asparagus Bed
Once your asparagus plants are in the ground, water regularly and deeply during the growing season to encourage root development. You can also plant some basil close to the edge of beds as a companion plant. Basil’s strong scent is said to be disliked by the asparagus beetle so planting it close to asparagus deters their visits.
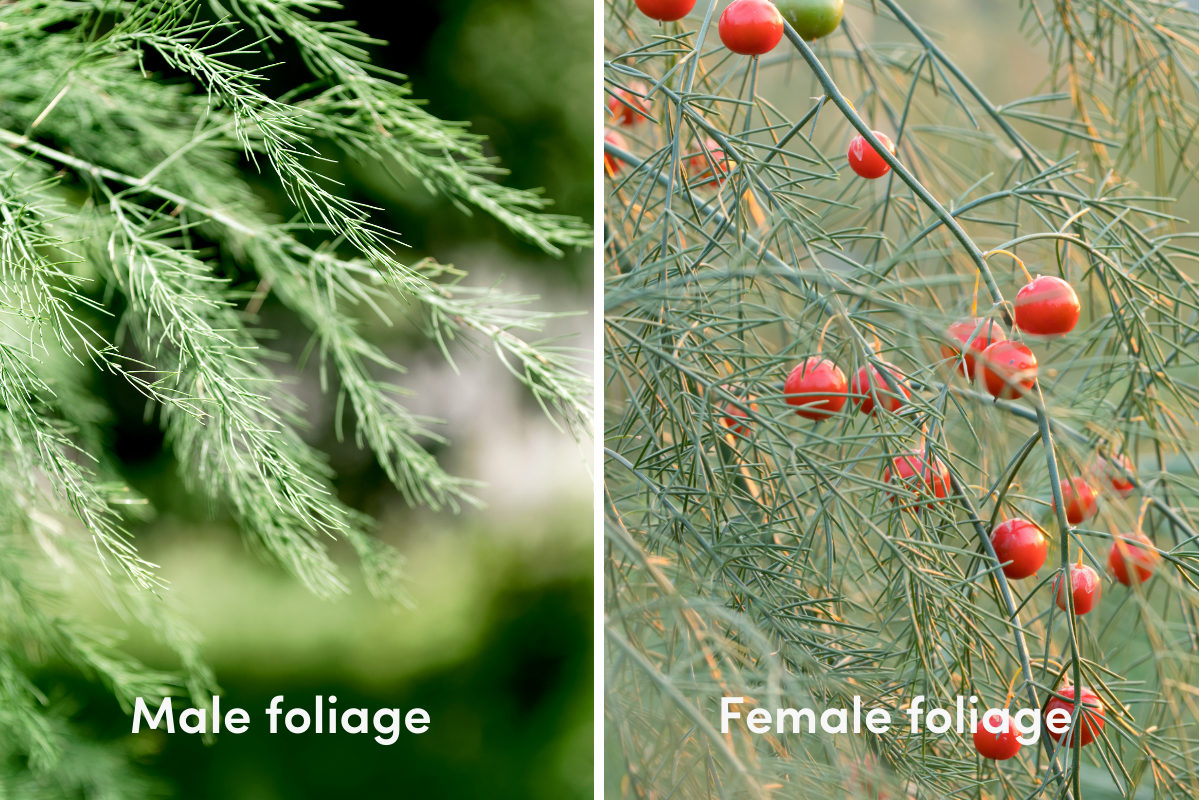
Asparagus grown from seed will produce both male and female plants. The males generally produce thicker spears, so female spears should be removed unless you plan to save seeds. Female plants produce red berries, which are poisonous.
After harvest time has finished, asparagus makes energy for next year’s spears. Allow tall spindly feathery stalks to form until the summer warmth finishes. As the arrival of autumn chills the air, cut down each of the stalks to soil level. Now is the time to dress the bed with well-rotted manure and leave it until next season. Mulching with dried grass clippings or compost can help retain moisture and suppress weeds.
Grow comfrey nearby and use its leaves as a natural fertilizer for your asparagus. Not only will the leaves act as a deterrent for pests; as the leaves decompose they also release calcium, iron, potassium, and magnesium to boost the fertility of the soil.
Pests and Diseases
- Slugs and snails enjoy the young seedlings! Take measures to protect your plants whether they’re still in their pots or have been transplanted into the garden.
- Asparagus beetles munch stems and feathery green foliage. Easy to spot, the adult has orange and black markings. Remove these and look for eggs laid in foliage, which look like tiny black spots on the feathery leaves. Roll the eggs between your fingers to stop the spread.
- Frost will sometimes cause emerging spears to turn black. If there is a cold spell predicted, cover the bed with black plastic or a frost cover.
- Asparagus rust is less troublesome. It causes foliage to turn a red color in summer, so cut away any affected foliage, destroy it by burning or put it in your rubbish bin. (Do not add it to your compost.)
Harvesting
It is really important not to pick asparagus spears in their first or second year! You need to be super patient and in year 3, you can pick just one spear per plant.
How and when to pick asparagus
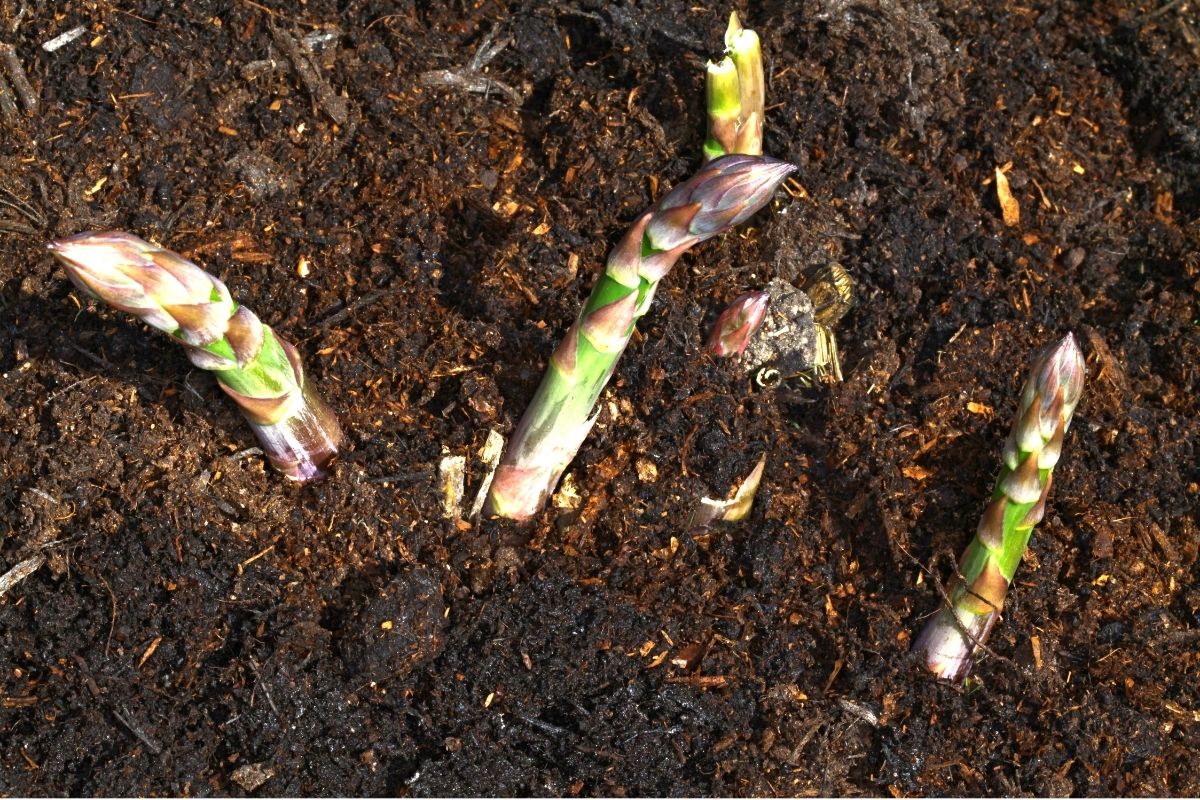
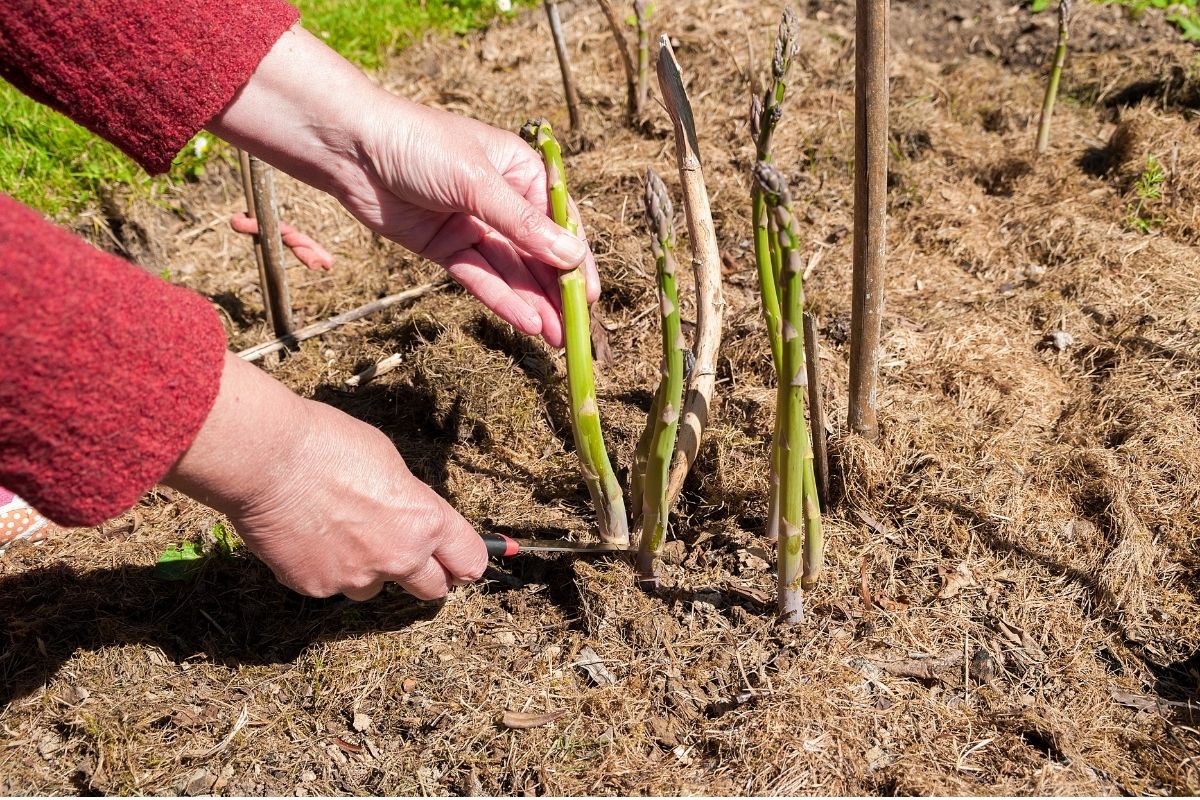
- Allow the spears to reach about 15cm above the ground and then cut them with a sharp knife slightly below the surface of the soil. Use a sharp knife so you do not damage the plant. You can cut one spear per plant in year 3.
- For year 4 asparagus, stop cutting after six weeks. From then onwards, continue cutting up to eight weeks.
- Spears continue to appear after this but if you keep picking, the following year your harvest will be very thin and disappointing. Think of asparagus as a treat that comes in set periods and stick to that. Then you can enjoy thick, tasty spears for many years to come.
Asparagus in the Kitchen
You will find it difficult to resist eating the freshly picked asparagus raw as soon as they are picked. If they make it to the kitchen, place the freshly cut stalks in a jar of water until you cook them to keep them fresh. Enjoy the unique flavor of asparagus lightly cooked in water for a few minutes, then drizzled with butter. They are also great barbequed with a little oil and lemon juice, used as a pizza topping or wrapped in ham or prosciutto.