It's no surprise that potatoes are one of the most popular crops in home veggie patches. They're straightforward to grow, give an excellent harvest, and are highly versatile in the kitchen.
Unlike most other veggies, potatoes aren't grown from seed or by buying young seedlings. Instead, a plant is grown from a single adult potato, or even a small piece of one. Given the right conditions, the smallest scrap of potato can grow into its own plant with a harvest nestling below it.
However, most experienced gardeners use certified seed potatoes as a starting point, and in Australia these are the only potatoes allowed to be sold commercially. These baby potatoes or tubers will be guaranteed disease free and will usually lead to more a reliable and productive crop.
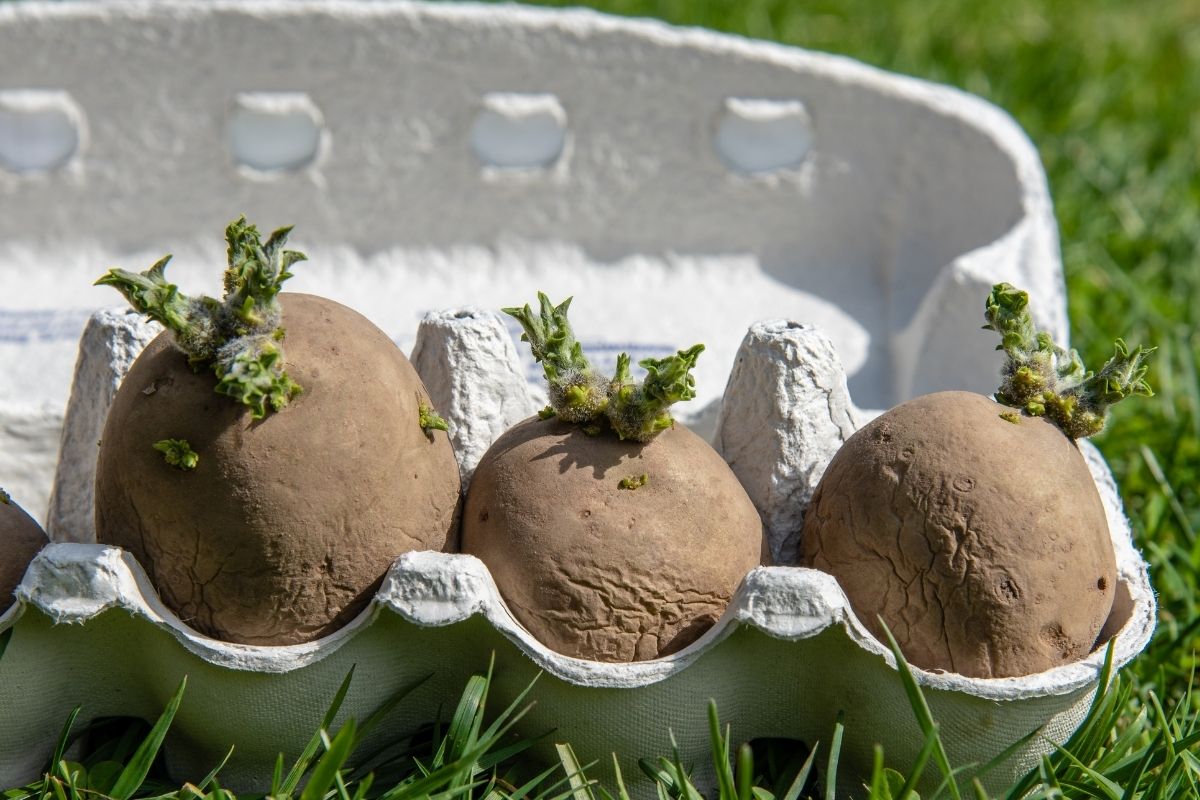
The Chitting Process
Simply covering a potato with soil is enough to get the ball rolling, but there's an extra stage that's traditionally used before sowing. Known as ‘chitting’, it involves placing the seed potatoes in a cool but bright position for a few weeks until they start to sprout. Once the new sprouts are 2-3cm in length, all but the two or three longest on one side are removed, and the potatoes are then sown.
The thinking is that this gives the potato plants a head start in growth, leading to an earlier and better crop. But this thinking isn't universally agreed upon. Non-chitted potatoes will still grow perfectly well, and if your location enjoys good conditions and a long growing season, then chitting isn't absolutely necessary. However, if you want to bring an early harvest of potatoes even further forward, chitting is certainly worth a try.
Growing Potatoes at Home
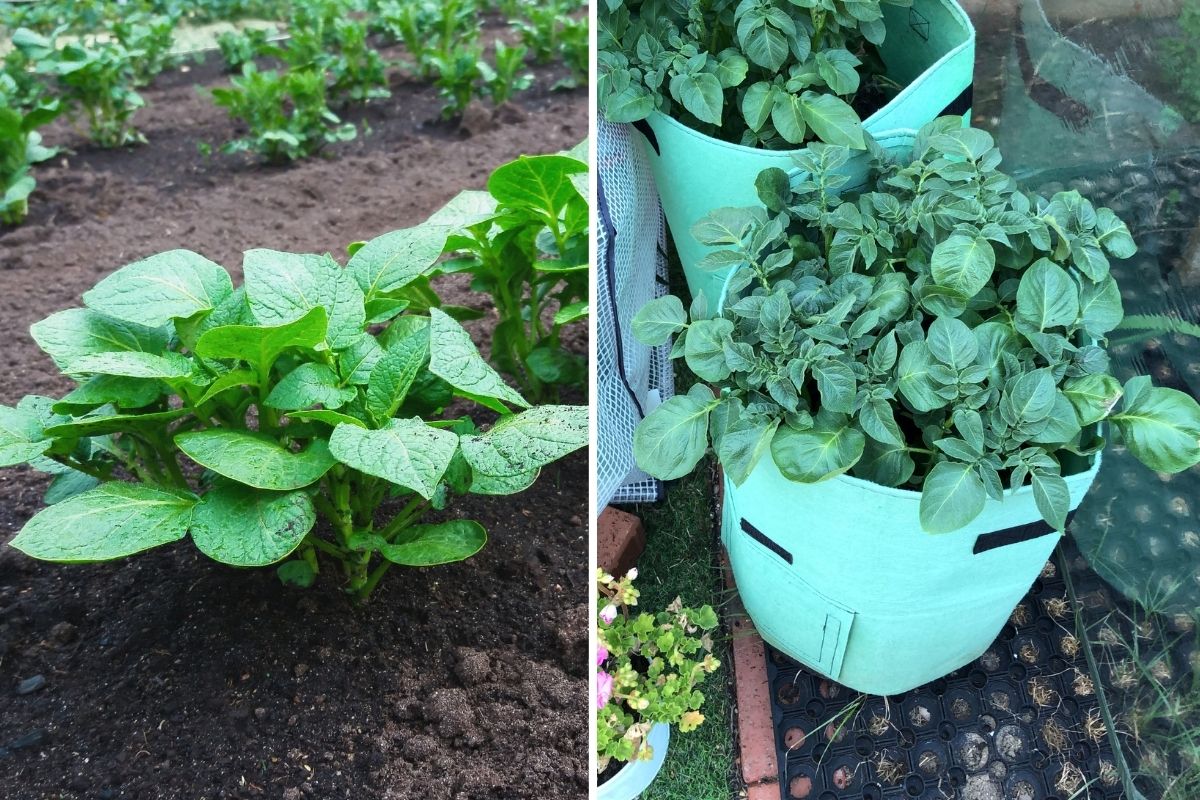
Whether you chit or not, there are two main ways of growing potatoes. The traditional way is to grow them in the open ground, but if you're short of space potatoes can also be grown in a grow bag or sack. Both methods begin in spring.
Growing Potatoes in the Ground
Potatoes need good, deep soil with a relatively light texture, along with a sunny position and plenty of water. They can be grown in open soil or in raised beds, but it's important not to use the same spot from one year to the next as disease can quickly build up. Try growing spuds after peas and beans in a crop rotation scheme, as they'll love the nitrogen that the legumes leave behind.
Once you've chosen your location, prepare the soil by adding a couple of centimetres of well-rotted manure or compost to the surface, scatter some blood and bone, then turn the soil over to a depth of about 30cm.
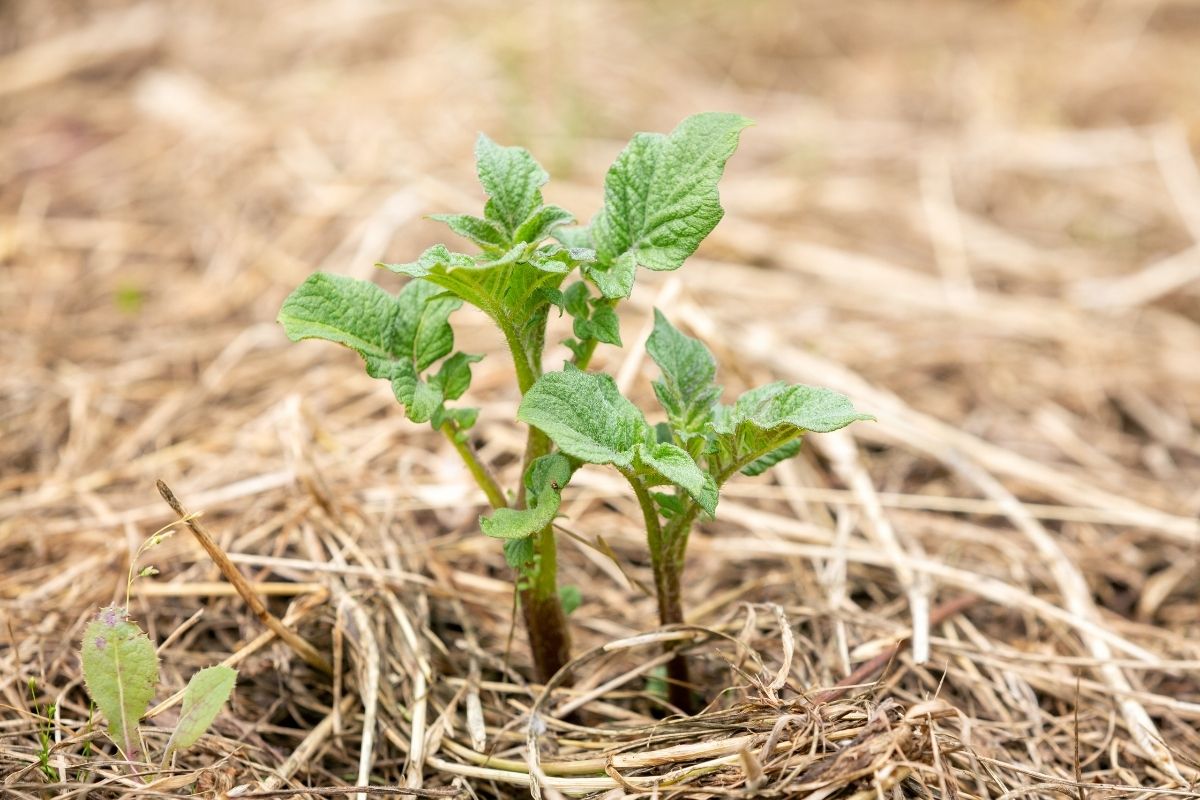
Next, dig trenches around 25cm wide and deep, 60cm apart, piling up the soil at the sides. Place the potatoes at the bottom, spaced 25 to 30cm apart with the shoots or eyes pointing upward, and cover with around 10cm of soil. Water in well.
Later, as the growing shoots reach around 15cm in height, return a little more of the soil to the trenches to cover the potato plant’s stems while leaving the top leaves above ground, and again water well. This process is known as ‘hilling up’ and prevents the tubers from turning green and inedible in the sunlight.
Continue hilling up as the plant grows, until the mounds are 30 to 40cm above soil level, or until the foliage of adjacent plants starts to meet.
Growing Potatoes in Bags
To grow in bags, take a potato grow bag, heavy duty planter bag or sack and roll the sides down so it's about half its height. Ensure there are drainage holes in the bottom to prevent waterlogging and rotting. Add a generous layer of fine-textured potting compost mixed with blood and bone to the bottom.
Place the seed potatoes on the surface, with shoots pointing upward, and cover with more potting mix. Depending on the size of the bag, around three or four seed potatoes should give good results, but try to maintain a spacing of around 25 to 30cm between each tuber.
As the leaves appear, unroll the sides of the bag a little, and add more soil mixture to fill. Continue doing this over time until the bag is fully unrolled and filled.
Ongoing Care
Apart from hilling up or adding fresh soil to the bags, potatoes need little ongoing care other than regular watering and attention to weeding. Some gardeners like to feed their potato plants a few times during the growing season, but if you've dug in plenty of compost and blood and bone at the start this isn't essential.
Harvesting Potatoes
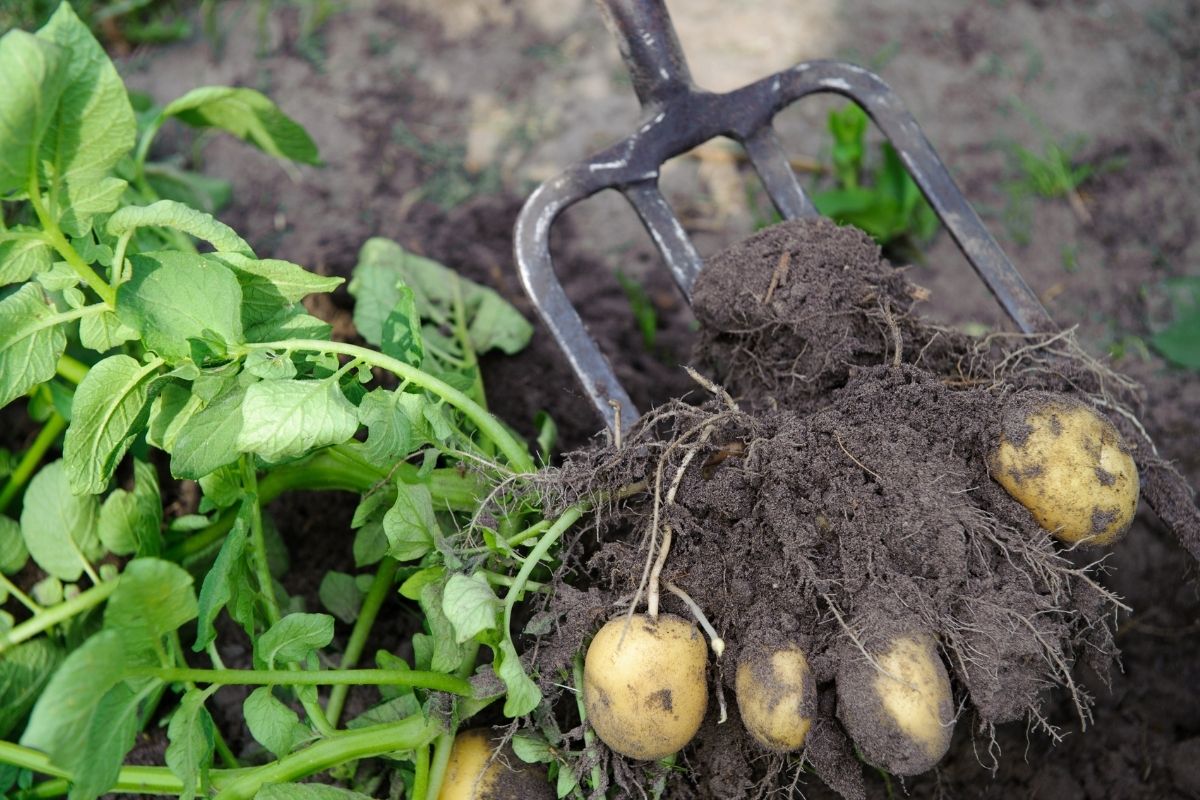
Early or new potatoes can usually be harvested as soon as the plants start to flower - dig up a sample to check for size. There's no need to harvest all your potatoes at once as they'll continue to grow and stay fresher in the ground than in storage.
For full-size or maincrop potatoes, wait until the foliage has flowered and then fully died back, which is usually in late summer or early autumn.
Early potatoes are best eaten as soon as possible after digging them up. But for maincrop varieties that you want to store, choose a dry day for harvesting. In the morning, carefully lift the potatoes from the soil using a garden fork, gently brush off any excess earth, and then leave the tubers on the ground to dry off for a few hours. This will thicken the skin and improve storage.
Storing Your Crop
Once dried, potatoes should be stored in a cool, dry, frost-free place with as little light as possible, such as in paper sacks in a cellar. Under ideal conditions potatoes can last until the next harvest, but before eating check for any green parts caused by exposure to light, as the colour is a sign of toxins within.
Whether you're a veggie-growing beginner or an old hand, there's a place in your patch for a potato plant or two. As far as platefuls of food go, they probably give the most generous return of any crop for their minimal growing effort.