Gardeners growing garlic for the first time will know that it’s one of the easiest crops to care for. Perhaps the most difficult part of the process is knowing when the bulbs are ready to harvest. And once the bulbs have been dug up, what’s the next step?
Read on to find out how to harvest and cure garlic so it can be enjoyed for months to come.
How Garlic Bulbs Are Formed
When garlic cloves are first planted, all the plant's energy goes into growing roots and leaves. It’s only after the spring equinox, when the days start to lengthen, that the plant shifts its energy from leaf production into bulb formation.This process involves several distinct steps:
- At first, the bulb simply starts swelling.
- The bulb then beings to divide into individual cloves.
- Next, the fleshy outer layer of the bulb thins out to form its outer skin.
- Then the layer around the individual cloves swells and become fleshy.
- This layer then thins out to form skins around the individual cloves.
- As the bulb matures, the cloves will grow larger while the skins around both the whole bulb and the individual cloves develop further.
- The bulb is ready to harvest when the skins are thin and the bulbs are full and firm.
- If the bulb is left to mature further, the cloves will separate from each other, ready to reshoot in autumn.
When Are Bulbs Ready to Harvest?
Depending on the variety and your climate, garlic bulbs should be ready to harvest in late spring or summer. At this time, the leaves will begin to yellow from the bottom up. As a general rule of thumb, softneck varieties should be ready to harvest when there are six green leaves left on each plant. Hardnecks will be ready when there are about four green leaves remaining.
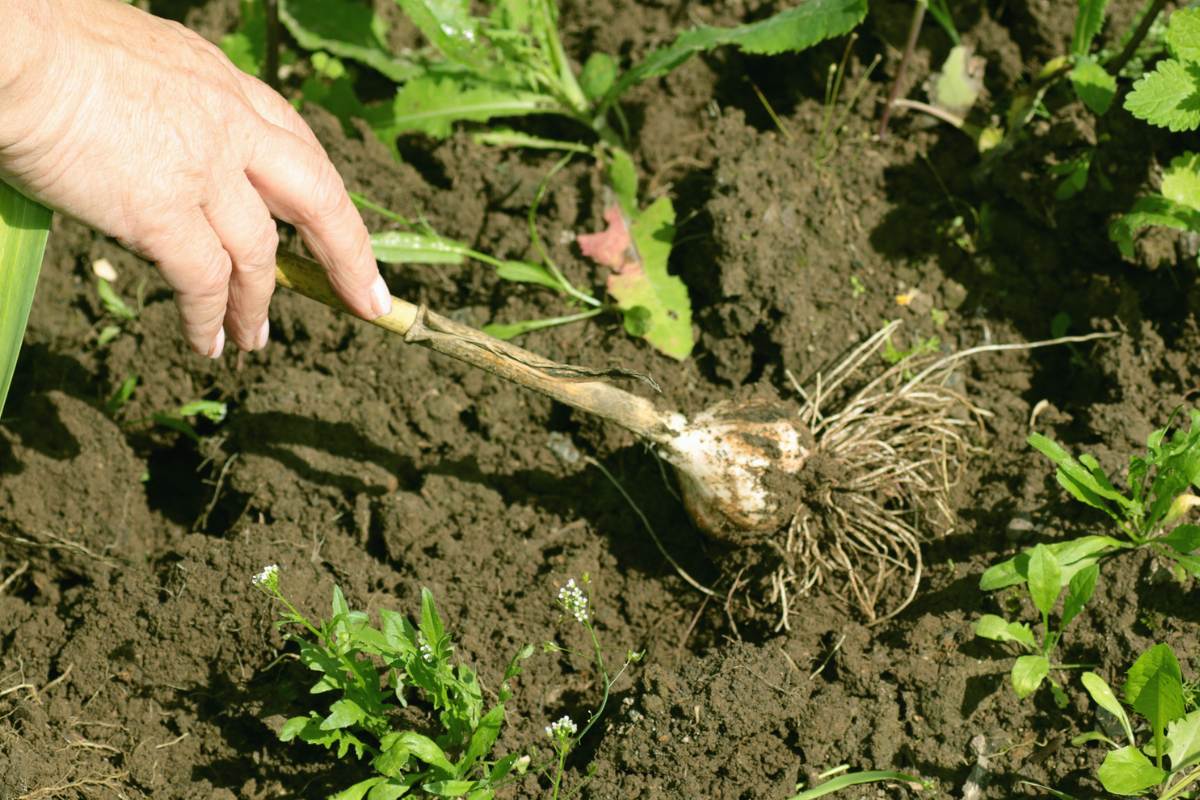
Dig Up a Test Bulb
While the yellowing leaves provide an above-ground signal that the bulbs may be ready to dig, it’s a good idea to examine a bulb more closely before harvesting the entire crop. Using a garden fork and digging gently to avoid damaging the bulbs, lift a single bulb from the soil. Next, cut the bulb in half cross-wise to see what’s happening inside.
As mentioned above, the individual cloves within the bulb should have developed, and the skins around both the cloves and the bulb should be visible. The individual cloves should look plump and they should be separated by thin skins, which will be either white or purple.
If there are no individual cloves visible or there are fleshy layers around the cloves, give the crop another couple of weeks to mature. If the skins are papery and the cloves have started to separate from each other, it’s a little late to harvest; in this case the bulbs are still fine to use but they won’t store as long as bulbs harvested at just the right time.
Harvest the Crop
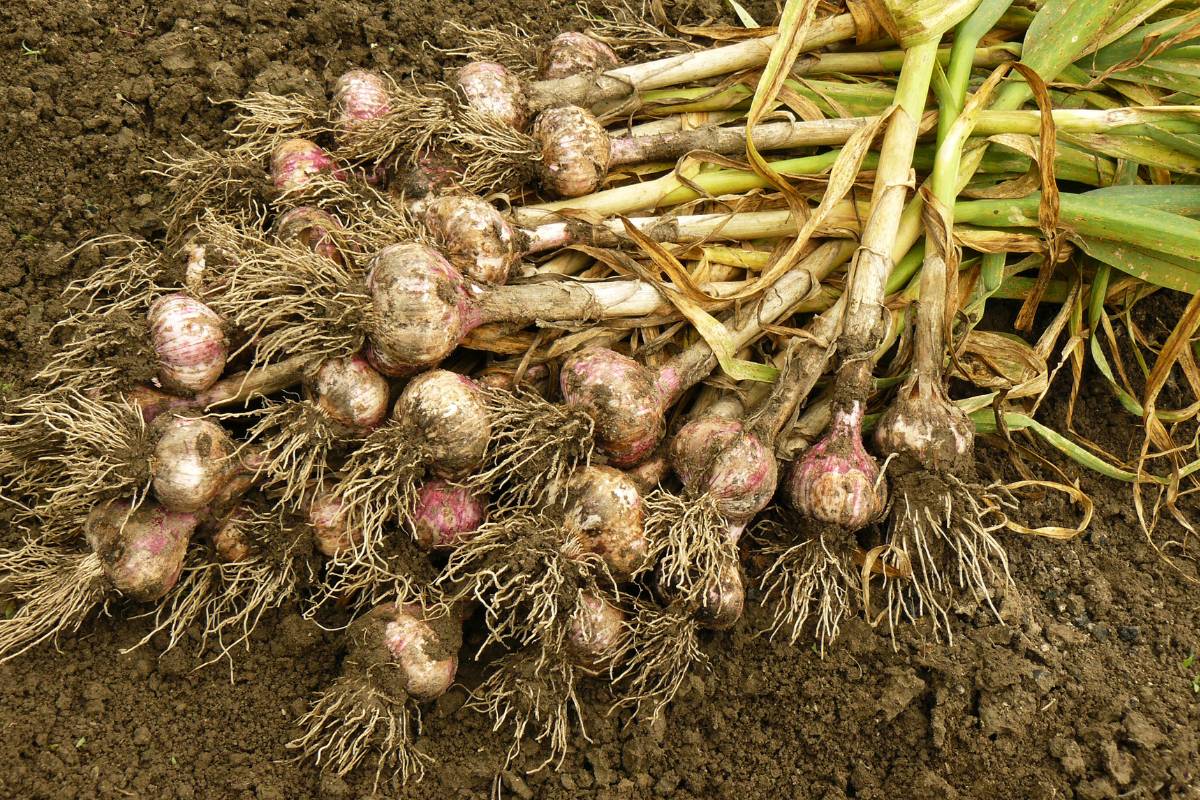
When the crop is ready to harvest, use a garden fork to lift the bulbs. Start digging a little way away from the bulbs so they aren’t accidentally damaged. Lift the bulbs and shake off any loose dirt, but do not brush or wash the bulbs as this will damage the skins and reduce the storage life of the harvest. Similarly, leave the entire plant intact for now - leaves, roots and all.
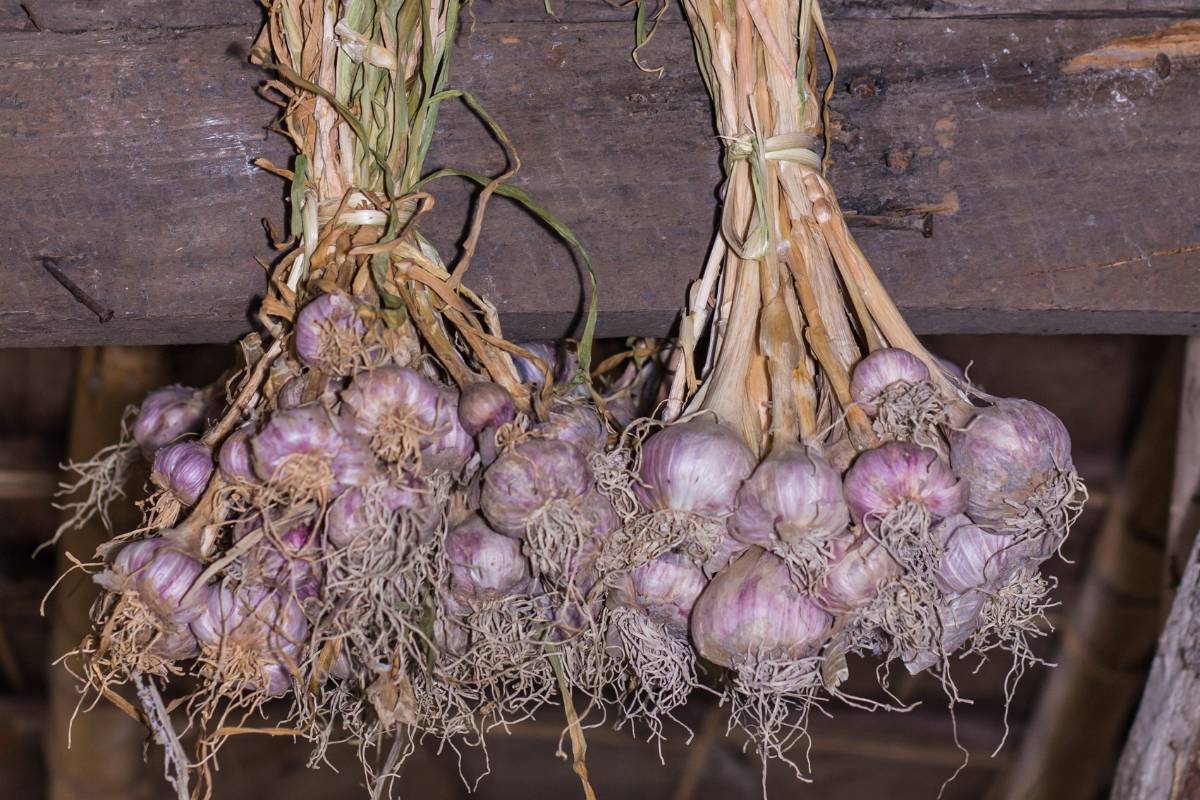
Cure the Bulbs
In the northern hemisphere where sun is not as harsh, bulbs are often pulled and left on top of the soil for a few days to cure. In most areas of Australia this will likely result in bulbs getting sunburnt and too hot, so they’re best moved soon after harvest to a dry, shady place where temperatures are stable. If the bulbs are left out, place them in rows with the leaves of one row covering the bulbs of the next to protect them from direct sun.
Bulbs can be hung in small bunches by their leaves or spread on wire racks to cure. Old flyscreens make good drying racks.
Check the bulbs regularly for signs of mould or decay. In humid climates or if leaves become mouldy, cut them off about 2cm from the top of the bulb. This will prevent the leaves absorbing moisture which may then be transferred down into the bulbs.
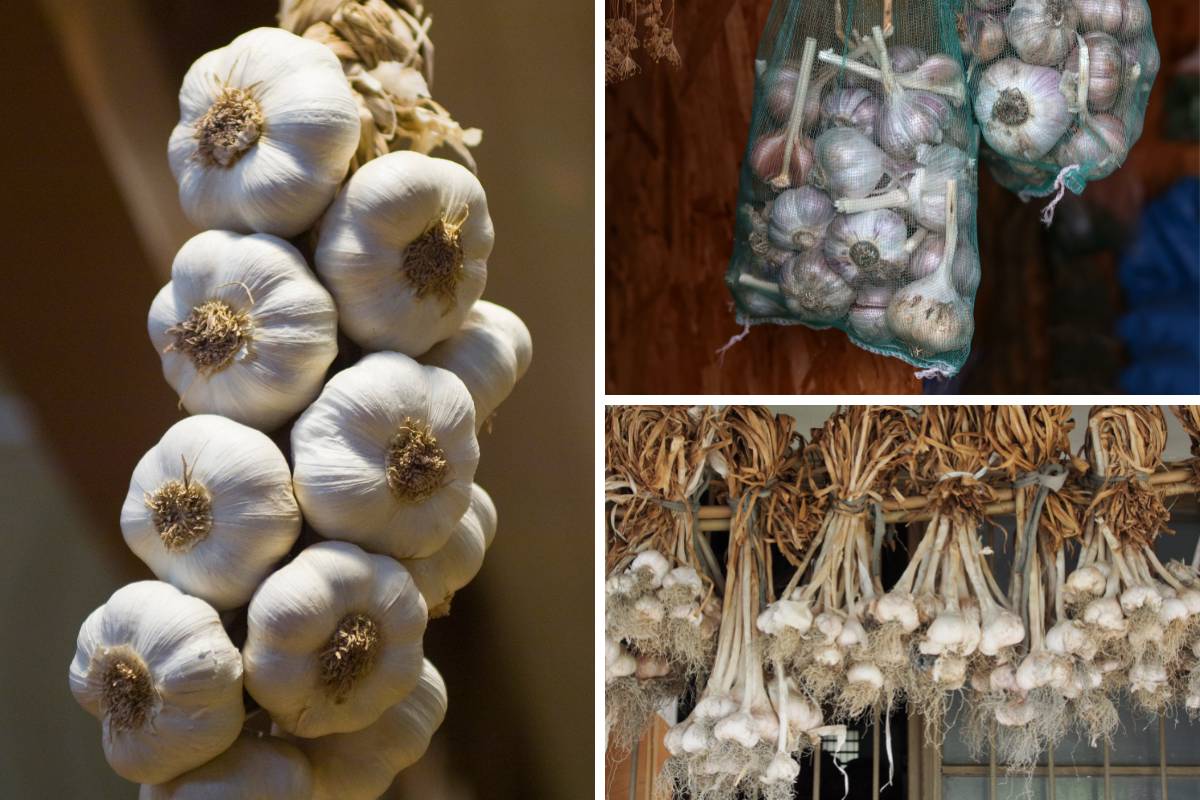
When fully cured, the garlic should have papery, dry skins with firm, tightly packed cloves. Any damaged or bruised bulbs should be eaten or minced then frozen rather than put into long term storage.
How to Store Garlic
First, choose the best bulbs for replanting, label them and store them separately. Garlic leaves can be braided with the bulbs attached so that many bulbs can be hung together without touching one another. If you take this approach, trim the roots 1cm from the bottom of the bulbs and hang the braid in a cool, dry place such as a cellar. To store individual bulbs, trim the foliage 2cm from the top of the bulb and the roots to 1cm from the bottom of the bulb. Store bulbs on shallow trays, in cardboard boxes or in net slings, all of which allow good air circulation, in a cool, dry place (around 10 degrees is ideal). Use the bulbs as needed, checking them regularly for signs of mould.
With a little bit of care and attention, a harvest of fresh, home-grown garlic bulbs can provide garlic all year round.