There are numerous reasons why gardeners may wish to have a temporary space to grow their crops. If you’re living in a rental, don’t have the cash for raised garden beds or just want to get growing while you plan a more permanent setup, a straw bale garden may be for you.
What Are Straw Bale Gardens?
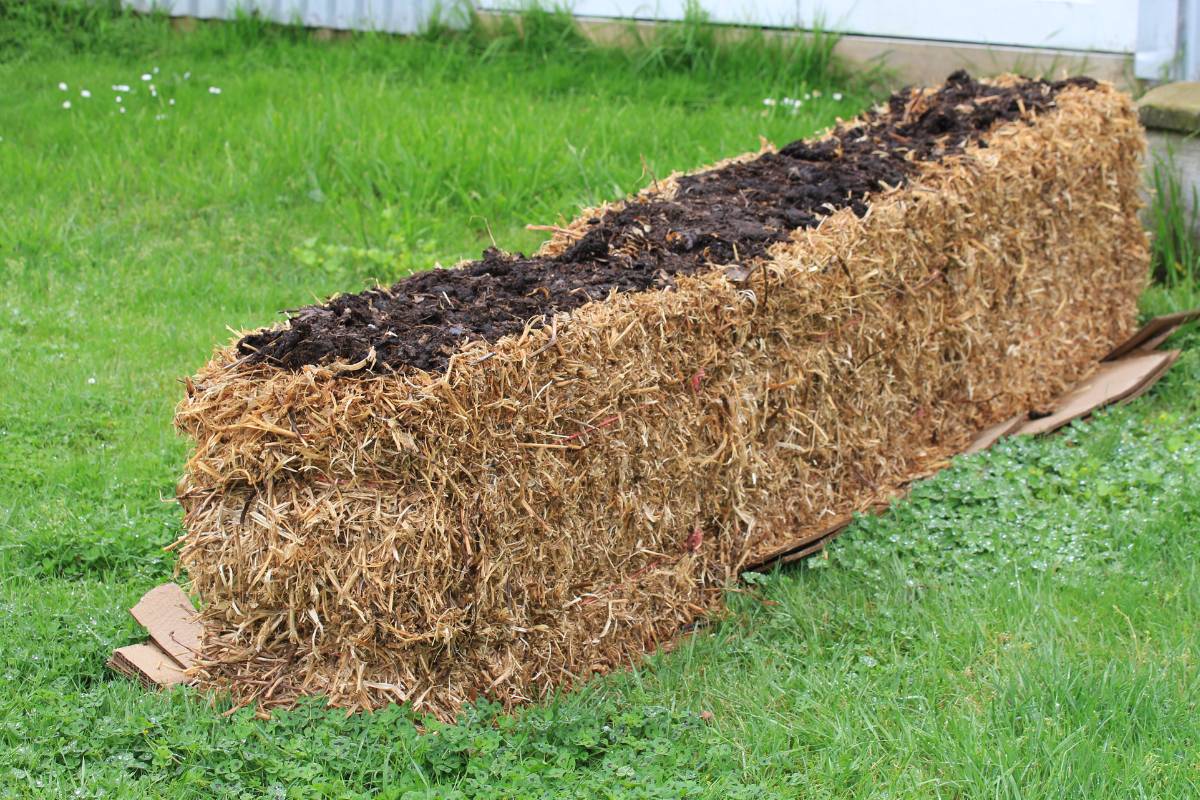
Straw bale gardens are raised gardens made of bales of straw with fertiliser and compost added. The bales act as both growing medium and container, removing the need to construct expensive raised beds. Each straw bale garden lasts only one season, as the bales decompose and break down while they’re supporting plant growth. Straw bale gardens can be constructed on almost any surface, including paving, concrete and lawn. Because new bales are used each season, the risk of soil-born and other diseases is low, as is the incidence of weeds.
Proponents of straw bale gardening report that yields are higher and earlier due to the warmth created in the straw and the nutrients that are made available when the bales decompose. That said, because the drainage in straw bales is so good they do require regular watering, and because they are temporary they’re only suitable for annual crops.
How to Construct a Straw Bale Garden
Materials:
- Newspaper or cardboard (if the straw bales are to be placed on a lawn)
- Bales of straw held together with baling twine
- High-nitrogen fertiliser such as pelletised chicken manure or blood and bone (some gardeners use lawn fertiliser)
- Compost (home made or bought)
- Seeds or seedlings of your choice
Optional materials:
- Star pickets or sturdy stakes and wire to construct a trellis
- Materials to set up drip irrigation lines on the bales
Lucerne and pea straw are two materials that are commonly available in bale form. Try to avoid bales made from wheat, oats or other grains or your bales may sprout and look like a shaggy chia head - if this happens you can remove or smother the sprouts to make space for your crops.
Method
- If the garden is being constructed on lawn, spread thick layers of newspaper or a single layer of cardboard down to smother the grass. Overlap the layers so there are no opportunities for grass to grow through.
- Place the bales with the ‘cut’ side of the straw facing up. The cut side will feel rough to touch. The twine holding the bales together should be on the sides.
- Arrange the bales in any shape you like.
- If growing climbing plants, construct a simple trellis by placing a star picket at each end of a row of bales and stringing fencing wire between them.
- Drip irrigation lines can be set up on top of the bales if desired.
- If growing on lawn, put landscape fabric or newspaper topped with mulch between the rows to reduce ongoing maintenance.
Seasoning the Bales
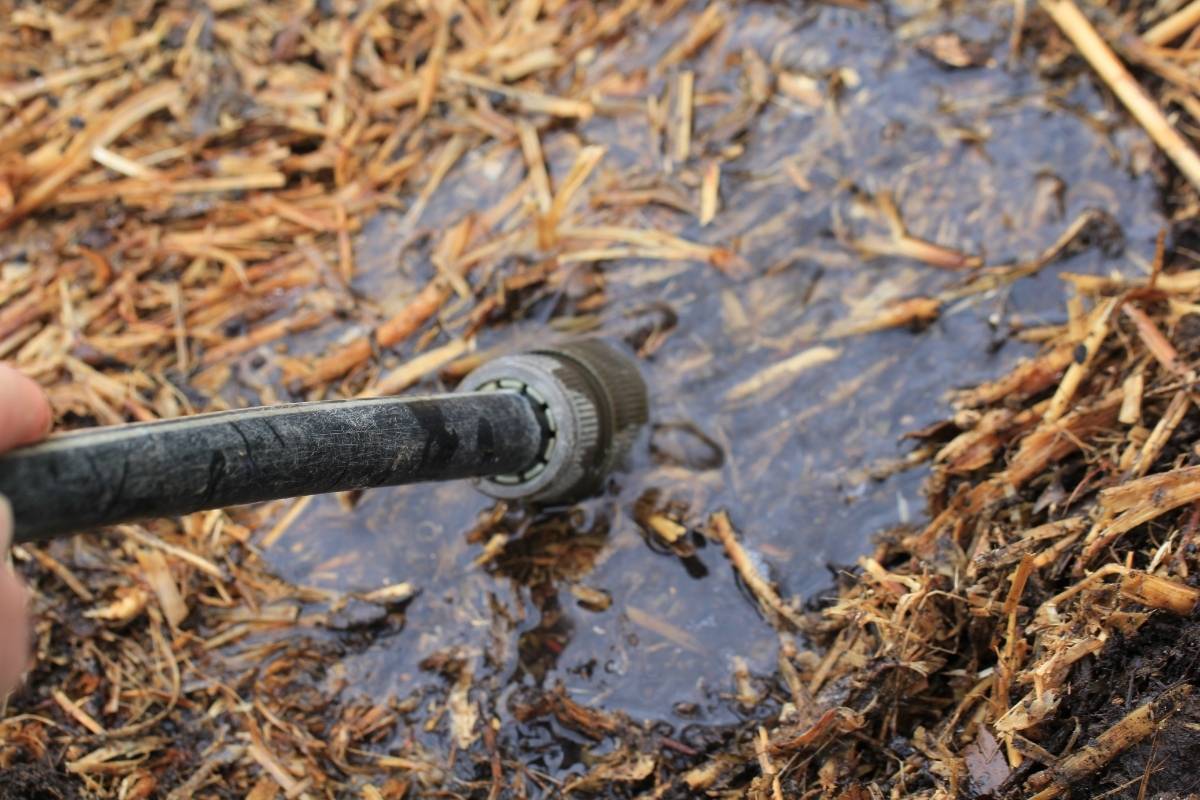
Once your bales are in position, allow at least two weeks to prepare them for planting. This process, called ‘seasoning’, involves adding water and fertiliser to start the bales decomposing. This will not only provide a soilless medium in which to grow your plants, it also heats up the bales, helping them decompose faster and also benefitting plants and seeds.
First, water the bales thoroughly from the top, pushing the hose down into the bales to make the water penetrate as much as possible. Next, add two or three cups of high nitrogen fertiliser per bale, spreading it evenly over the top surface. Water in well.
At this stage you can cover the bales with plastic sheeting or a tarp to speed up the seasoning process if desired. If you leave the bales uncovered, water them more frequently, making sure they never dry out completely. Either way, leave the bales for a week initially, then repeat the process of watering and adding fertiliser and leave the bales to season for at least another week.
Over time you should be able to feel the temperature in the bales increasing, then gradually decreasing. Then it’s time to plant.
What to Grow
Any annual vegetables, herbs or flowers can be grown in the bales. Leafy vegetables of all kinds, soft-leaved herbs, bush beans and nightshades all perform well. Flowers also grow well, particularly those that require excellent drainage, such as dahlias.
Keep in mind that some plants may need extra support or space when growing in the confined space of the straw bales:
- Climbing plants such as vine tomatoes, climbing beans and peas will need a trellis or support to grow up.
- Top-heavy plants like corn and sunflowers may also need staking.
- Root crops including carrots, beetroot and parsnips can be challenging to grow at the beginning of the season when the bales are still tightly packed; they should be fine to plant in succession with a quick-growing leafy green or similar.
- Sprawling plants such as pumpkins and melons grow well in straw bales; they will spill over onto the ground around the bales, giving an exuberant feel to the garden.
Planting Into the Bales
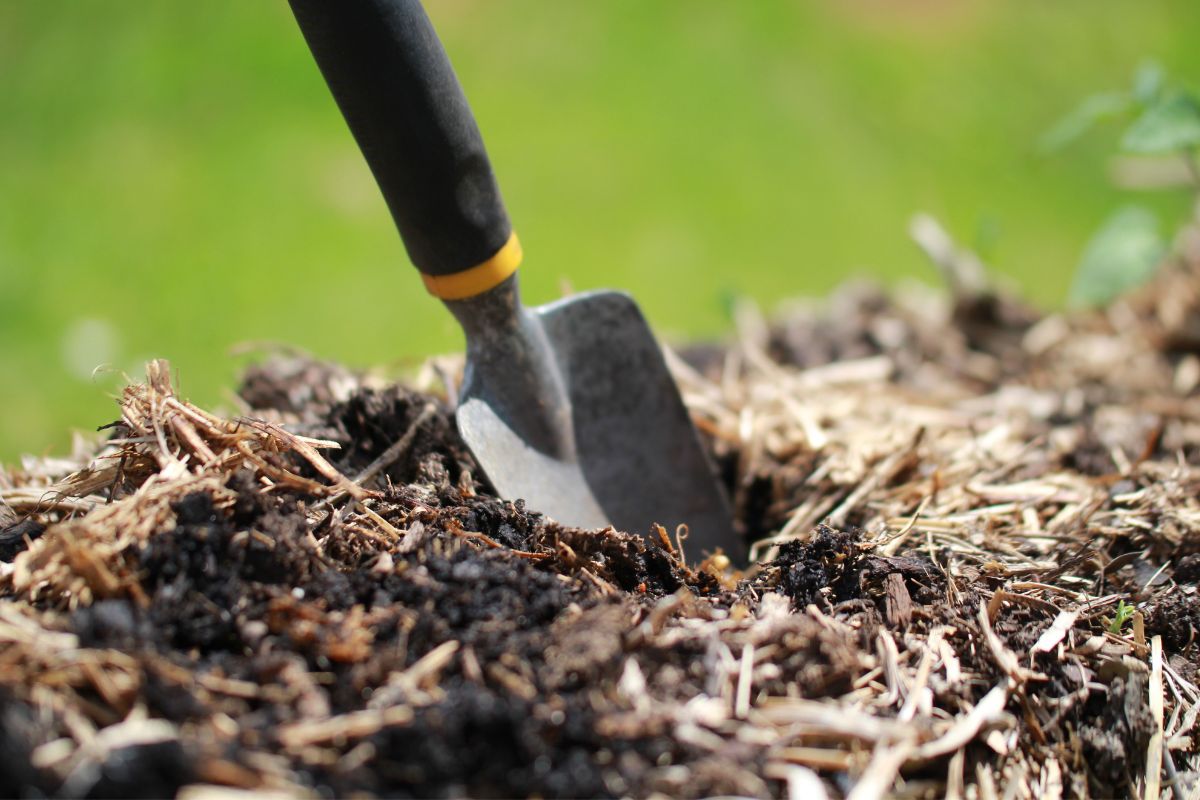
When it’s time to plant, use a sharp tool such as a hori knife to dig into the top of the bales. Make small planting holes or crevices and fill these with well rotted compost or good quality garden soil, then plant seedlings in the usual way and water in well.
To sow seeds in your straw bale garden, spread a 3cm to 5cm layer of compost across the top of the bale and sow seeds in the usual manner. By the time the seeds have grown to a reasonable size, the bale will have broken down sufficiently to allow the plant’s roots to grow freely.
You can also plant into the sides of the bales, which makes the most of the growing space and is a good way to add companion flowers and trailing herbs such as thyme and oregano to your garden.
What to Do with Used Bales
By the end of the season it’s likely that the bales will have broken down to the point of near-collapse. The good news is that all the nutrients and organic matter they contain make them a perfect addition to compost. You can either transport them to an existing compost pile or bin, or make a temporary one near your straw bale garden using sturdy stakes and chicken wire to hold the materials while they break down further.
Alternatively, if in the future you’re planning to plant into the soil where your straw bale garden was situated, simply spread out the straw and compost in situ and water it in well to continue the decomposition process.
Straw bale gardens are cost-effective and sustainable, requiring few building materials to construct. If the thought of a temporary growing space is appealing, it may be worth experimenting with a straw bale garden of your own.