Are you looking to add a unique twist to your garden? If so, you may want to grow a ketchup 'n' fries plant, a fascinating grafted plant producing potatoes under the soil and tomatoes above ground.
Read on to learn how to grow, graft, care for and harvest this novel crop. By the end of summer you may be enjoying your very own dual harvest of tomatoes and potatoes.
What Is a Ketchup 'n' Fries Plant?
A ketchup ‘n’ fries plant, also known as a pomato or tomtato (or in its Aussie form as a spuds ‘n’ sauce plant) is created through grafting. Since both tomatoes and potatoes belong to the Solanum family, they are compatible to graft, forming a single plant within a few short weeks. By combining the vigorous tomato plant's above-ground portion with the potato plant's productive roots, you can enjoy two harvests in the time and space it usually takes to grow either plant.
Why Grow a Ketchup 'n' Fries Plant?
There are several reasons why growing this novel grafted crop can be a rewarding experience for home gardeners. Firstly, it’s a unique plant that is sure to attract attention and serve as a conversation starter in your garden. Grafting a tomato and potato together also allows you to grow two crops in a limited space.
The larger tomato leaf canopy produces more energy than a typical potato plant, and this energy is then shared throughout the entire plant. Keep in mind that growing two crops at once may result in smaller yields for each crop, especially the potatoes.
Which Varieties to Use?
While you can use any tomato variety, cherry tomatoes are usually chosen for their productivity and vigorous growth. Determinate or indeterminate potatoes can be used, but note that hilling up soil around indeterminate varieties won't be possible as this would smother the tomato-producing part of the plant. For our trial we used a standard cherry tomato and a Red Lady potato.
How to Graft a Ketchup 'n' Fries Plant
Materials:
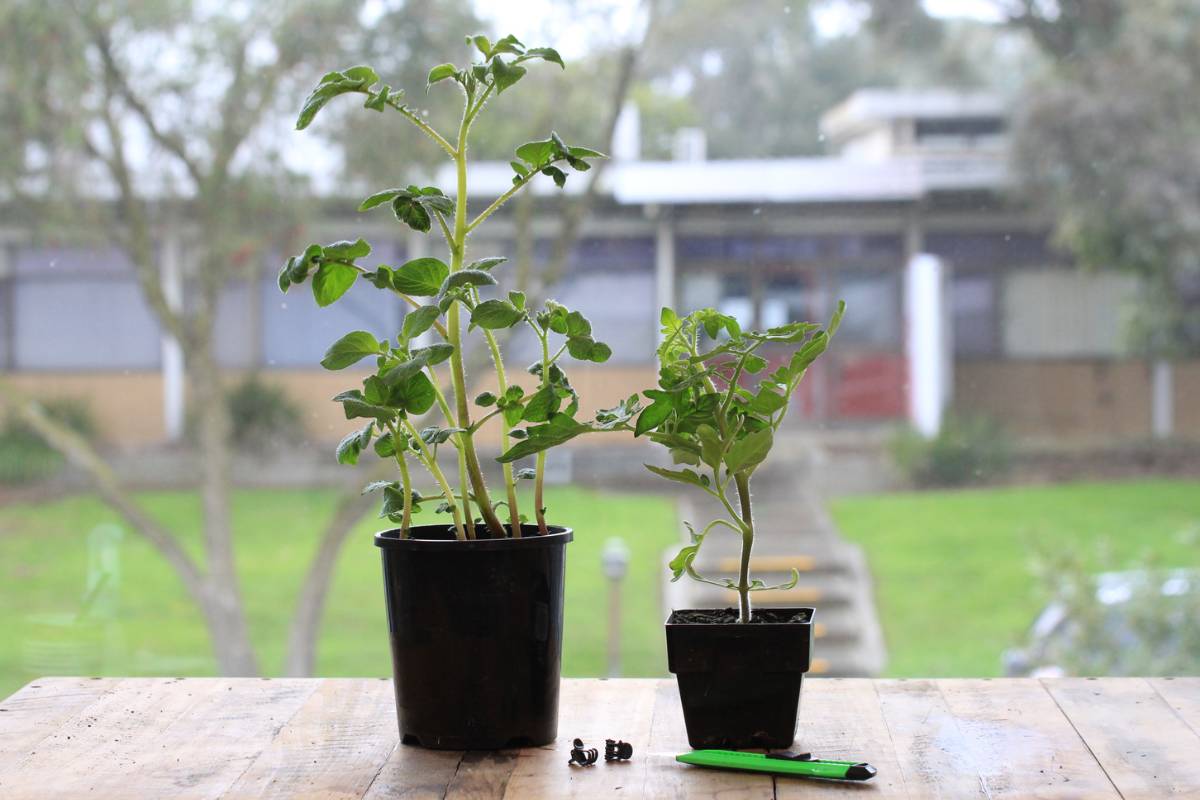
- Potato plant: Grow a single seed potato in a 10-15cm pot. Once the shoots of the potato are at least 10cm tall it’s ready to graft. A plant with 3 or 4 shoots provides several opportunities for grafting; if your plant has more shoots than this, remove some at ground level.
- Tomato cuttings: Three or four 10-15cm long tomato cuttings. Prune them off a mature tomato plant or harvest them from seedlings.
- Clean sharp grafting knife or box cutter: Use this to make precise cuts during the grafting process. Disinfect the knife with metholated spirits before use.
- Clips or grafting tape: These will help secure the grafts in place. Cutting plastic tubing such as a short length of aquarium tubing lengthwise is one option; we used a small clip used to stake orchid blooms.
- 3-4 short bamboo stakes or skewers and a plastic bag: These will be used to cover the grafted plant while the graft union heals.
Method:
- Choose a shady spot or work indoors on a cool day so plants don’t become dehydrated.
- Compare the diameters of the potato and tomato stems to ensure they are roughly equal.
- Remove most of the leaves of the tomato cuttings, leaving only the growing point and small leaves around it intact.
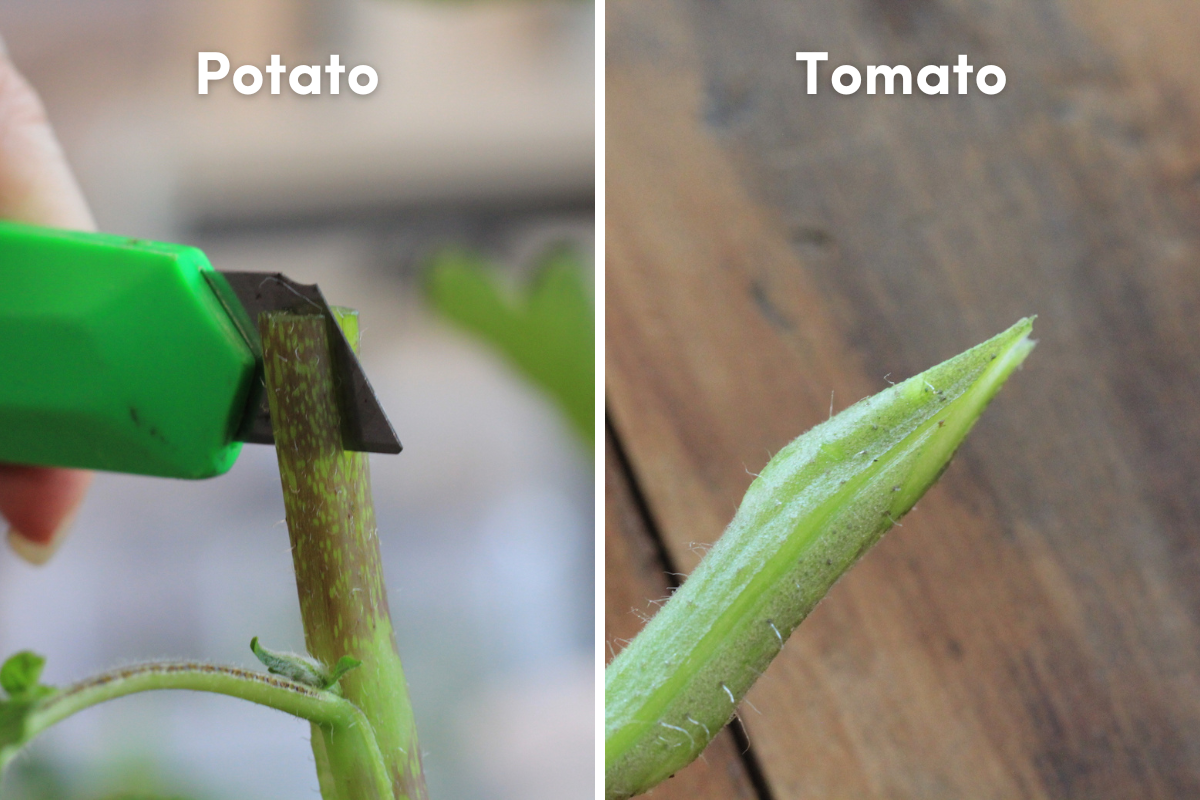
- Cut the potato shoots 5-10cm above soil level, making a straight cut across the stem.
- Make a 2-3cm deep slit down the middle of the potato stem using the grafting knife or box cutter.
- Cut the tomato stem at an angle on either side, creating a sharp wedge shape. This exposes as much of the stem as possible for better contact with the potato plant's stem.
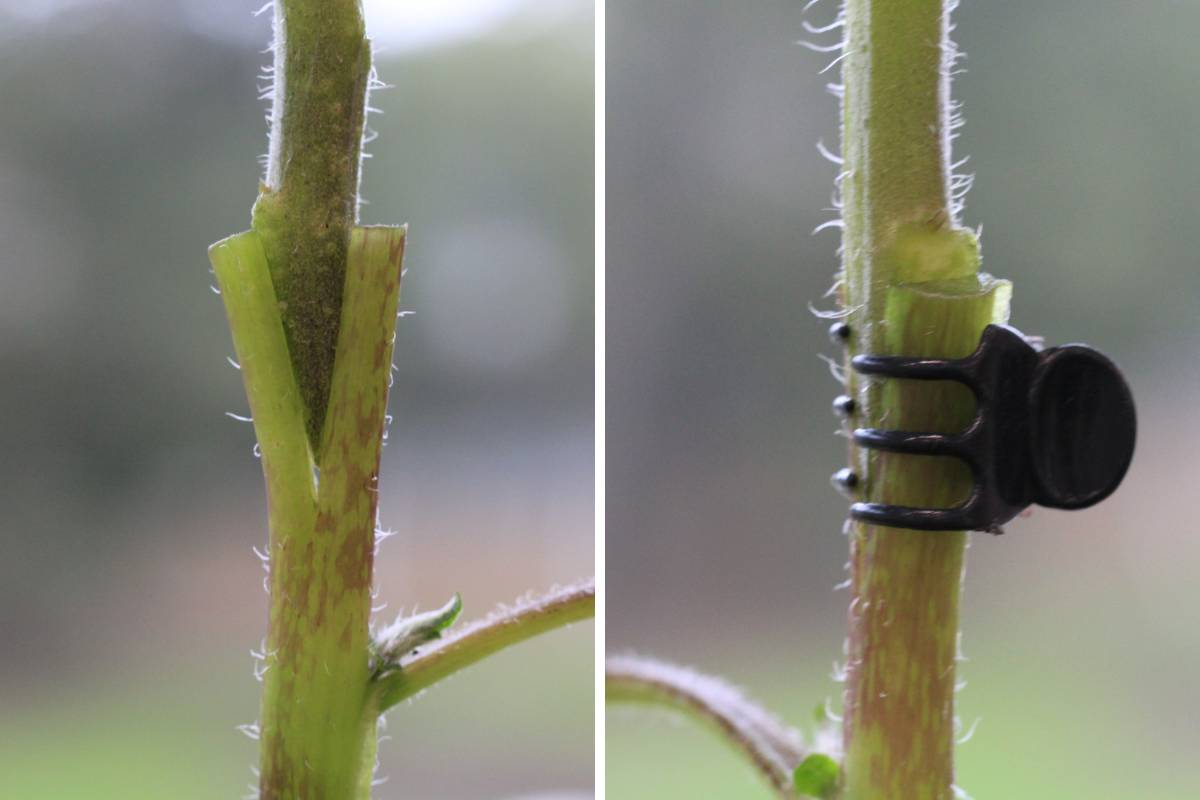
- Gently slide the tomato stem into the slit in the potato stem until you have a tight fit, and secure it with grafting tape or clips. This can be a bit fiddly, but luckily the vigour of the plants means they are fairly forgiving of imperfect grafts.
- Insert the stakes around the edges of the pot and cover it with the plastic bag to create a high humidity environment.
- Place the potted ketchup 'n' fries plant in a sheltered position and keep it hydrated for about a week. The tomato leaves may wilt initially but should recover within a week.
- Leave the plants to grow for two to three weeks until you see strong growth and new shoots on the tomato plants.
- If some of the grafts don't take, cut those stems off at soil level. Similarly, if new shoots emerge from the potato plant, snap them off at soil level to reduce competition with the tomato stems.
Growing On
Now that you have successfully grafted your ketchup 'n' fries plant, it's time to provide the optimal conditions for its growth.
Once you’re happy that the graft has taken and you see some new growth, transplant the grafted plant to a larger pot to give it ample space for root and tuber development. A 40L (10 gallon) container is recommended as a minimum size. Alternatively, you can use a potato grow bag to make harvesting the tubers easier.
Prior to transplanting, enrich the soil in the pot with compost or a fertiliser suited to tomatoes. This will provide the necessary nutrients for the plant's growth.
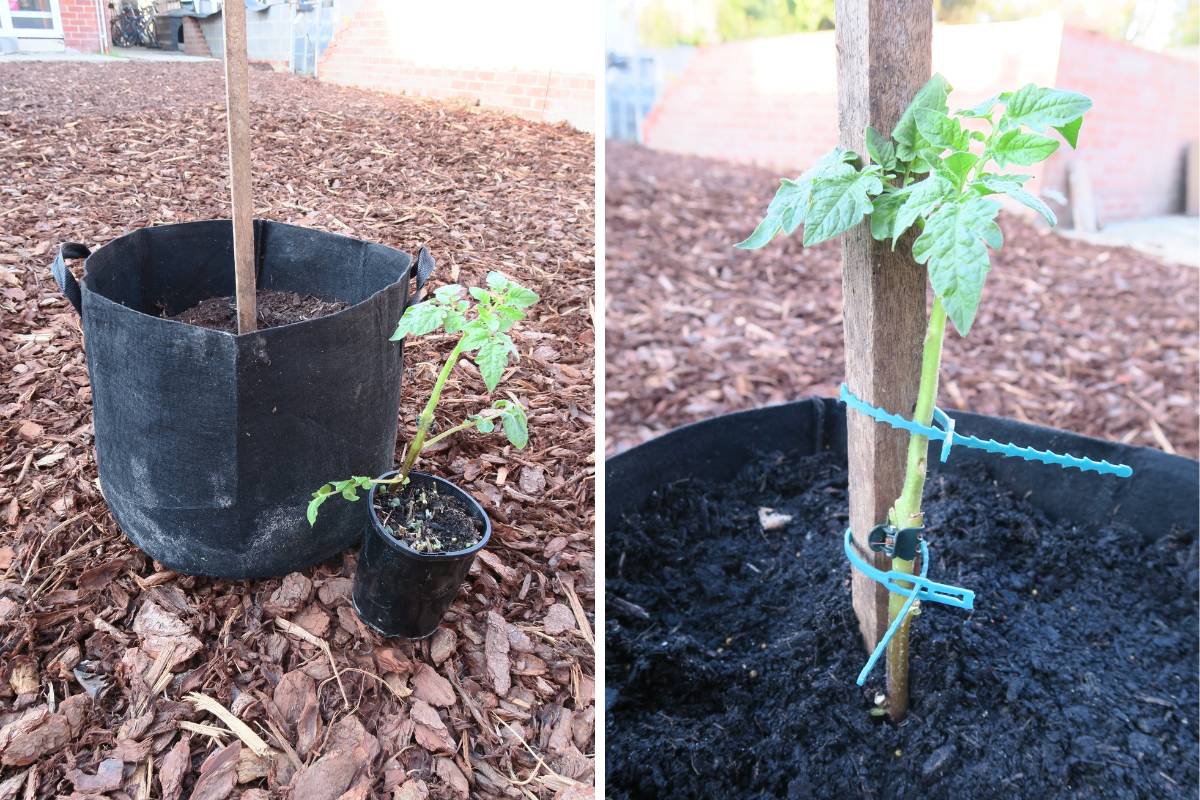
Remove any potato leaves below the graft when the ketchup ‘n’ fries plant is put into the larger pot. The plant can be planted deeply so the bottom of the potato stem is buried and the graft is close to soil level; the shorter stem is stronger and more stable in outdoor conditions, and potato tubers should form along the buried potato stem.
Just like any tomato plant, the ketchup 'n' fries plant will benefit from support as it grows taller. Use stakes or a tomato cage to provide stability and prevent the plant from sprawling.
To ensure a successful harvest, follow these cultivation tips:
- Water regularly: Ketchup 'n' fries plants require regular watering to support their rapid growth. Aim to keep the soil consistently moist but not waterlogged.
- Add extra nutrients: Due to the energy shared between the tomatoes and potatoes, the plant may benefit from additional fertiliser during the growing season. Use a tomato-specific fertiliser to provide the necessary nutrients for both crops.
- Remove unwanted growth: Keep an eye out for any shoots emerging from the potato portion of the plant. These shoots should be promptly removed to allow the tomato portion to thrive. Similarly, if you notice any root growth from the tomato stems, prune them off to maintain the plant's focus on fruit production.
Harvesting the Fruit and Tubers
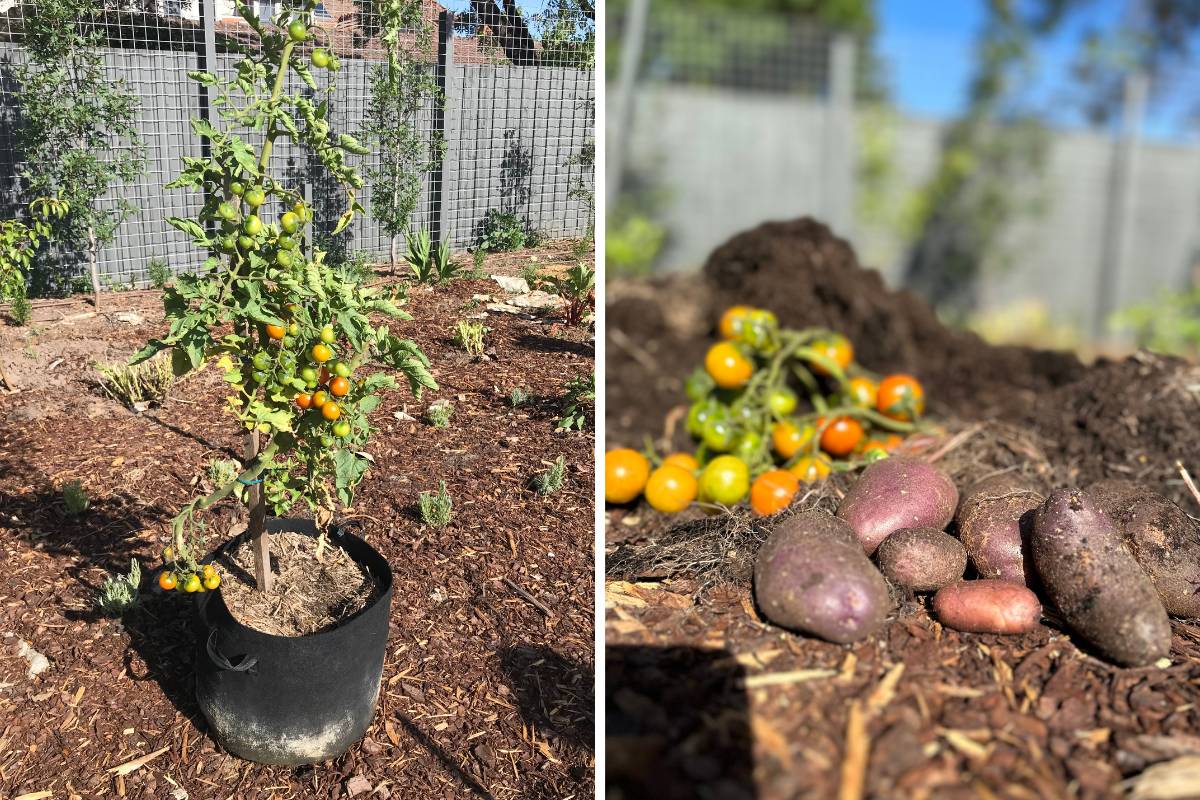
Treat the tomato portion of the ketchup 'n' fries plant as you would any tomato. Harvest ripe tomatoes as they reach their desired color and size throughout the growing season.
The moment of truth arrives when harvesting the potato part of the plant. Towards the end of the growing season, as the plant starts to die down, it's time to harvest the potatoes. Cut back the tomato portion of the plant and gently tip the root ball out of the pot. Dig through the soil to harvest the potatoes.
Expected Yield
While the ketchup 'n' fries plant offers the advantage of a dual harvest, it's important to note that the growth of both crops may be slightly compromised. Growers often report slightly weaker growth above ground than is usually achieved with tomatoes.
Due to the shared energy resources, the potato yield may also be lower compared to growing potatoes independently. The root ball may be larger than usual, but anticipate a yield ranging from a third to two thirds of what you would typically harvest.
Growing a ketchup 'n' fries plant can be a fascinating and rewarding experience for home gardeners. This novel space-saving solution may be just what’s needed to get both crops producing in your patch.