Indoor plants bring life, beauty and a touch of nature into our homes. They purify the air, enhance our wellbeing and create a calming ambiance. But to ensure their optimal growth and care, it is essential to repot plants every so often. While this may seem like a major and somewhat risky task, the process is actually quite simple and plants will often reward you with healthy new growth.
This article explores the reasons why repotting is crucial, how to identify when a plant needs a new pot, and provides step-by-step instructions for repotting houseplants. Let’s get started.
Why Repot?
For plants to access adequate nutrients and water to support their growth, the space available for soil and roots needs to be in balance with the above-ground stems and leaves. Over time, some plants very obviously outgrow the size of their original pots. Not only does this leave plants starved for water and nutrients, it can put pots at risk of toppling and falling from furniture or shelving. Noticeably out of proportion plant-pot combinations are prime candidates for repotting.
Even if above-ground growth hasn’t created an obvious imbalance between plant and pot, repotting may still be required. As they grow, plants’ roots will take up more and more space in the soil, displacing the potting mix and filling the small gaps within the soil that usually hold air and water. The small amount of potting mix left stops absorbing enough water to support the plant's needs.
Additionally, the roots may block the drainage holes, leading to waterlogged soil and potential root rot. Furthermore, the quality of the potting mix deteriorates over time, meaning it lacks the necessary nutrients the plant needs for growth.
Does Your Plant Need Repotting?
As a rule of thumb, houseplants should be repotted every two to three years to replace the old potting mix. If in doubt, the following signs may indicate that a plant is ready for repotting:
- Roots growing from the bottom of the pot.
- Flexible plastic pots won't ‘give’ when gently squeezed, indicating that the roots are densely packed.
- Watering seems ineffective; the potting mix is dry despite regular watering.
- Water runs straight over the sides or out the bottom of the pot without being absorbed by the potting mix.
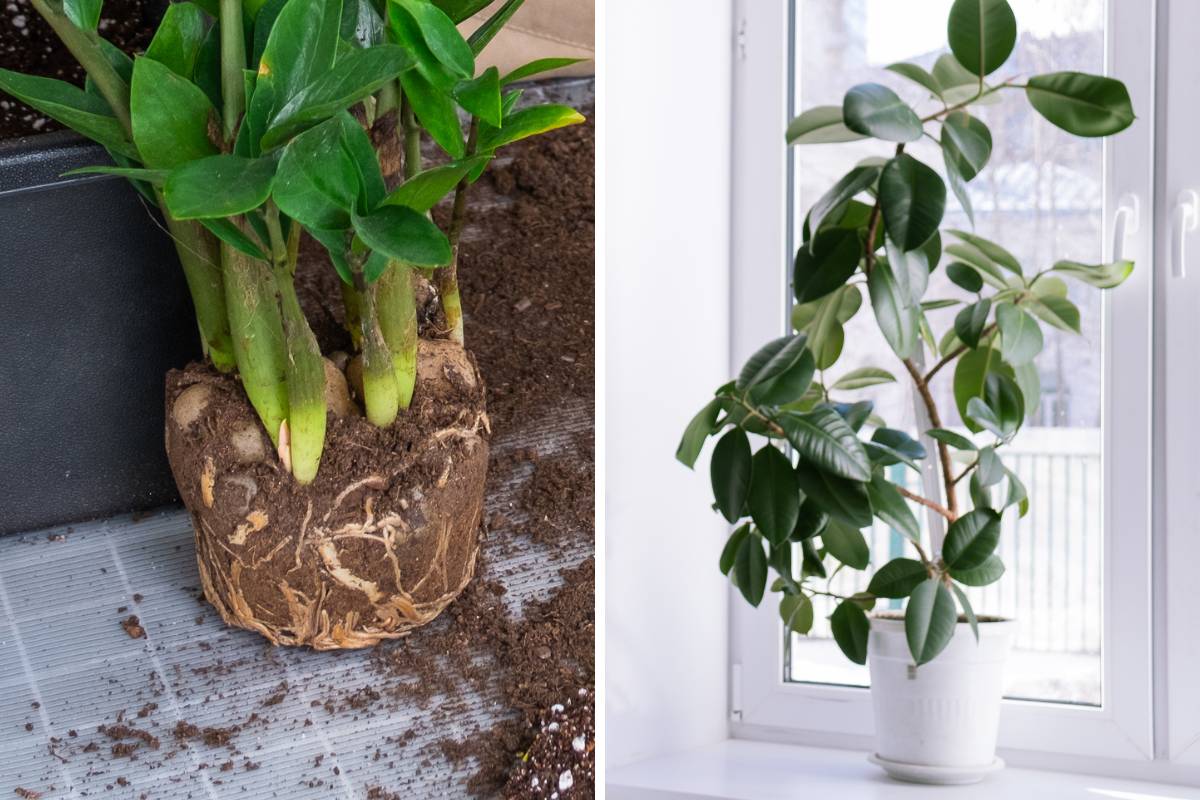
- The plant appears ‘out of proportion’ to its pot or is top-heavy.
- Plant growth has slowed or stopped, even in spring and summer.
If you're uncertain whether your plant needs repotting, gently remove it from its pot and examine the roots. By turning the pot on its side and slowly wriggling the plant part-way out of the pot, you can often see whether the roots are circling or crowded, indicating the need for repotting.
When to Repot
The ideal time to repot indoor plants is during the warmer months of spring and summer when they are actively growing. This timing takes advantage of plants’ natural growth cycle, and they are likely to settle into their new homes more quickly and with less chance of succumbing to root rot and other diseases.
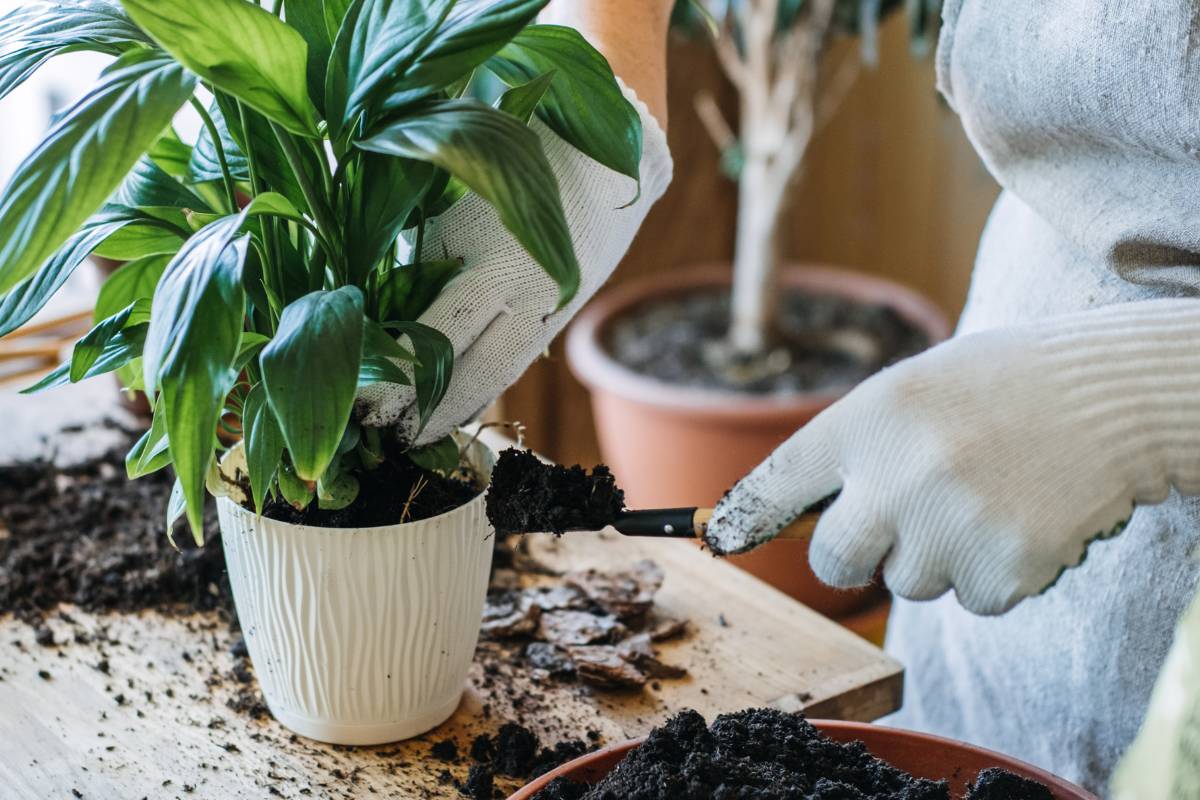
Repotting Step-by-Step
- Gather all the necessary tools and materials: the new pot, potting mix, slow-release fertiliser, clean secateurs, a bucket or sink for soaking pots, and a watering can.
- Make sure to scrub and sterilise any used pots before reusing them for repotting.
- If the potting mix doesn’t include a slow-release fertiliser, it’s a good idea to add some at the recommended rate; do this by thoroughly combining fertiliser granules or balls with the potting mix in a tub.
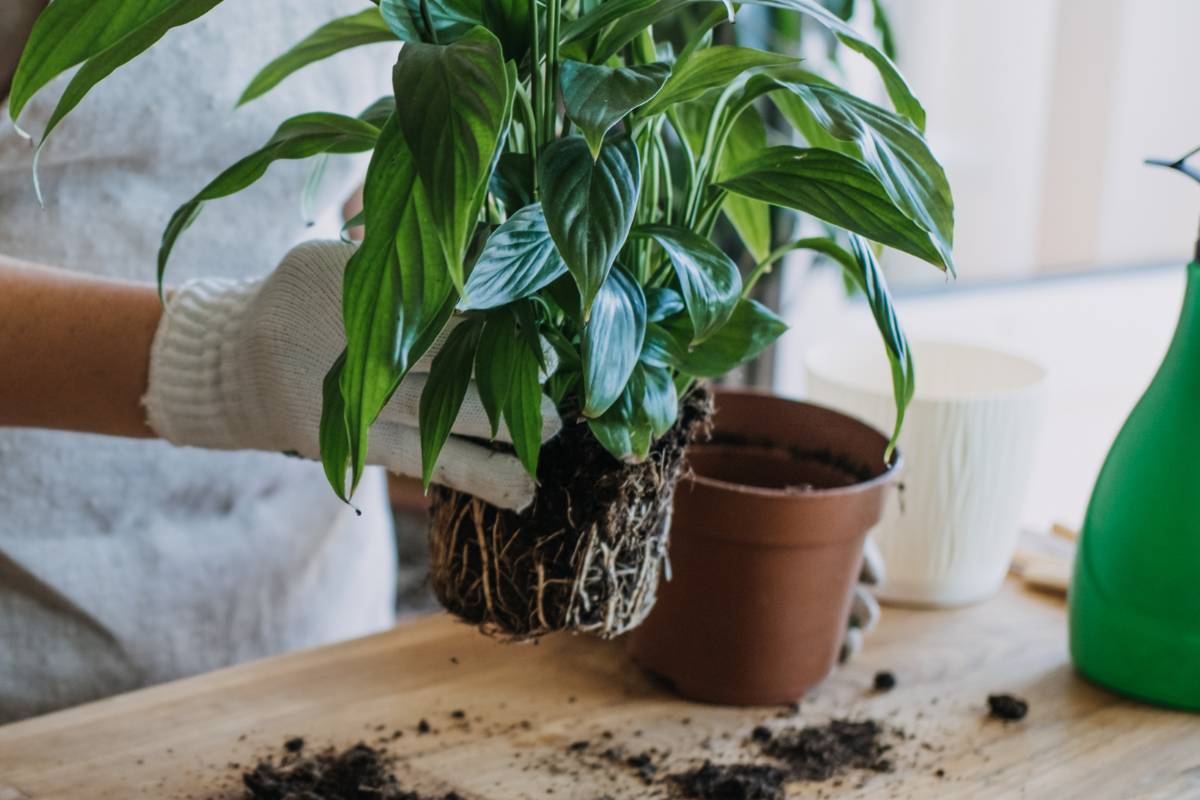
- Remove the plant from its pot by gently squeezing the pot (if made of a flexible plastic), and wriggling the plant. If plants are difficult to dislodge from the pot, soaking the rootball for a few minutes can help loosen it. Remove the loose potting mix from around the roots.
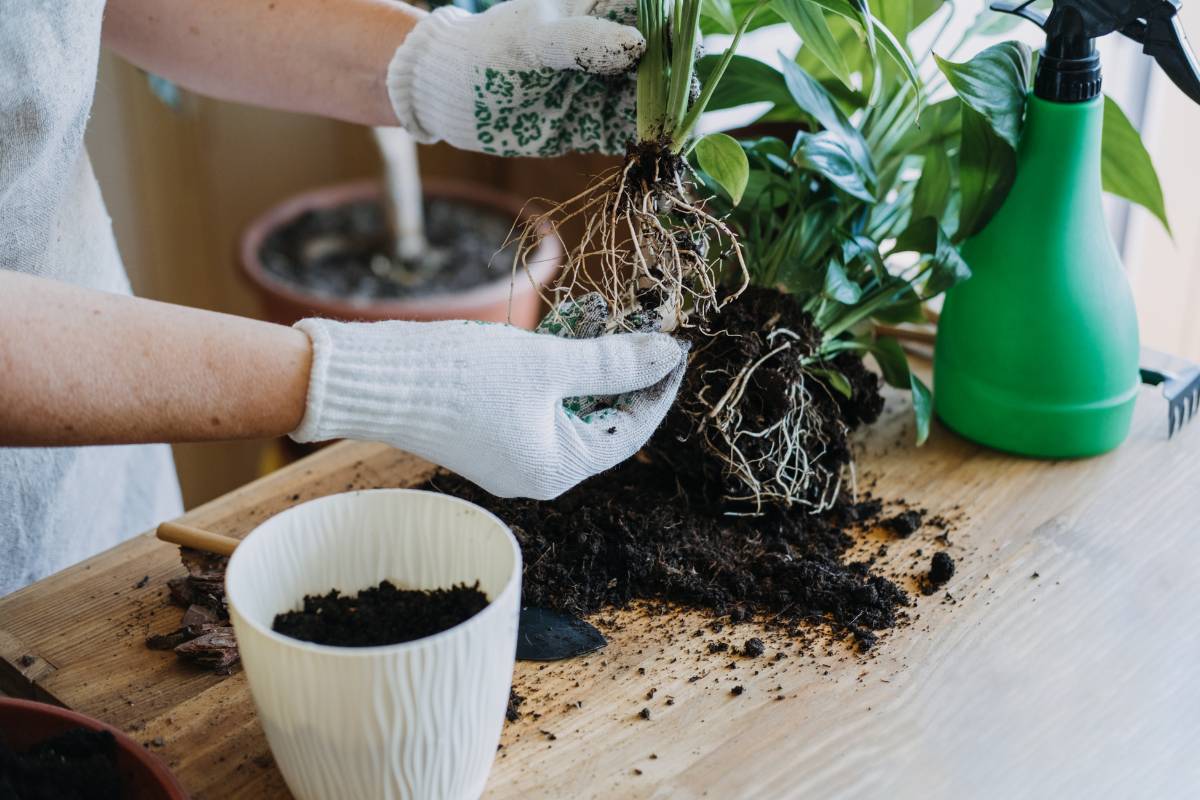
- Inspect the roots and trim off any dead, damaged or circling roots. If repotting into the same pot, prune about a third of the root volume from the root ball.
- Place a small amount of potting mix in the bottom of the new pot. There is no need to add pebbles, broken pots or other drainage aids.
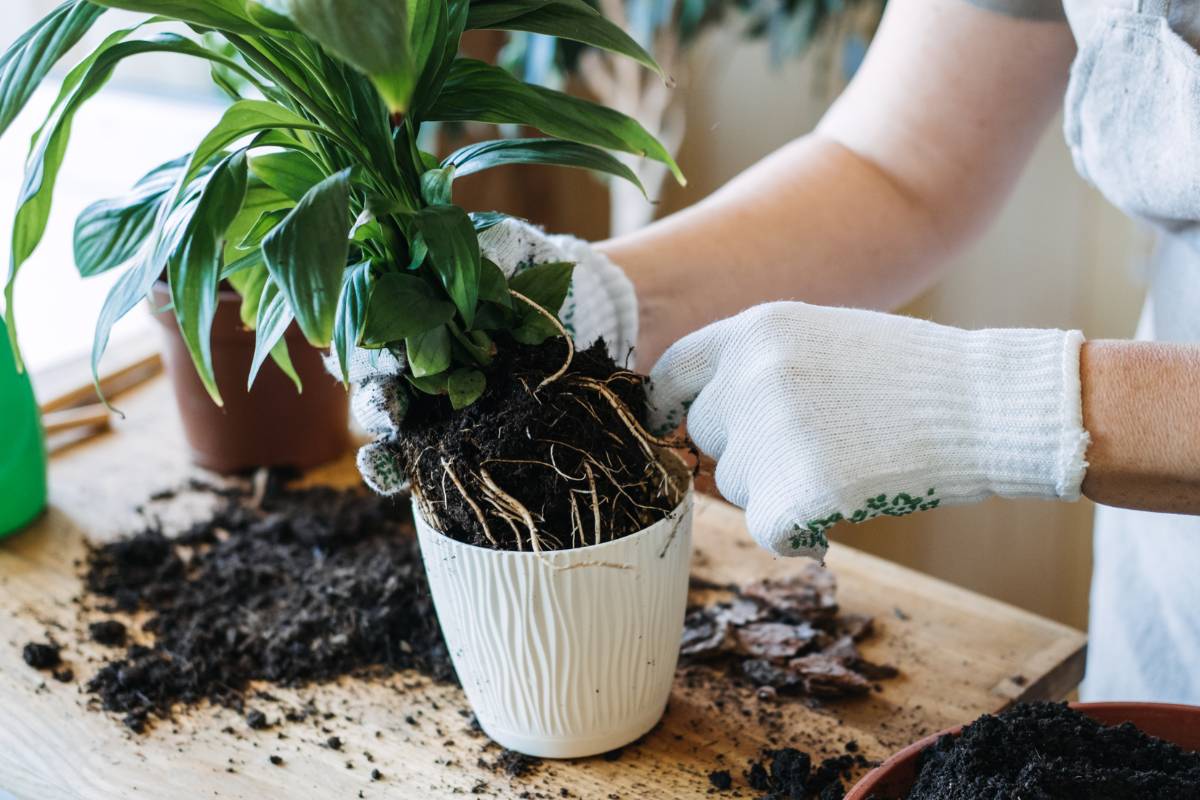
- Position the plant in the pot, ensuring it is centred and sitting straight and upright, with the soil surface at the same level as in its previous pot.
- Add more potting mix around the roots, taking care to eliminate any large air gaps. Take your time and gently tap the pot several times to help the potting mix settle.
- Water the plant thoroughly, washing away any soil on the leaves, and check the level of the potting mix. Top it up if needed.
- After repotting, inspect the general health of the plant, looking for pests, wiping the leaves, pruning any dead foliage, and giving the plants a general tidy.
Remember that plants may take a few days or weeks to recover from repotting. Keep the soil moist but avoid overwatering or fertilising during this stage. Give your plants time to settle into their new homes.
By repotting your houseplants when necessary, you provide them with the space, nutrients and proper growing conditions they need to thrive. Your efforts will be rewarded with healthier, happier plants that will continue to bring you happiness for years to come.