Climate Zones for Australian Gardeners
Knowing your climate zone will help you decide the best time to sow the vegetables, herbs and flowers you want to grow, and which varieties should perform well in your garden. Growing plants that are suited to your climate zone will usually give you the best results in your garden.
How to Use Climate Zones
First, find your climate zone using the map or descriptions below. Next, refer to our sowing chart, which provides approximate sowing times for our most popular seeds for each climate zone.
While knowing your climate zone is helpful when planning your garden, there are many other factors that may affect how your plants grow, including unseasonal weather conditions, the specific microclimate of your garden and how you care for your plants. You know your garden better than us, so if a different climate zone seems to ‘fit’ your garden better, go ahead and use it as a guide.
Our climate zones cover huge areas of Australia, so we recommend gardeners also consider their local conditions when planning what and when to plant. For example, gardeners in alpine areas have shorter growing seasons than gardeners in cool coastal areas, even though both alpine and coastal areas are included in our ‘Cool Temperate’ climate zone. We recommend gardeners in cool regions look at the ‘days to maturity’ information provided for each variety and choose those that will mature in a short (6-12 week) growing season.

Tropical
- Includes: Darwin, Cairns, Townsville, Exmouth
- High humidity summers with most rainfall in summer and dry, warm winters. Includes northern Australia from Exmouth (WA) across to south of Townsville (Qld).
- Set as my climate
Arid
- Includes: Alice Springs, Mildura, Albury-Wodonga, Shepparton, Wagga Wagga, Dubbo
- Hot dry summers, winters can be warm or cool depending on the region. Includes a large area of central Australia from the WA coast to Charleville (Qld), Tamworth (NSW) and Albury-Wodonga (NSW/Vic).
- Set as my climate
Subtropical
- Includes: Brisbane, Bundaberg, Coffs Harbour, Gold Coast, Hervey Bay, Mackay, Rockhampton, Sunshine Coast
- Warm humid summers with high summer rainfall and mild winters. Includes coastal Queensland and northern NSW from north of Mackay to just south of Coffs Harbour.
- Set as my climate
Temperate
- Includes: Sydney, Perth, Adelaide, Newcastle, Toowoomba, Central Coast NSW, Wollongong, Bunbury
- Moderate humidity and reliable rainfall, with four distinct seasons. Includes coastal areas from north of Port Macquarie to south of Woollongong in NSW, coastal SA and the southeastern coast of WA.
- Set as my climate
Cool Temperate
- Includes: Melbourne, Canberra, Hobart, Launceston, Ballarat, Bendigo, Geelong, Mt Gambier
- Low humidity with most rainfall in winter; hot dry summers and cold winters. Some regions will experience frosts and snow. Includes coastal areas of south-eastern Australia and alpine areas of Victoria, NSW and Tasmania.
- Set as my climate
Climate Zones FAQ
What if I can’t find my climate zone?
If you can’t locate your zone from looking at the map or the descriptions on this page, we suggest that you think of
an area that has a climate that’s similar to yours and use the zone for that area as a guide.
What if I live on the border of two zones?
If you live near the border between two zones we suggest you read the descriptions for both zones and decide which
best describes the climate where you live. Depending on the microclimate in your garden, you may be able to grow a
wider range of plants over a longer season than others in your zone. Lucky you!
What is a microclimate?
A microclimate is a small area where the temperature or humidity differs to the climate of the surrounding area. For
example, if you live in a climate zone where frosts are common but your garden is protected by buildings or large
trees, your garden may be frost-free. Similarly, if you live in a warm temperate zone but your garden is at a high
altitude your microclimate may have more in common with the cool temperate zone, so use this as a guide when
deciding which zone is relevant to you.
Can I grow varieties not listed for my climate zone?
While our climate zones and sowing chart will help you decide what is suitable to plant in your garden, they provide
general guidance only. We recommend you start by sowing seed that’s recommended for your climate zone; once you get
a few successes under your belt you can experiment with varieties in neighbouring zones and see how you go –
gardening is all about experimenting after all!

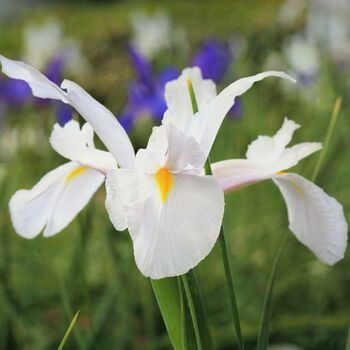
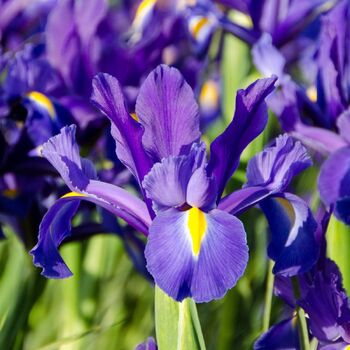
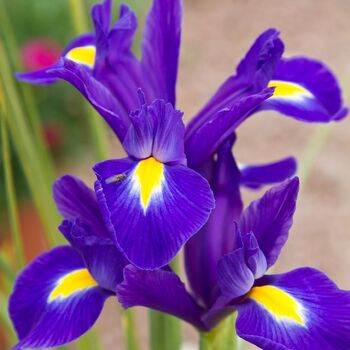
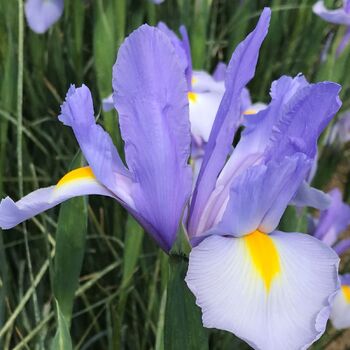
How to Grow Dutch Iris Bulbs
Grow Guide #2615
Family: Iridaceae
Binomial name: Iris x hollandica
Life Cycle: Perennial
This 'How to Grow' guide details everything a home gardener needs to know to plant, grow and care for Dutch iris (Iris x hollandica).
When to Plant Dutch Iris Bulbs
Use the table below to identify the best time of year to plant Dutch iris bulbs in your climate.
| JAN | FEB | MAR | APR | MAY | JUN | JUL | AUG | SEP | OCT | NOV | DEC | |
|---|---|---|---|---|---|---|---|---|---|---|---|---|
| Cool | ||||||||||||
| Temperate | ||||||||||||
| Sub-Tropical | ||||||||||||
| Tropical | ||||||||||||
| Arid |

.png)


Preparation
Dutch iris plants are best grown in full sun or part shade. Choose a location that will receive at least 3 hours of full sun each day.
Dutch iris plants need a loose, well drained soil enriched with organic matter. Prepare soil by weeding it thoroughly, digging it over to at least a spade’s depth to loosen the soil, and adding aged animal manure or compost. Organic matter can be dug into heavy soil to lighten it so roots can grow freely. Keep the area free of weeds until planting. Learn more about preparing soil for planting here.
Dutch iris plants can be grown in containers. If possible choose a variety that’s recommended for container growing. Use a good quality potting mix and make sure your container is large enough for mature plants; a minimum of 40 litres is recommended for Dutch iris. During the growing season, keep in mind that container grown plants may need additional fertiliser to encourage healthy growth.
How to Plant Dutch Iris Bulbs
Dutch iris bulbs should be planted directly in their final position in the garden or a container.
- Plant individual bulbs 10cm apart and 10cm deep with the pointed tip facing upwards.
- Cover with soil and water in well.
- Keep soil moist but not wet until shoots emerge.
How to Grow Dutch iriss
Dutch iris plants may need watering during the growing season. Water when the soil is dry about 5cm below the surface (test this by scratching away a little soil with your finger). Water deeply in the early morning or late afternoon. Avoid watering the leaves of plants to avoid fungal diseases. Learn more about watering here.
If soil was well prepared no extra fertiliser should be necessary, as bulbs store all the energy needed to bloom from the previous year's growth. In poor soil or to give your plants an extra boost, application of a high-potassium fertiliser or one formulated for flowering plants can be beneficial:
- apply slow release fertiliser at the recommended rate when the first shoots emerge, OR
- apply liquid fertiliser at the recommended rate and frequency when the first shoots emerge.
After flowering, fertilise bulbs with blood and bone or aged or pelletised chicken manure and water in well.
Dutch iris plants should flower in approximately 60-90 days.
If growing Dutch iris for cut flowers, cut them when the buds are just beginning to unfurl. Use sharp snips or secateurs to cut the longest stems possible, removing the lower leaves and placing the stems immediately in a clean bucket of water. Learn more about cutting and conditioning homegrown flowers here.
Deadhead or cut Dutch iris flowers regularly during the growing season. Using sharp secateurs or snips, cut flowers for picking with the longest stems possible, or snap off dead flowers. Removing old flowers regularly will direct the plant's energy back into the bulb rather than into the production of seeds.
Leave foliage to die down naturally after flowering; the bulb will absorb the nutrients in the leaves and use them to form the flowers for next season. Once all foliage has died down use sharp secateurs or snips to cut individual leaves at ground level.
Dutch iris bulbs can remain in the ground for several years without the need to lift and divide them. Mulch heavily to protect bulbs from very hot temperatures over summer. Bulbs can be lifted in areas that experience wet summers, if they become overcrowded or to move them to a different location in the garden.
To lift Dutch iris bulbs, use a garden fork to lift the bulbs from the soil, taking care not to damage them. Prune off any dead leaves still attached to the bulb. Store bulbs in a cool, dry space on a wire rack or in a bag that allows good airflow, such as one made from netting. Temperatures around 20 degrees are ideal for storage; exposure to hot temperatures (over 30 degrees) may affect the viability of the bulbs. Bulbs can be replanted the following season in line with the planting chart above.
Common Problems when Growing Dutch iris
Like all plants, Dutch iris is susceptible to some pests, diseases and other problems. Below is a list of the most common problems gardeners encounter when growing Dutch iris plants:
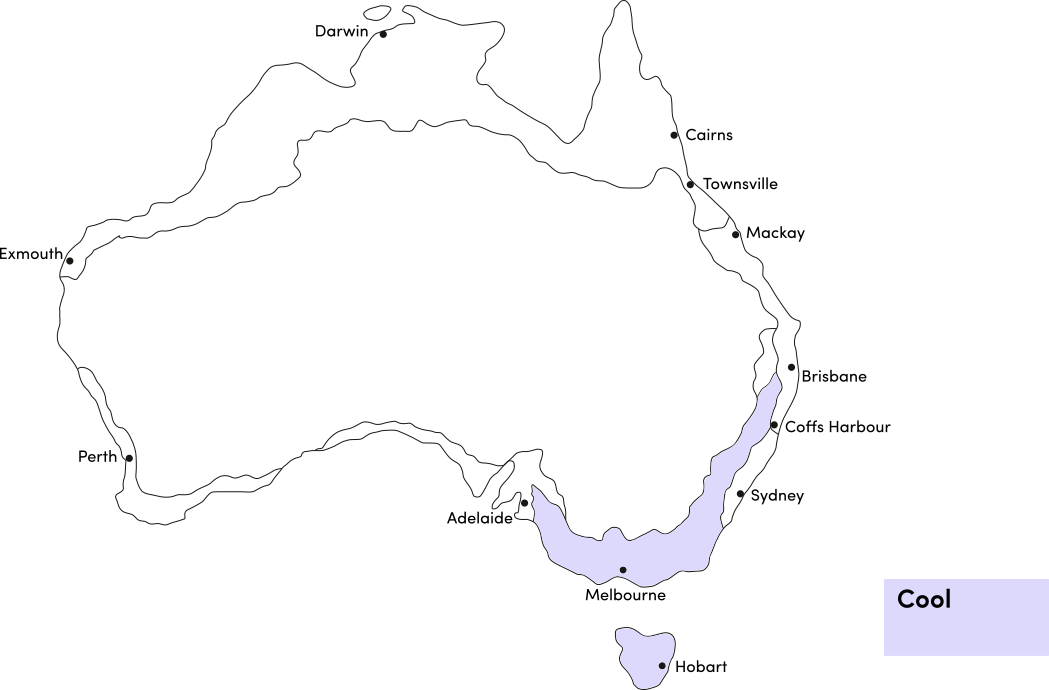
 Aphids are small (2-4mm long) sap-sucking insects that congregate on the new shoots or the undersides of leaves. They can cause leaves to wilt or become discoloured, and also excrete honeydew which can attract ants and other insect pests. To manage aphids, remove them by spraying with a garden hose, apply a soap or alcohol spray, or encourage predatory insects to your garden. Read more about aphids here.
 Bacterial leaf spot is a disease that causes irregularly shaped brown spots on all above-ground parts of a plant. The spots at first appear to be wet but become dry and scab-like over time. Leaves and flowers can fall prematurely. Water plants at soil level (not on the leaves), dispose of fallen leaves and fruit and practice crop rotation.
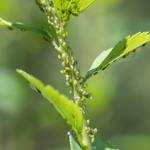
 Rust (Puccinia sp.) is a fungal disease that causes brown to orange raised spots or patches to appear on foliage. Fungal spores are spread by wind or water to neighbouring plants, especially in temperatures of 10-20C and when humidity is high. To manage rust, space plants to avoid overcrowding, grow them in the recommended amount of light (eg full sun), do not over fertilise crops, remove dead plants and practice crop rotation. Read more about rust fungus here.
 Grey mould (Botrytis sp.) is a fungal disease that causes flowers to become mouldy and fruit to rot. Spores are transported by wind and can survive in soil or on green waste. The fungus spreads most in cool, damp weather. Prune off affected flowers and fruit, water plants at soil level (not on leaves) and if necessary spray with an appropriate fungicide or homemade spray.
.jpg) Rotten bulbs or corms are caused by pathogens entering bulbs or corms after sitting in cold, wet soil, being temporarily waterlogged or being exposed to warm temperatures in winter. They may show obvious signs of rot, have no roots or shoots, or produce stunted yellow leaves but no flowers. Plant bulbs and corms in free-draining soil, raised garden beds or containers; do not water while dormant; and lift and store them if recommended for your climate.
Rotten bulbs or corms are caused by pathogens entering bulbs or corms after sitting in cold, wet soil, being temporarily waterlogged or being exposed to warm temperatures in winter. They may show obvious signs of rot, have no roots or shoots, or produce stunted yellow leaves but no flowers. Plant bulbs and corms in free-draining soil, raised garden beds or containers; do not water while dormant; and lift and store them if recommended for your climate. Slugs and snails are molluscs that feed on tender leaves and shoots, mostly at night, leaving slimy trails behind them. Control them by removing their hiding places, keeping free range poultry, collecting them by torchlight or by placing traps. Read more about slugs and snails here.