
When people think of growing vegetables at home, generally what comes to mind is raised garden beds or growing directly into the ground. But there’s a way to optimise your growing space whilst adding a more complex structure to your garden, and that’s by installing some arches.
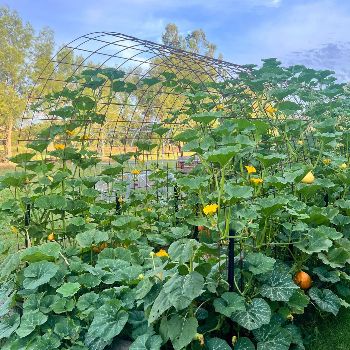
Climbing plant varieties like pumpkins, melons, beans, peas and even indeterminate tomatoes grow amazingly well over arches. Where plants like pumpkin would normally take over an entire garden bed (or more!), by encouraging them to grow vertically over an arch, you create space in the garden bed below the arch to grow additional vegetables or flowers to encourage pollinators.
By growing vertically, you encourage airflow through your plants which reduces diseases such as powdery mildew. In places with high humidity, this can be a game changer. Additionally, if your plants and their fruits are off the ground, it reduces pest attack and they are less prone to soil-borne diseases. As a result, you get healthier plants and therefore fruits, all round.
Whether you’re short on space, want to increase your vegetable yield or just add beauty and interest to your growing space, growing vertically is a great solution.
.jpg)
Types Of Arches
There are a range of arch types you can use in the garden, but the most important factor for growing food over an arch is its strength. It needs to be strong enough to support what you’re growing, but to also withstand the weather. Whilst you don’t need to purchase the most costly arch, it needs to be fit for purpose. Consider the size of your fruit when deciding on the perfect arch. Climbing beans, for example, can be supported on a relatively lightweight arch, but large fruiting vines like pumpkins and watermelon require a heavy-duty arch. The last thing you want is for your arch to snap under the weight of your plant.
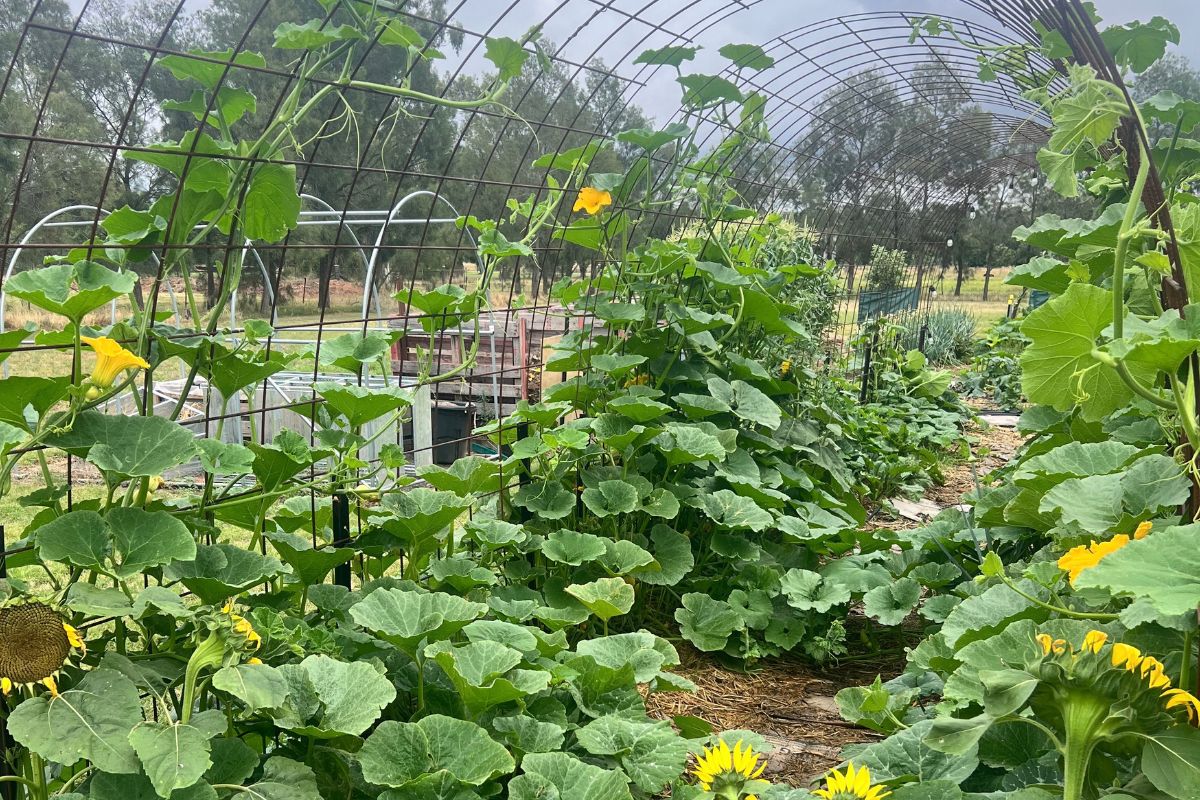
The most trustworthy and weatherproof arch is reinforcing mesh (also known as reo mesh) that is bent over to form an archway, and is then secured to star pickets (or other iron posts) in the ground. Reo mesh is used in the building industry and is typically embedded into concrete to increase strength. So rest assured, if Queensland Blue Pumpkins are your go-to variety, you can grow them over reo mesh! Note that standard reo mesh is untreated steel, so it will rust to a brown finish over time (as in the photos here). It stays strong for years, but galvanised sheets are available if you’d prefer it didn’t rust.
There are many garden centres and online stores that sell ready-made arches which takes the guesswork out of it. This is a more convenient option for most people if the reo mesh arch is impractical in your garden space. Just be sure to check the materials it’s made from to aim for longevity.
Installing An Arch
When you install an arch, firstly you need to consider how it will fit into your garden. Do you already have a garden bed, or are you adding the garden bed after you install the arch?
If you have existing garden beds, ensure the archway legs fit within them. You can also position the arch over two garden beds with a central path, creating a walk-through space to enjoy the fruits of your labour.
If you don't have an existing garden bed, you have more flexibility in the placement and design of your archway. One option is to secure a premade arch by placing the legs in grow bags on each side and growing straight from them rather than a garden bed. This is particularly beneficial if your only growing space is a balcony. Or you can simply add your arch to two raised garden beds and create a mulched pathway underneath if you have a yard with more space. If you’re determined to grow the biggest fruits and want a more permanent solution to growing vertically, then a reo mesh arch might be the solution for you.
.jpg)
How To Install A Reo Mesh Arch
To install a reo mesh archway, you will require:
- One 2.4 x 6m reo mesh sheet (this is the standard size of a reo mesh sheet)
- 6 x 1.5m star pickets
- 6 x caps for the star pickets
- Metal cable ties
- Sledgehammer
- Sturdy gloves and eye protection
To install the reo mesh arch, you will need to:
- Wear gloves and eye protection.
- Hammer the 1.5m star pickets solidly into the ground at 1.2m intervals (0m, 1.2m and 2.4m), on both sides. The width across should be about 2m (the wider you go the lower your arch will be so consider this if you want to walk underneath it).
- Place the short side of the mesh against the bottom of the inside of the star pickets while you slowly bend the mesh over to secure the other side against the opposite star pickets (this is definitely a two-person job, please don’t attempt this solo!). The mesh is under a lot of tension while it is bent and can spring back if it slips, so keep clear of the ends.
- Once the reo mesh is in place, stand firmly on the mesh to push the ends into the ground slightly. This helps to secure its position prior to tying it to the posts.
- Secure the mesh to each star picket using metal cable ties.
- Place a cap on each star picket for safety, as the edges tend to be sharp.
- Once in place, you can decide whether you want to grow vegetables from the inside or outside of your archway. Both work equally well.
Growing Plants On The Arch
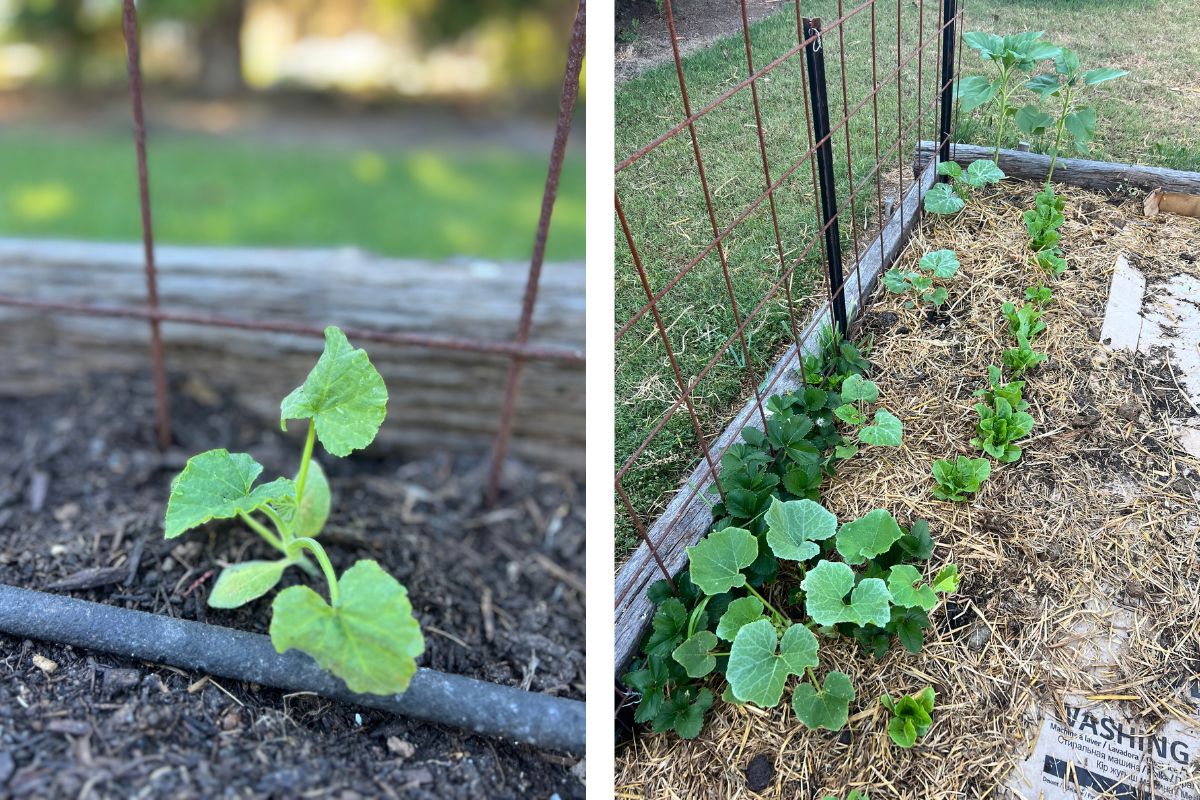
Once your arch is installed, placement of the plant at the base of the arch should be as close to the arch as possible, regardless of whether it is on the inside or the outside.
Continual adjustments will be required throughout the growing season to ensure plants are connecting to the arch and have adequate support. To ensure the plants successfully climb the archway, training of the plant should begin as early as possible. You can use natural twine or soft material ties to gently attach young vines to sections of the arch as they grow. Or if your plants have large enough leaves, such as pumpkins, you can assist the plant by looping over leaves and their tendrils through the arch infrastructure.
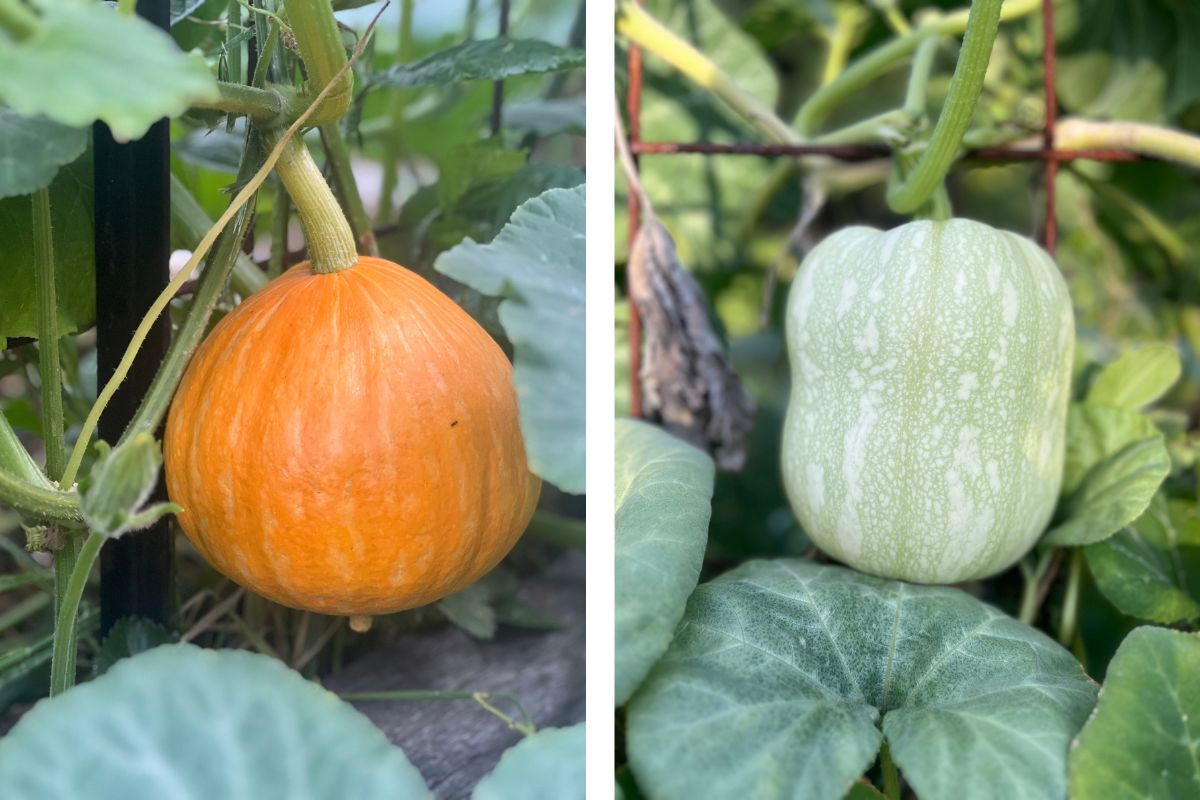
Sometimes larger fruit like pumpkins and watermelons can get stuck inside the arch frame, so check regularly and reposition fruit before it grows into the mesh.
.jpg)
.jpg)
Handy Tips To Support Heavier Fruit
You’ve installed the perfect arch for your target fruit or vegetable but what if the fruit is so large that you think the vine might snap?
The best thing to do is provide support to the fruit by doing one of the following:
- Find an old pair of stockings, cut one of the legs open lengthways and use this to support the fruit. Tie both ends around the archway tightly. As the fruit grows, the arch will take the additional weight, rather than the vine.
- You can also use an old bra, t-shirt or towel to do the same thing! Support the fruit with the material, and clasp the bra straps or tie the shirt/towel over the archway to support the fruit. This is also a great way to reuse what you already have rather than spending money, and this method avoids adding new materials into the environment.
- If you’re out of second-hand options, you can purchase purpose-made fruit hammocks from online retailers suitable for the variety of fruit you’re growing.
What Else Can Arches Do?
Arches can provide strategic shade in and around your yard depending on where you install them. This can be beneficial if the plants you’re growing around them require part shade throughout the day.
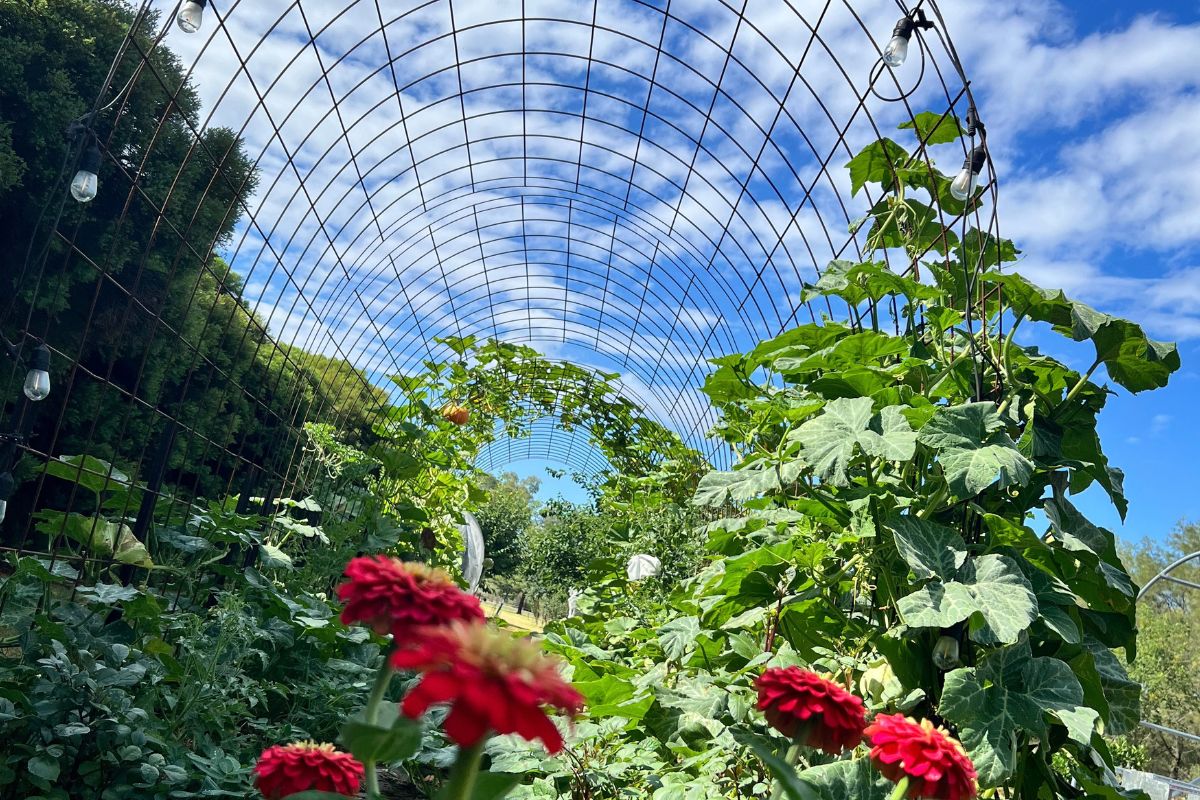
Arches can support solar lights that can be draped across the frame, creating ambient light for evening harvests when you need to quickly grab something from the garden for dinner. Solar lights look particularly whimsical in the garden, and even more so over an arch.
Arches can provide additional habitat for local birdlife. With plants weaving in and around the arch, insects will be buzzing all about the place, attracting birds in to feed from above. Birds are incredibly beneficial to your garden as they help keep pests off your crops.
All in all, if you haven’t considered growing food on an arch before, maybe now is the time. Before you know it, you’ll be harvesting fruit from your feet to your head!
(1).jpg)
Article & Photographs by Lauren Eather