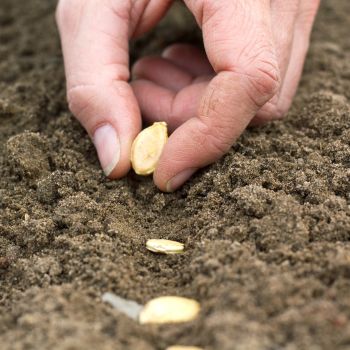
Anyone who grows their own vegetables, flowers, herbs, or other plants, starts at least some things in their garden from seed. There is a huge variety of seed sizes, shapes, and outer protective layers. Some seeds you plant may require special treatments. In this article, we will explain what those treatments are, why they are necessary, and help you learn about the seeds that may need help to germinate so you can apply the appropriate treatment for the vegetable, herb, or flower seeds that need them.
Important note: The methods described on this page should only be used when necessary. These methods are not required or recommended on most seeds types.
What Is Dormancy?
Dormancy is a built-in genetic mechanism that seeds develop within themselves to stop germination from occurring, even under the ideal soil, temperature and moisture conditions. Different species have different dormant periods, and the length of dormancy varies from species to species, depending on plant anatomy and physiology.
There are three categories of seed dormancy:
Innate Dormancy exists in fresh seeds that have a genetic mechanism that delays sprouting until the proper season — even if the soil and climate conditions are conducive to germination. In temperate areas, mild winter temperatures can produce hormonal changes within seeds. The embryo inside the seed continues to grow.
Induced Dormancy applies to seeds that might germinate immediately. Birds, pollinating insects, and the wind spread seeds around, dropping them anywhere under conditions that are unsuited to germination. For example, induced dormancy occurs when seeds are buried deep underground. Many seeds that lie far below the soil surface experience physiological changes. As long as the seeds are deprived of light, water, and oxygen, they cannot germinate. Eventually, the seeds will move closer to the soil surface where conditions are ideal for germination.
Enforced Dormancy is the simplest form of dormancy. As long as seeds cannot get adequate warmth, light, or water, they cannot germinate. When seeds are no longer deprived of everything they need to grow and thrive, their life cycle begins. Seeds that are stored in a dry place for any extended time lose their dormancy because of a phenomenon that is known as “dry after-ripening.” These seeds remain dormant just because they are deprived of essential conditions. However, an embryo can still develop inside the hard seed coat.
Soaking Seeds in Tap Water Before Planting
Some large seeds that have hard “jackets” or a thick skin that protects an embryo will germinate far sooner if they’re soaked than they would if they were planted in the soil without any pretreatment. The longer these seeds soak in water, the softer that protective skin gets. As that happens, the water reaches the embryo, causing it to swell as it prepares itself for germination. The ground would absorb most of the water before it got to the seed, and that’s why it would take so much longer for direct-sown seeds to sprout.
When it comes to soaking seeds, there is no consensus whether hot tap water, cold water, or room temperature water works best.
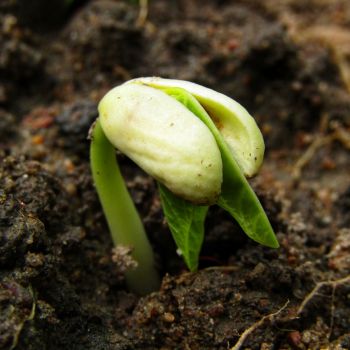
Soaking is an effective way of waking up the sleeping embryo inside a large, hard seed. Many large seeds will germinate in three or four days after they’ve soaked, whereas seeds that didn’t soak in water before planting may take as long as two weeks to sprout.
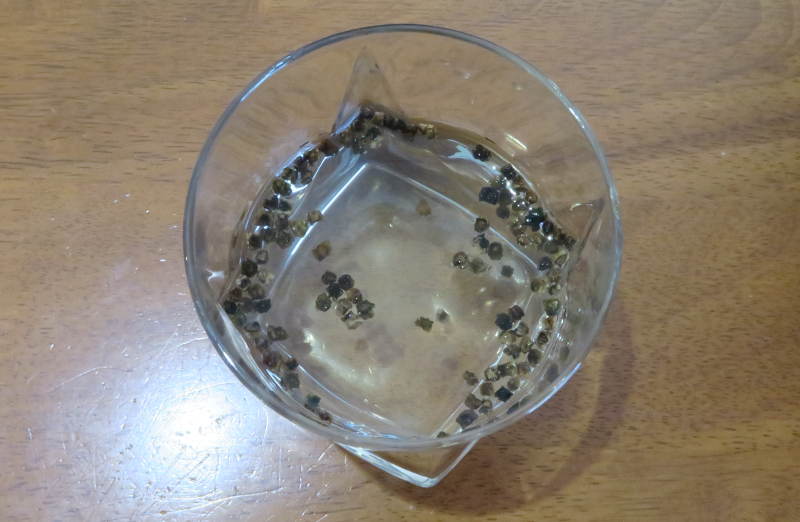
It is widely assumed that viable seeds will sink in cold water, but seeds that float aren’t viable. That assumption is not valid because some seeds are flat, and some seeds have edges. Both flat seeds and seeds with edges may float because of their shape, but they are still viable.
*It is okay to keep your seeds in the cold water for several days — provided you change the water every day.
Stratification
Stratification is the term that describes a process where some seeds need to go through at least one cycle where the temperature changes before the seeds are ready for planting and germination. All stratification techniques require moisture.
Stratification is a process of replicating the conditions that nature provides to wake seeds up from dormancy and speed up the sprouting process. When gardeners have to use artificial methods of simulating nature’s environment, they are using stratification techniques.
The amount of time it takes to stratify seeds varies from species to species. Most flower, herb, and vegetable seeds will germinate if moistened seeds are stored in a dark place with temperatures of between 4 — and 5-degrees Celsius (or 39 to 40 degrees Fahrenheit) for at least two or three months.
Important Note*** --It is critical that anyone who wants to stratify seeds know what conditions any seed species needs to wake up from dormancy before starting the stratification process.
#1. Cold Water Soaking
The cold water method is essentially the same as the soaking process that was previously discussed. Instead of leaving seeds out in the open air, seeds should be chilled in the refrigerator.
#2. Refrigeration
Depending on the seed species, you may need to refrigerate seeds for as short a time as 10-days, or as long as one to three months. If you’re going to stratify seeds, be sure you can keep the seeds in the refrigerator for however long they need to chill.
Soak seeds in water for 12 to 24 hours. Remove the seeds from the water and lay them on a soft cloth. Mix a medium of equal parts of sand and peat moss. You’ll need enough to surround the seeds without cramping seeds, so they stick together. You can place the peat and sand mixture in a sealable plastic bag or airtight container. Before you add the seeds, be sure you label the baggies or containers with the name of the seed variety that is in it and the date on which you’re putting them in the refrigerator.
Add the seeds to the containers and remove any excess air before you seal it. You will want to cut tiny slits in the bag and container top to let air in. The absence of air circulation will create excess moisture in the enclosed bag or container, and that will cause mold growth. Check on your seeds every few days. Make sure that the sand/peat moss combination is consistently moist. If it dries out, use a plant sprayer to mist the medium gently.
#3. Autumn Sowing
It is a common practice in Europe for gardeners to stratify their seeds using the Autumn planting method. There are two possible ways to do this. The first method is the simple, direct sowing technique. Seeds are laid far enough below the surface of the ground that they aren’t exposed to light. Soil temperatures and moisture levels are consistent several inches below the ground, and that will give the seeds the resting period they need.
An alternative is to dig deep holes in the ground. The holes will hold pots that contain planted seeds. After placing the pots in the holes in the ground, the holes are recovered. Give the seeds a deep soak before leaving them to rest until they are ready to sprout in Spring.
#4. Sowing Seeds During the Winter Solstice
The theory behind this method is that by sowing your seeds on the first day of winter, you give them a chance to chill throughout winter and experience the gradual warming that occurs the closer the calendar gets to Spring. With longer days and more daylight, the ground warms up, and the conditions become more favourable for sprouting.
Soak seeds for 24-hours before planting them in a seed-starting tray or the ground. Don’t use soil from your garden in seed starting pots. Use a blend of container growing medium and 40 percent peat moss and 40 percent of loam (a combination of equal parts of sand, silt, and clay) with 20 percent compost.
Protect the flat with a fine mesh screen or a plastic top that has slits or holes to let air and moisture in. Place the seeds in a location where they won’t be exposed to harsh weather.
#5. Outdoor Cold Stratification
The process of stratifying seeds outside in cold temperatures is essentially a modification of the refrigerator method. Soak a paper towel in cold water. Ring it out to remove excess water. Fold the sheet in half and spread the seeds out on one side of the cloth. Fold the towel in half again, using the palm of your hand to press the two sides together so that all the seeds make contact with both sides of the moist towel.
Before you place the paper towel in a plastic bag, label the outside of each bag with the name of the seed variety that is inside the towel, and the date on which you put them inside the bag. Press or fold the bag so any air inside can escape.
Poke holes in the bag or cut one or two slits to let air in. Take the seeds outside and place them in a protected, dark location. Check on the seeds from time to time. Use a plant sprayer to mist the paper towel if it feels dry. Moisture is critical to the success of seed germination.
The Royal Horticultural Society recommends a variation on the paper towel and plastic bag method. Combine equal parts of either coir or composted bark with a combination or perlite or vermiculite, coarse sand, and either or all of the above. Moisten the soil-less mixture before putting it in a clear plastic bag.
Spread the seeds around in the bag so that the seed starting mixture surrounds each seed. Release any air that’s trapped inside the bag and then seal it. Poke small holes or cut slits in the bag to let air inside and to prevent mold growth. For cold, moist stratification, place the plastic bags filled with seeds in a refrigerator where the temperature is always below 5 degrees Celsius (or 40 degrees Fahrenheit.) Seeds should remain in the fridge for anywhere between four and 20 weeks, depending on the length of time each seed species needs.
Don’t forget to check the plastic bag from time to time. Shake it to see whether any seeds have started to germinate. If the growing medium starts to feel dry, mist it with a plant sprayer just enough to re-moisten the mixture.
Scarification and Chitting
Some plant seeds have a rock-hard outer shell that makes it tough, if not impossible, for moisture to penetrate the seed. Seeds like this don’t germinate well without some human help. In the wild, common rodents gnaw on seeds, and their sharp teeth may weaken the hard shell enough that the protected embryo can absorb water. All scarification techniques are designed to remove enough of the hard seed coat or jacket so that tiny embryo deep inside the seed can absorb water.
Both scarification and chitting are methods of pretreating seeds to ensure that they germinate and that the seedlings develop into vigorous plants. Without this help, seeds with the hard protective layer will take a long time to sprout - if they germinate at all.
Scarification involves the use of an abrasive material or a tool that can break through the hard shell so the seed can absorb water after planting. Many substances or tools work well for chitting and scarification, including the following.
-
Sandpaper
-
A Nail File or Other File
-
A Triangular File (a 3-sided file where all three sides are tapered.)
-
A Microplane Grater
-
Nail Clippers
-
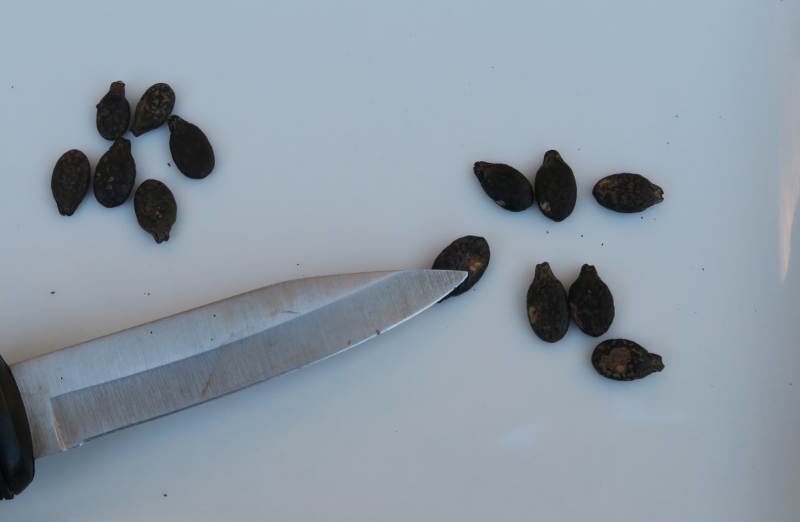
A Sharp Knife
-
A Single Razor Blade
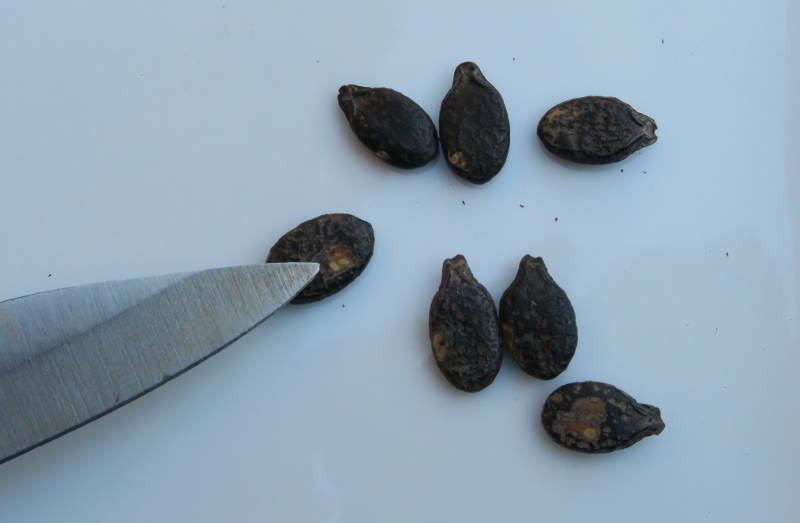
Scarification Using a Knife, a Blade, a Microplane Grater, or a File
Always practice safety when using a sharp tool to scarify a seed. Find a well-lighted area where there is a flat surface like a kitchen counter. Using the sharpest point of the tool, gently rub the seed, always directing the tool away from people's’ bodies.
Hot Water Scarification
Boiling water can be an effective way to soften the hard “jacket” on some seeds. To use this method, bring a pot of water to the point where it’s about to boil. The water temperature should be about 82 degrees Celsius.
Soak the seeds until the water cools. Check to see if any seeds didn't sink to the bottom. In some cases, seeds that don’t sink to the bottom of the pot are not viable and won’t sprout. Seeds that are scarified with hot water must be planted on the same day.
Alternatively, the seeds can spend the night in the freezer before thrusting them into a pot of boiling water. Remove the pot from the heat and allow the seeds to soak in the water for several hours - until it cools to room temperature.
Using Sandpaper for Scarification
Take a large piece of coarse sandpaper and a clear glass jar with a wide mouth. Cut the sandpaper so that it covers the interior circumference of the jar from top to bottom. Strips of heavy duty tape that are folded over to create double-sided strips will keep the sandpaper in place inside the jar. Once the sandpaper is secure, put the seeds in the jar. Cover it and screw the top on tightly. Shake the jar vigorously, so the sandpaper touches the seeds often enough to soften the hard seed coat.
Seeds that undergo treatment to hasten germination or soften hard seed coats need to be planted right away. Once the layers that protect seed embryos are loosened, softened, or chitted or filed away, there is no longer anything to protect the plant embryo, so it is important to plan to do these things when you have the time to see the process through to the end.
Using techniques that trick the seeds into thinking that they’ve experienced the conditions they need to have in nature is a good way to make it possible to grow things that couldn’t be grown otherwise. These practices speed up the germination process while ensuring that vigorous seedlings will grow and thrive whether they’re transplanted into pots or containers, or into the ground in a back or front yard garden.