Cucurbits are a familiar feature of Australian veggie gardens. From zucchini to pumpkin, cucumber to melon, these versatile and easy-to-grow plants are some of the most reliable and productive in the home garden.
But there's another branch of the family that's probably less familiar and is most often grown for looks rather than taste. Ornamental gourds can be found in both the soft-skinned Cucurbita genus alongside their squash cousins, and also in hard-skinned variants from the closely related Lagenaria family. Both kinds are unusual and interesting plants to grow.
Why Grow Ornamental Gourds?
Although ornamental gourds can look great growing in your garden, and a few varieties can even make their way to your table, it's after harvest that their qualities really come into play.
Treated in the right way, they can last indefinitely to provide the centrepieces of decorative autumn displays, be carved into lanterns, or simply used as ornaments around your home. And the harder-skinned varieties can be put to yet more practical uses, such making vases, bowls, birdhouses and even musical instruments.
For everything beyond the most temporary decorative use, careful drying after harvest is needed to stop gourds from rotting. Luckily, drying is an easy process, although it takes several months to do properly.
Gourds' Appearance
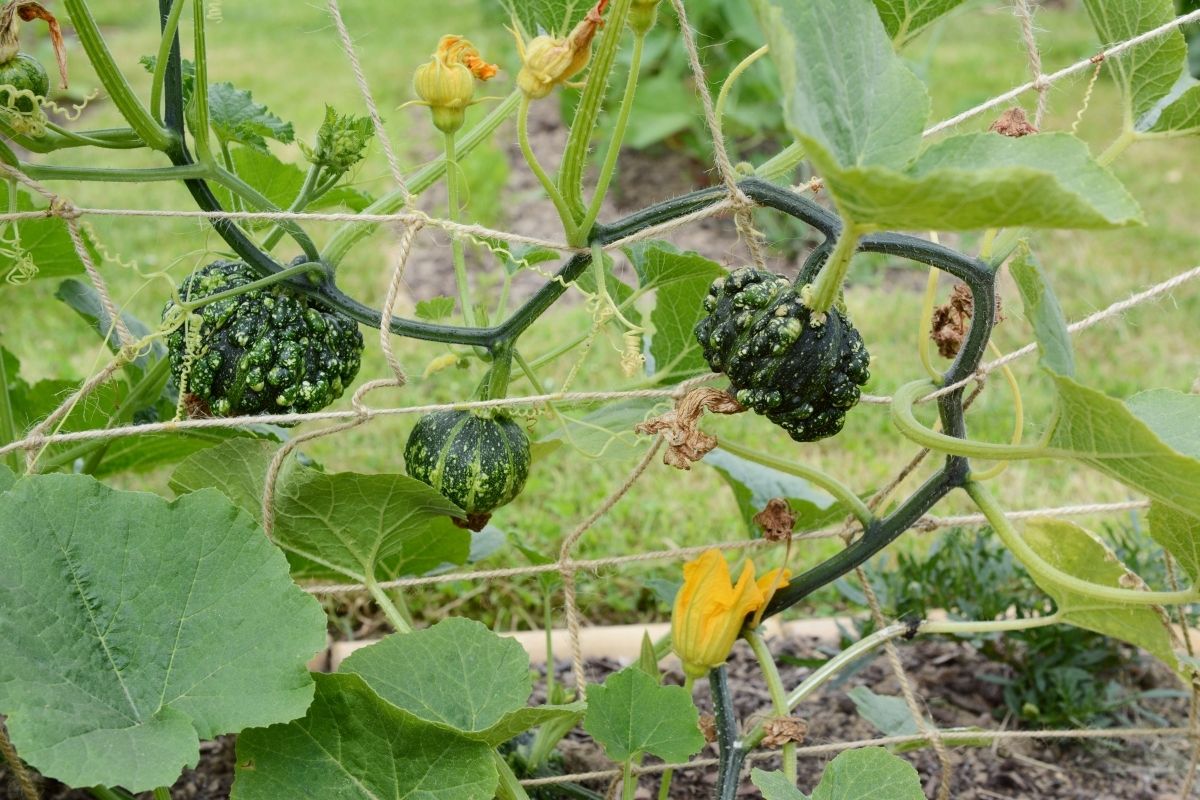
Soft-skinned gourds of the cucurbit family tend to be mainly green when growing, sometimes with patches of white, although orange and golden ones can also make an appearance. After drying they mostly become tan or brown.
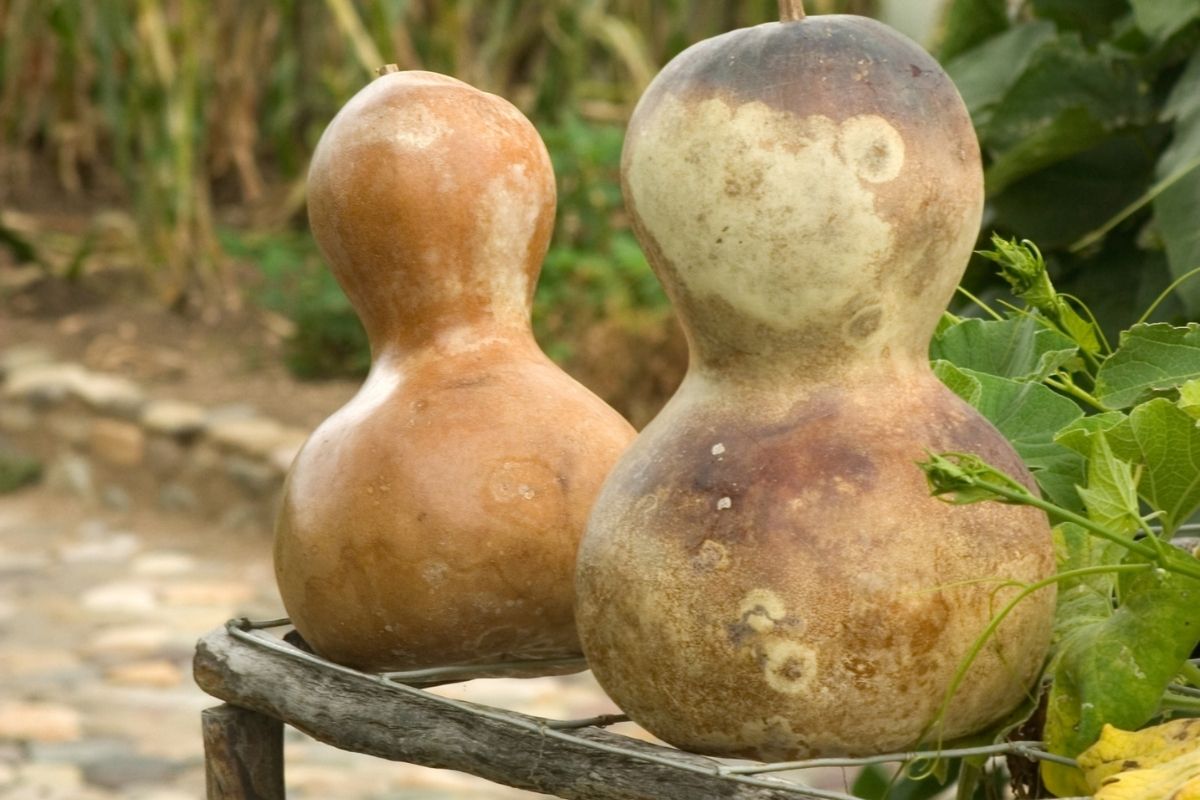
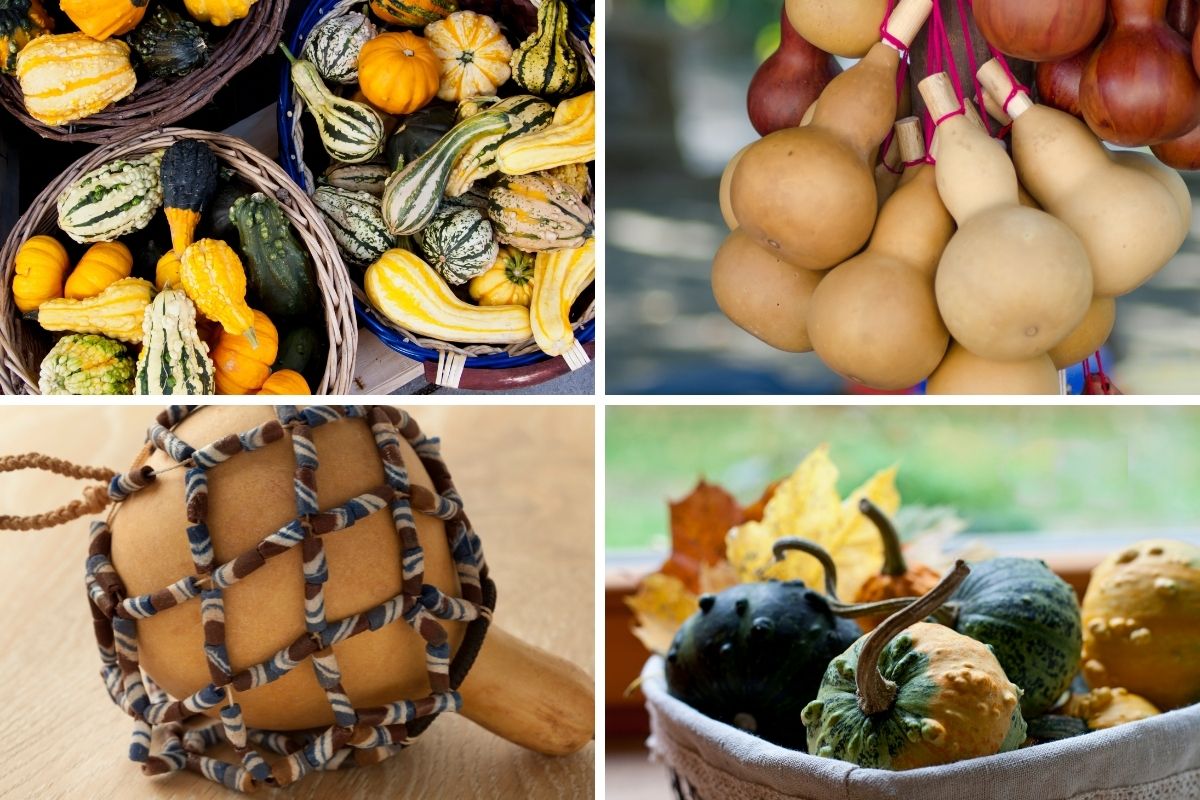
Hard-skinned Lagenaria gourds, on the other hand, are available in a much wider range of colours including green, white, blue, purple, orange, yellow and even a patterned mixture of several shades. What's more, many hard-skinned gourds retain their colour even after drying. Their shapes are likewise many and varied, ranging from globes to bell shapes to bowls, and are often covered in all kinds of interesting swirls, protrusions and bumps (called warts).
How to Grow Ornamental Gourds
Ornamental gourds are annual plants that should be sown in spring after all risk of frost has passed. They require a sunny spot and rich, fertile soil that drains easily. While gourds will grow in cool regions they can take up to six months to produce mature fruit, so seeds should be started indoors in cooler climates.
As with pumpkins, most ornamental gourds grow as sprawling vines. The final plant size can vary, but the most prolific and unruly varieties can produce vines up to 5m long. Because of this they require plenty of space in a garden - their extensive leafy foliage will quickly smother anything planted nearby.
The recommended spacing depends on variety, but in general seeds should be sown in clumps of three grouped 150-180cm apart, with 180-210cm between rows. After germination, remove the weakest seedlings; the strongest one will need all available water and nutrients as it grows.
Left alone, most varieties will sprawl over the ground, producing fruit on the side-stems of their vines. However, many gardeners prefer to give the vines some support with a trellis or sturdy tripod. When the developing fruits are allowed to hang rather than lie on the soil, they'll tend to produce rounder, more even shapes with fewer blemishes. If the plants start to outgrow their supports, prune the growing tip back to spur the production of more side-stem fruit.
Gourds require plenty of water, particularly the larger varieties, but be careful to water the soil around the base rather than the plant itself. As with many members of the squash family, wet foliage can quickly lead to mildew and rot.
Harvesting Ornamental Gourds
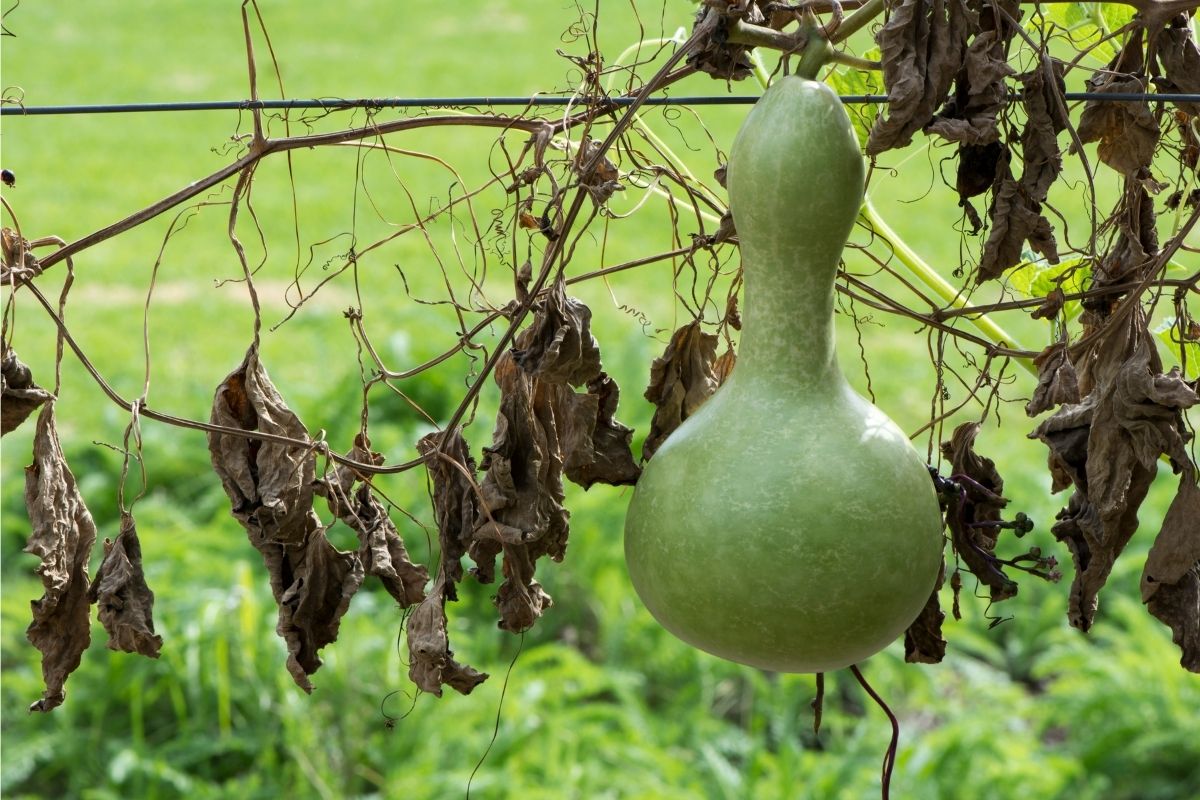
It usually takes around 180 days for full-sized fruit to develop, and for ornamental purposes harvesting should be delayed until the gourds are fully ripened on the vine, which can take several weeks longer.
Once ripe, the stems will start to dry out and turn brown, and the skin will start to toughen while still retaining its colour. Although it's important to wait until the fruit is ripe if possible, don't delay harvesting if there's a risk of frost, as the damage this causes will rule out successful drying later.
To harvest, carefully cut through the stem leaving 3-5cm attached to the gourd. Use a sharp blade to cut, and avoid handling the stem, as any damage risks going on to spoil the whole fruit. Similarly, discard any gourds already showing signs of damage, as if rot sets in it can quickly spread to the whole harvest in storage.
Preparing and Drying Your Gourds
To begin the drying process, take your harvested, intact gourds and wash them in soapy water, then leave to dry naturally in the open air. Next, give the skin a gentle wipe down with rubbing alcohol to sterilise it and reduce the risk of mould developing.
Now the main drying process can begin. Store your gourds in a dry, well-ventilated place out of direct light. The skin will start to harden, and after a week or so should be toughened and dry.
At this point, move the gourds to a dark, dry, cool area, placing them so they don’t touch each other on a ventilated surface such as a rack or screen. Alternatively, hang each gourd using garden twine around the now-dried stem. Again make sure they don't touch each other, and that there's good airflow around each one.
Leave in place for up to six months, turning the gourds every couple of weeks to encourage even drying and to discourage mould. If any gourds start to shrivel, soften or rot during drying, discard them as soon as this is discovered. Light surface mould can be gently wiped off using a little more rubbing alcohol.
After the drying time is complete, the gourds should feel light and hard to the touch, and will rattle with seeds when shaken. They're now ready for carving, painting, varnishing, waxing or using in any other crafty way you can think of.
A Few Ideas for Using Your Gourds
Fully dried gourds look great as ornaments or decorations on their own, but they can also be put to some interesting uses.
- Arrange with dried foliage, flower heads and berry sprigs for an autumn table decoration.
- Cut a small hole in a hollow gourd and use it as a natural, hanging birdhouse.
- Longer, thinner gourds can be cut in half to make vases for dried flowers and other decorations.
- Rounder gourds can be halved and used as bowls for potpourri.
- Small, round gourds can make fun musical shakers, with the seeds inside providing a maraca-like rattle.
However the gourds are used, these fast-growing vines and their colourful fruit are easy and fun to grow.