Dahlias are stars of the late summer and autumn garden, blooming in a myriad of colours and forms. Any gardener who has grown a dahlia from a tuber can attest to the vigorous way the shoots erupt from the soil, the stems growing strongly to support the colourful and plentiful blooms.
But did you know that you can also take cuttings from tubers as an alternative way of propagating the plants? According to dahlia experts, growing from cuttings has several advantages over growing from tubers:
- there’s no risk of tubers rotting in the ground before they shoot
- the risk of disease may be reduced
- cuttings will produce plants and flowers that are just a good, if not better, than those grown from a tuber
- several cuttings can be taken from each tuber, resulting in more plants overall.
This last point is the reason that many dahlia breeders and growers use cuttings; it lets them multiply their stock quickly. For the home gardener, the cutting technique is a useful one to know if you’re looking to increase the number of plants to fill a garden bed or to have spare plants to give away, swap or even sell.
Dahlias grown from cuttings will grow and form tubers in exactly the same way as tuber-grown plants. It’s possible to lift and divide these tubers at the end of the season just as you would any other dahlia.
Dahlia Tuber Anatomy
Dahlia tubers are 'stem' or true tubers, meaning they are bulbous modified stems that grow underground. The tuber stores carbohydrates to help the plant survive through the winter so it can reshoot in spring. The growth point or 'eye' on a dahlia tuber is located on part of the old stalk. The neck connects the old stalk to the storage part of the tuber, with the 'tail' being where roots will form. The eyes are often difficult to locate while the tubers are dormant, but will be obvious once the tuber is 'woken up' either by warm temperatures or a small amount of moisture.

How to Take Cuttings
1. Let the Tubers Grow Shoots
Begin by ‘waking up’ your tubers in later winter or early spring. Fill a seedling tray or small pot with free-draining, just damp potting mix, coir or sawdust. Make sure the pot or tray you use has good drainage, remembering that dahlia tubers are prone to rotting. Sit the tuber horizontally on top of the mix. You can half bury some of the tuber, but make sure the neck and stem are not covered with soil.
It’s a good idea to label the pot or tuber so you don’t forget which variety you’re growing. Some growers write the name of the variety on the tuber itself using a permanent marker pen.
Place the container in a warm spot out of direct sunlight. There’s no need to water the tubers so long as the soil remains slightly damp to the touch. You should see eyes develop near the neck of the tuber within a couple of weeks. Shoots will then emerge from the eyes.
2. Take the Cutting
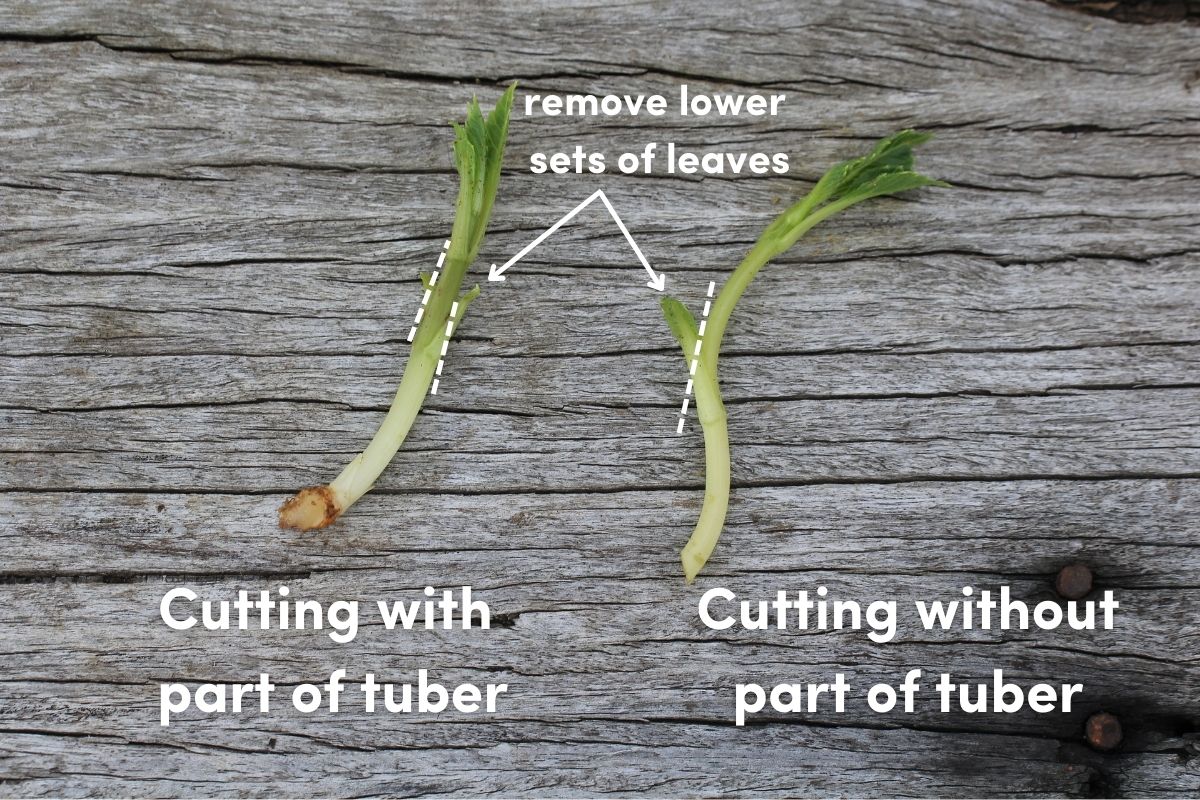
You can take a cutting once the shoots are 5-10cm tall and ideally with three to four leaves. Use a clean razor blade or sharp knife. There are two options when taking the cutting:
- Cut the shoot near to the tuber leaving the eye and a small stub of the shoot on the tuber. The eye and remaining shoot will regrow, and the tuber can then be planted as usual.
- Cut a small piece of the tuber along with the shoot. Many gardeners believe this helps the cutting establish, but as the eye has been removed from the tuber it will not reshoot. This is a good technique to use if there are multiple eyes on a tuber or clump of tubers; leave 2-3 eyes and their corresponding shoots on the tuber to be planted and take cuttings from the rest.
3. Trim the Lower Leaves
Remove the lower leaves, leaving just the top pair. If the top pair of leaves are large you can cut them in half to reduce water loss.
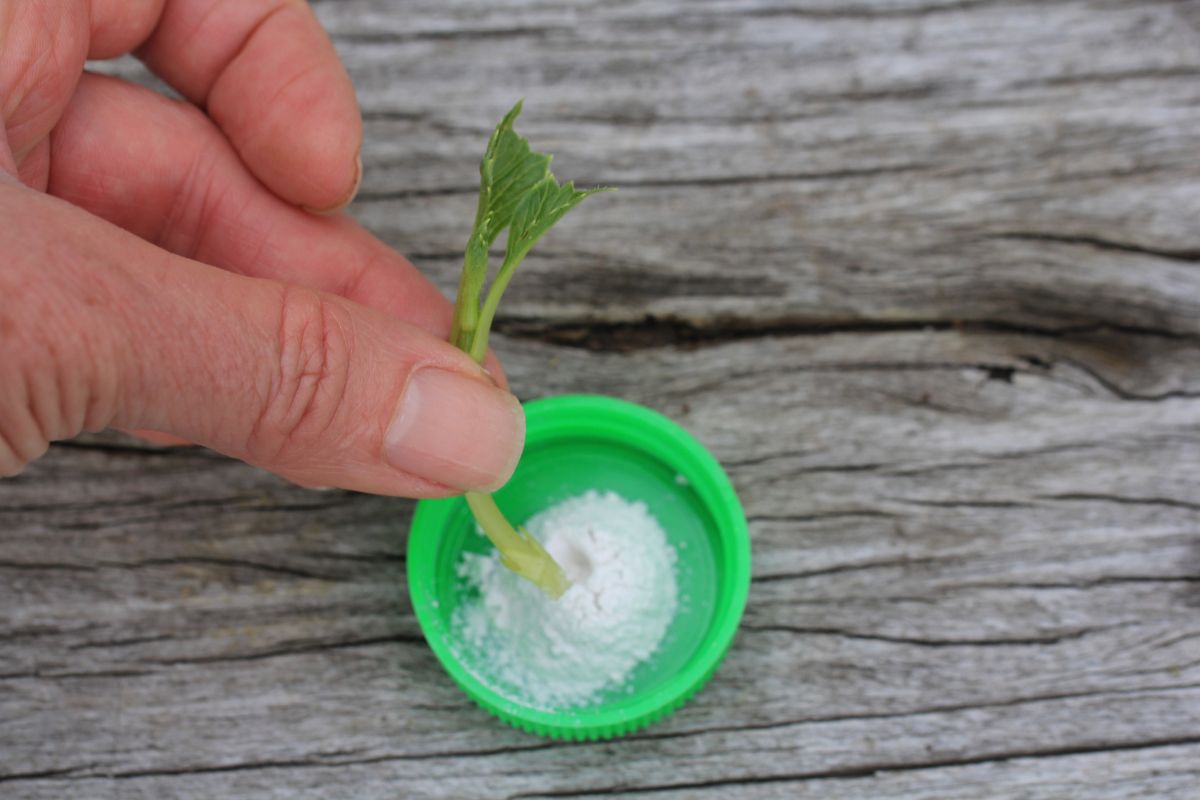
Some gardeners dip the ends of the cuttings in rooting hormone powder with the aim of speeding up root formation, though this step is not essential. Note that because dahlias have relatively soft stems, powdered hormone products are considered more suitable than hormone products in liquid or gel form.
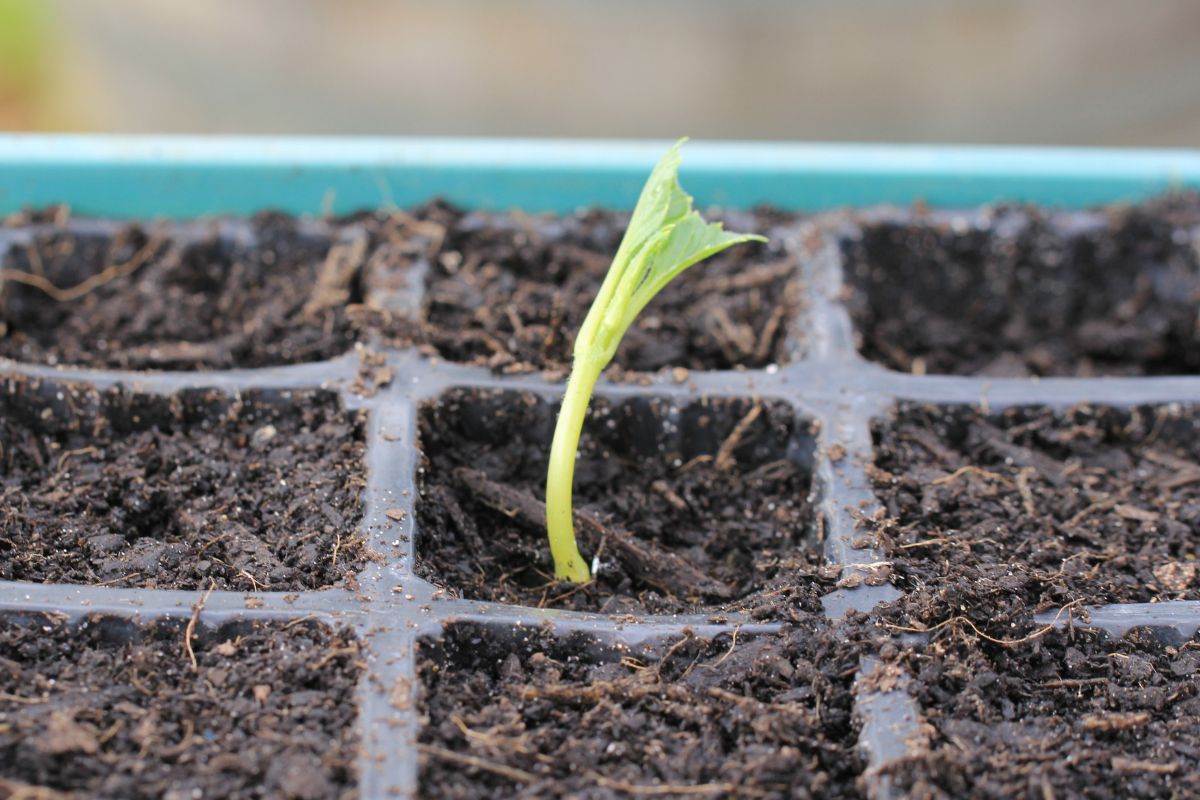
4. Pot Up the Cutting
Plant the cutting in free draining potting mix. A standard commercial mix is fine, though some growers improve the drainage of the soil by adding 30-50% perlite or a mix of coarse sand, perlite and vermiculite.
5. Create a Good Growing Environment
Dahlias love the heat, so a warm environment with a moderate to high humidity is perfect to get the cuttings growing well. Use a mini greenhouse, place your cuttings on a sunny windowsill or make a makeshift greenhouse using a crate or foam box covered with a plastic lid. Keep the soil mix moist but not too wet. Plant out the cuttings once roots have developed and new leaves are beginning to form.
If you grow dahlias and want to multiply your plants quickly, cuttings may be a technique worth trying in your garden.