Any hard-working tool deserves proper care and maintenance to extend its useful life. In particular, any tool that cuts, prunes or chops should be kept sharp at all times - not only to keep the blade in good condition for longer but for practical gardening reasons, too.
Sharper blades cut more easily and are safer to use, compared to blunt edges which can slide and skitter unpredictably, with all the risk of injury that involves. Sharper tools also cut through plant stems and branches more cleanly, leaving less ragged damage behind that can invite infection.
While professional blade sharpening using mechanical grinders is a good solution for maintaining an edge, there's a much simpler option that's perfect for home gardeners: a sharpening stone.
What Is a Sharpening Stone?
At its simplest, a sharpening stone is a block of fine-grained stone that's abrasive and tough enough to grind down metal blades and other edges. Also known as whetstones, from the archaic word ‘whet’ meaning ‘to sharpen’, sharpening stones are inexpensive to buy, easily portable, and simple to use after a little practice.
Sharpening stones come in two main types, either as a stand alone block or as stones attached to a base or handle for easier use. Within these two forms, most use water as a lubricant to protect the stone and tool, while some use lubricating oil instead.
As a final variation, some whetstones offer two or more surfaces with different grades of roughness, for coarser grinding or finer edge finishing, depending on your needs. However, all kinds of whetstones are used in largely the same way. Here's what to do.
1. Preparation
Using a sharpening stone on your much-loved gardening tools might seem a little daunting, but it's easy to do and will soon become second nature. If you're worried about causing any damage through inexperience, you can always test the process on an old tool where a few nicks or chips won't matter.
For your everyday tools, it's best to use a whetstone a few times a year to keep your blades nicely honed rather than trying to revive a very blunt or damaged blade (in these cases, a trip to a professional sharpener might be a better idea).
Preparing the Sharpening Stone
To start, find out which lubricant you need to use with your particular stone, then apply a small amount and leave it to soak in for five to 10 minutes.
Preparing the Tool
If you're sharpening secateurs that can be dismantled, remove the blade to give easier access to the cutting edge. Also note that most secateurs - and many other cutting tools, for that matter - have both a sharp side and a flat side to the blade. If this is the case, be sure to only work on the already sharpened edge.
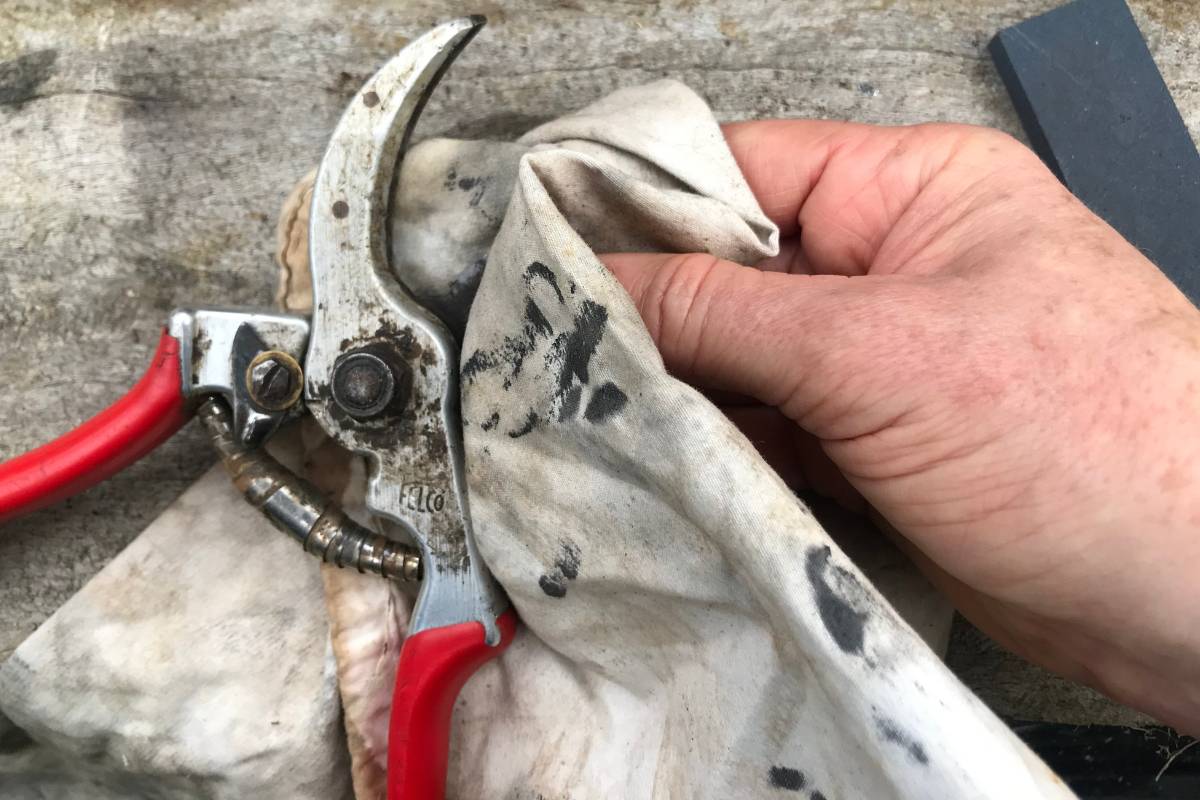
In any case, clean the blade to remove all dirt and rust, if necessary using machine oil and/or steel wool to make sure the metal is fully exposed.
2. The Sharpening Process
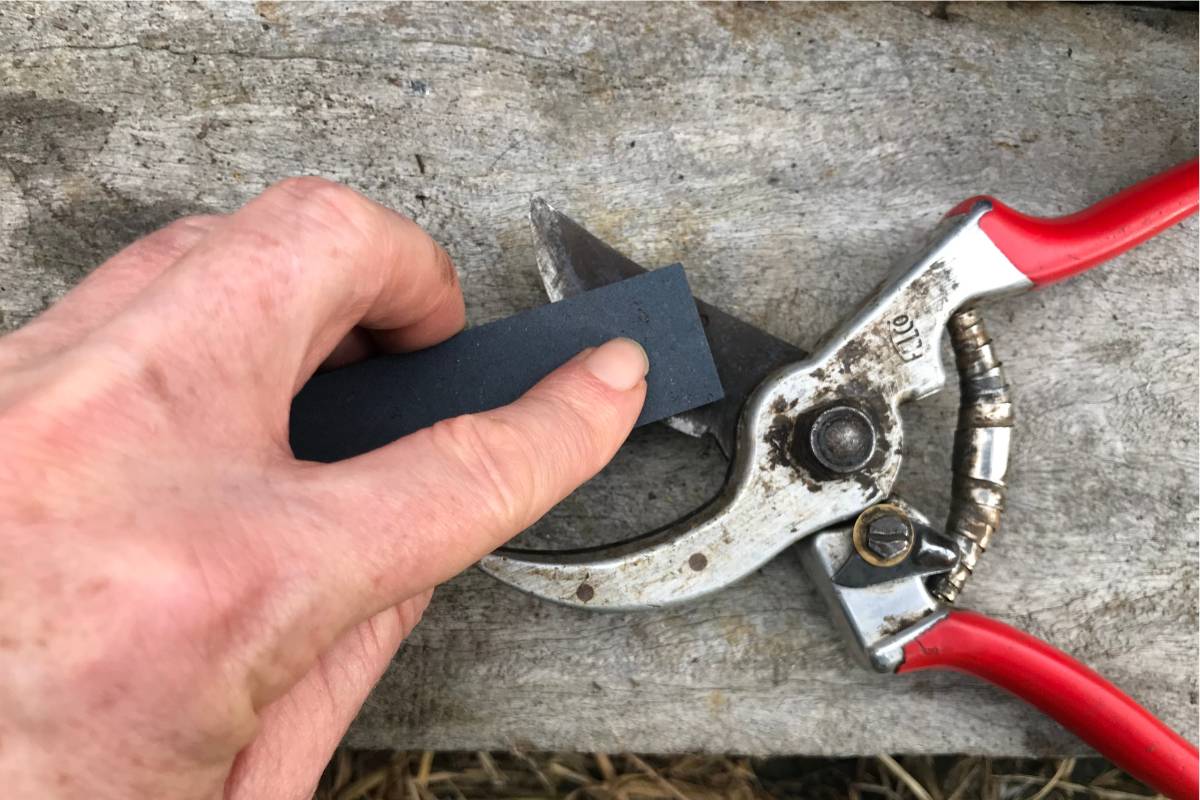
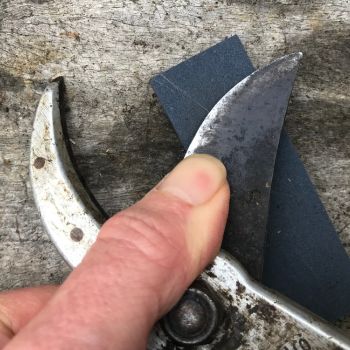
Next, place the sharpening stone on a solid surface, such as a workbench or table, and securely grasp the blade you're working on. Angle the sharpened side of the blade against the stone so that it matches the slant - usually around 23 degrees though this can vary from tool to tool - and push it sideways and away from you in a firm but smooth sweep along the stone. Cover the full length of the blade so the edge is sharpened evenly.
Check the blade after every sweep, continuing until you see shiny, smooth, newly exposed metal along the whole length of the blade. Going a little too far with sharpening is unlikely to damage the blade, but it's a wasted effort and will wear the tool out more quickly, so stop once the metal is evenly exposed.
Once the correct stage is reached, if the blade has a flat side, place it level on the stone and give it a final sweep or two to remove any burrs. Or, for double-edged blades, repeat the sharpening process on the other side before gently removing any burrs on both sides.
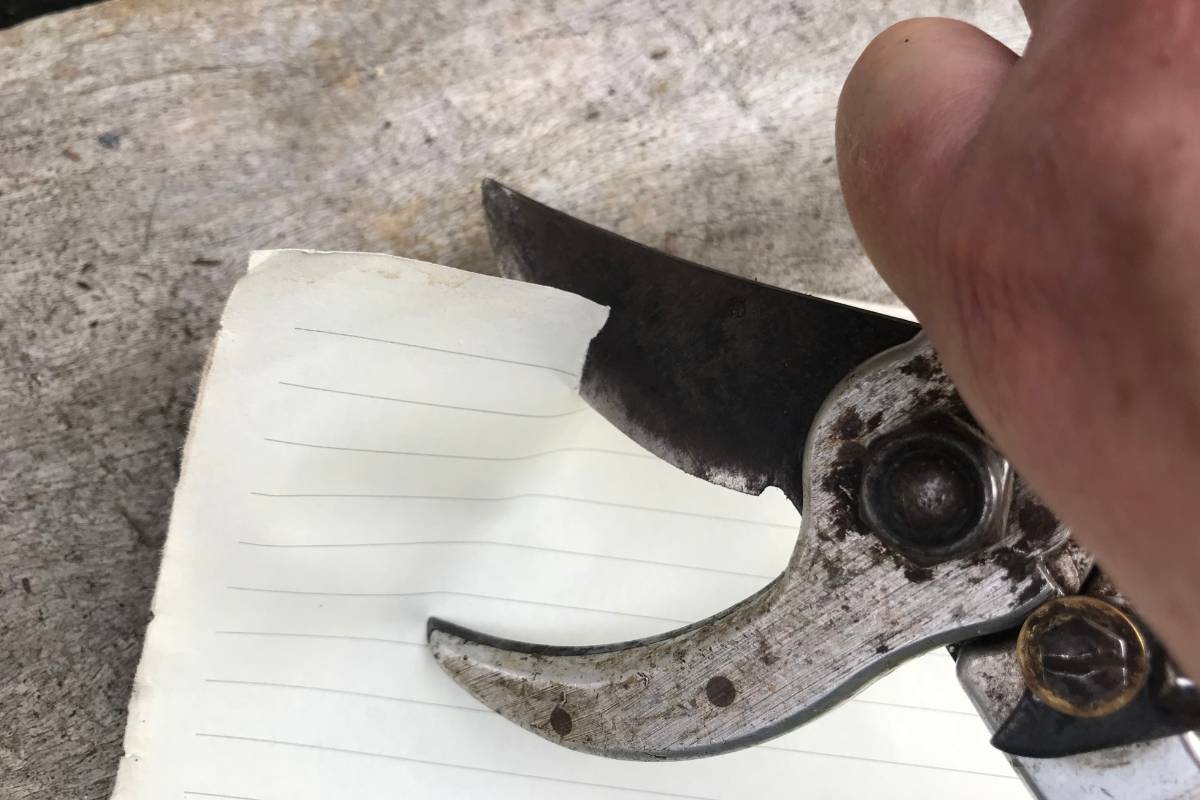
Once finished, test the sharpness of the blade by cutting a piece of paper - it should cut through cleanly and crisply without effort or tearing.
3. After Sharpening
Once the blade is honed to your liking, brush away any filings and rub the blade over with a drop of oil for protection, then reassemble the tool if needed.
After working on any other tools that need sharpening, check the sharpening stone for any grooves or damage which can build up over time. If you see any, run a second whetstone or a piece of sandpaper over it until smooth again.
Lastly, clean the sharpening stone using a little more of the appropriate lubricant, then allow it to dry completely before storing it wrapped in a thick towel for protection.
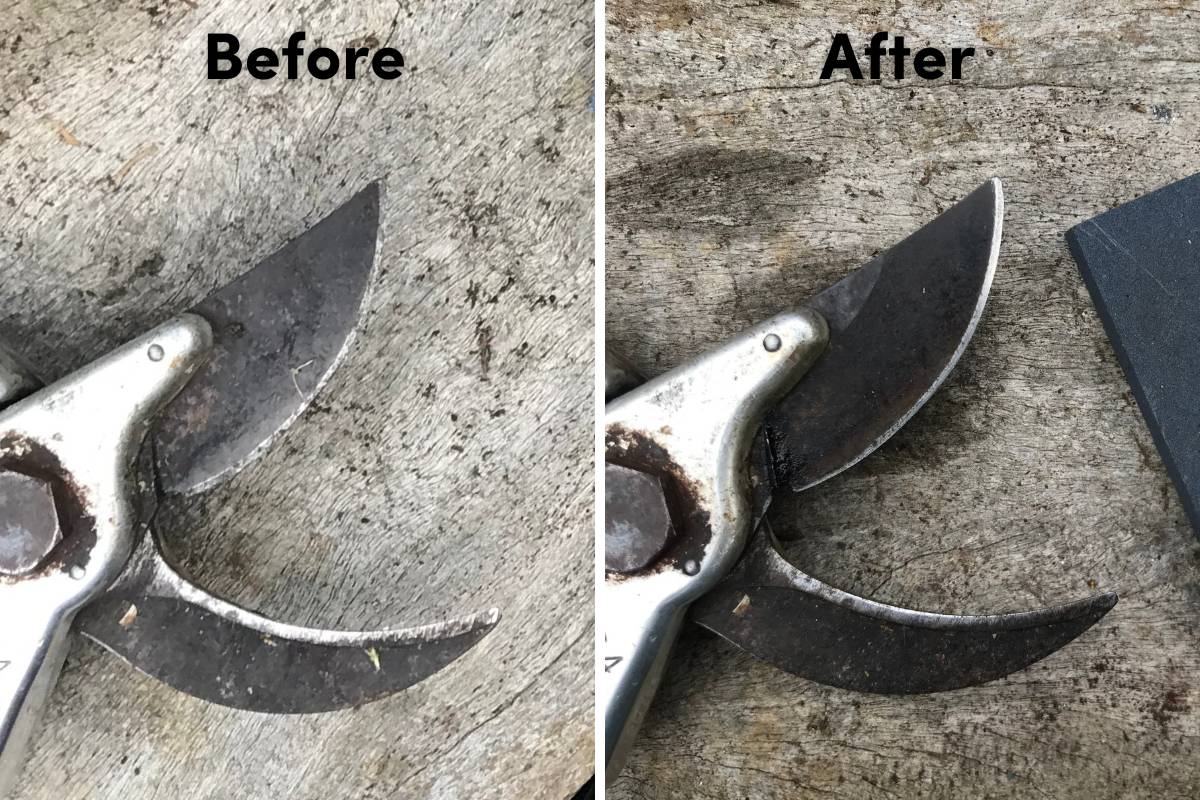
When used correctly and regularly, a sharpening stone will greatly extend the working life of your favourite cutting tools, while also benefiting your gardening with cleaner and safer cuts.