
Dahlias are a wonderful and rewarding addition to any garden, offering spectacular blooms and the bonus of multiplying year after year. Understanding their lifecycle is the key to successfully growing, harvesting, and storing these fascinating plants. So, let's take a look at the journey of a Dahlia - from a single tuber to impressive summer blooms, and the wonder of multiplying your harvest for future seasons to come.
Watch our step-by-step video guide on the lifecycle of a Dahlia.
How To Grow Dahlias & Their Lifecycle
1. Waking Up Your Tuber & Sprouting
The Dahlia’s lifecycle begins with a tuber. When purchasing or starting your Dahlias, they generally come as a single tuber or as a small clump. As spring arrives, the tubers will begin to sprout "eyes" (the small growth points on the crown) and at this stage they are ready to be planted.
2. Planting Your Tubers
You have two main options for getting them started:
- Pots: You can start them early in containers to get a head start on the growing season. If they are a pot suitable variety, they can stay in their pots for the season or be transferred to a larger decorative pot.
- Direct Planting: You can also plant tubers directly into your garden. They do well in garden beds with loose soil, raised garden beds and rows, even veggie beds.
- Spacing: The distance you leave between each tuber will depend entirely on the specific variety you are growing, as some plants become much larger than others.
3. Plant Maturity & Harvesting
Once planted, Dahlias are exceptionally fast growers. You can expect your plants to reach full maturity in about 90 to 120 days. During this window, the plant focuses on developing a strong root system, hardy stems and lush green foliage - eventually rewarding you with continuous, vibrant flowers. Dahlias are an exceptional choice for cut flowers and colourful garden displays.
4. End of Season & Seed Collecting
As the season progresses, flower production will naturally start to slow down. The end of Dahlia season is generally late summer to mid autumn, depending on your climate and Dahlia variety. You may notice the flowers will start to fade and some will turn to seed. If you are looking to multiply your plants for the next season, it is important to understand the difference between using seeds and using tubers.
- Seed: Unless you are planting a specifically stabilised seed variety, growing dahlias from seed acts like a lottery. The resulting flowers will usually look completely different and unpredictable compared to the plant they came from.
- Tuber: Will produce an exact replica as the tuber is a clone of the parent plant, guaranteeing the exact same flower variety next season.
5. Digging Up & Storing Your Tubers
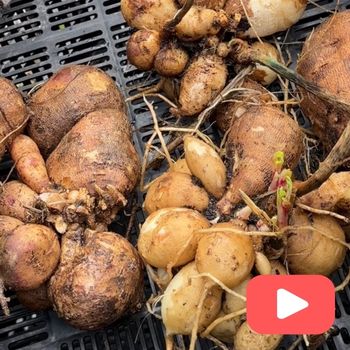
When the season ends and the plant starts to die back, you will need to make a decision. You can leave the tubers in the ground (if your climate is suitable), or you can dig them up to store over the winter. If you choose to dig them up, you will discover that your single starter tuber has multiplied into many viable tubers for the next season!
Here is the best method for digging and storing your dahlia tubers safely:
- Use A Garden Fork: Always use a garden fork over a spade. Spades can easily slice through and damage the tubers underground.
- Dig A Wide Circle: Insert your fork in a wide circle around the perimeter of the plant. This ensures you do not crush or damage the hidden tuber clump.
- Loosen And Lift: Gently loosen the soil around the entire circle until you can easily pull the whole clump out of the ground.
- Clean The Tubers: Spray all the dirt off the tubers using a hose. Make sure to look underneath the clump for hidden dirt also.
- Cure In The Sun: Lay the clean tubers out in the sun to dry and cure. This hardens the skin for storage.
- Pack For Winter: Store the dried tubers in bulb crates. Alternatively, pack them in sawdust or a mixture of sawdust and dirt in dry paper bags. The goal is to keep them entirely free dampness that may cause rot and mold.
- Store In The Right Environment: Place your crates, containers or bags in a cool, dry area to rest over the winter until it is time to plant again next spring.
6. Diving Your Tubers
So now that your one starter tuber has become many, you're probably wondering how to divide them! There is an art to diving tubers, that we will cover in a later article to make sure you get the most our of your Dahlia tuber clumps before planting the following season.
Browse our full range of Dahlia Tubers