
Leave a garden unattended for a week over summer and you can come home to crispy tomatoes, drooping herbs and a veggie patch that takes weeks to recover.
Olla pots, pronounced "Oh-yah", can help solve that problem without installing a drip irrigation system or calling in a favour from the neighbours.
While you can buy ready-made ollas, they're surprisingly simple and inexpensive to make at home. All you really need is an unglazed terracotta pot, something to seal the drainage hole and a saucer to use as a lid.
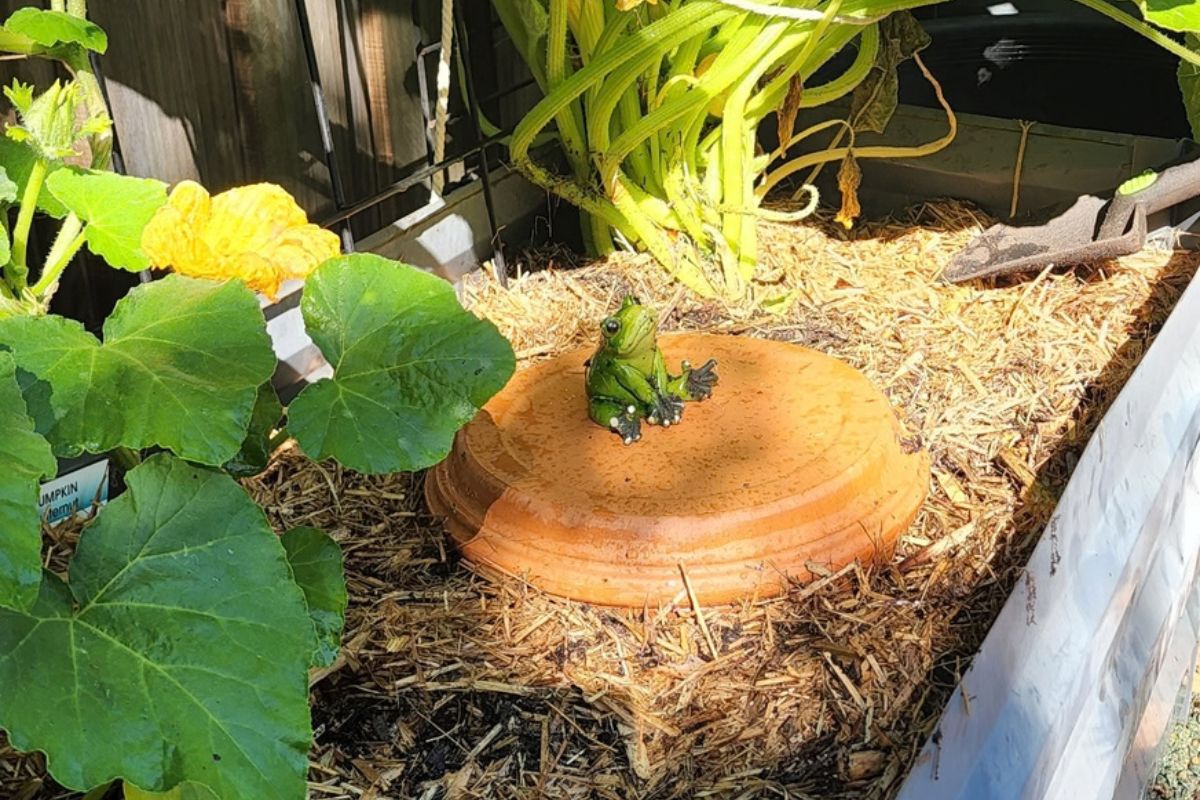
Once buried in the garden, the pot acts as a small underground water reservoir, slowly releasing moisture into the surrounding soil. It's particularly handy for vegetable gardens, raised beds and other areas that tend to dry out quickly during summer.
The History of the Olla Pot
Olla irrigation might feel like a clever modern gardening hack, but its roots stretch back thousands of years. Buried clay pots have been used to irrigate crops for more than 4,000 years, with variations of the technique appearing in different parts of the world.
The word "olla" comes from the Latin word for "pot", and over time, unglazed clay vessels became a simple and effective way to deliver water directly to the soil. The technique was particularly useful in dry regions, where conserving every drop of water was important.
Thousands of years later, the basic principle remains much the same: bury a porous clay pot near your plants, fill it with water, and let the soil and terracotta do the rest.
How An Olla Pot Works
Terracotta is porous. When an unglazed terracotta pot is filled with water and buried in the soil, moisture slowly moves through the clay walls and into the surrounding root zone.
Instead of watering from the surface, where some water is lost to evaporation or run-off, the olla supplies moisture below ground where plant roots can actually access it.
As the surrounding soil dries, water continues to move through the terracotta. How quickly this happens depends on the soil, temperature, size of the pot and how much water nearby plants are using.
This makes olla pots particularly useful during the hotter months, or when you're heading away and won't be there to water regularly. They won't replace every watering method, but for a vegetable patch or raised garden bed, they're a simple backup system.
What You'll Need
- Unglazed Terracotta Pot: It must be unglazed so water can move through the porous clay. Avoid pots that have been painted or sealed.
- Terracotta Saucer: Choose one large enough to sit securely over the top of the pot once it has been buried.
- Blu Tack: This can be used to plug the drainage hole before applying the silicone.
- Silicone Sealant: Look for a non-toxic option suitable for outdoor use and follow the manufacturer's directions for curing.
Before you begin, check the pot for cracks or damage. Even a small crack can let water escape much faster than intended.
.jpg)
Sealing The Base
The key to a working olla is creating a watertight seal over the drainage hole. If it isn't properly sealed, water will drain straight out of the bottom instead of slowly moving through the terracotta walls.
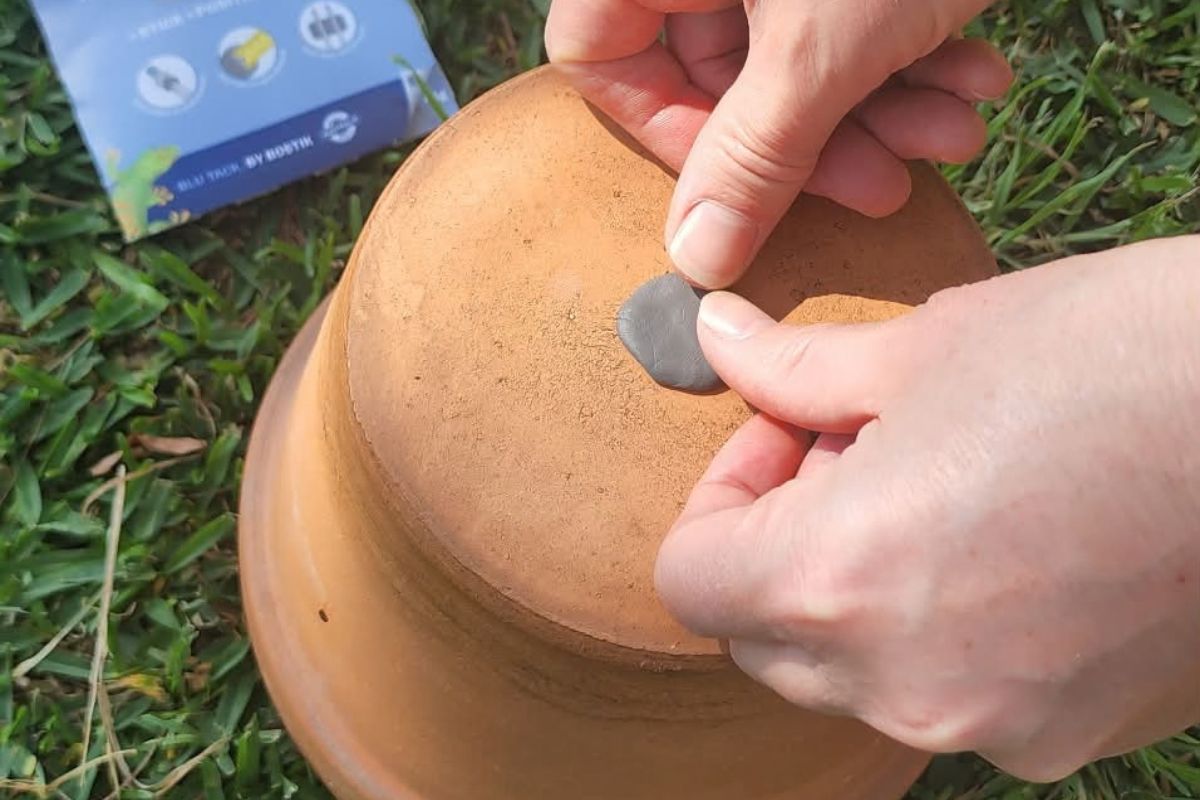
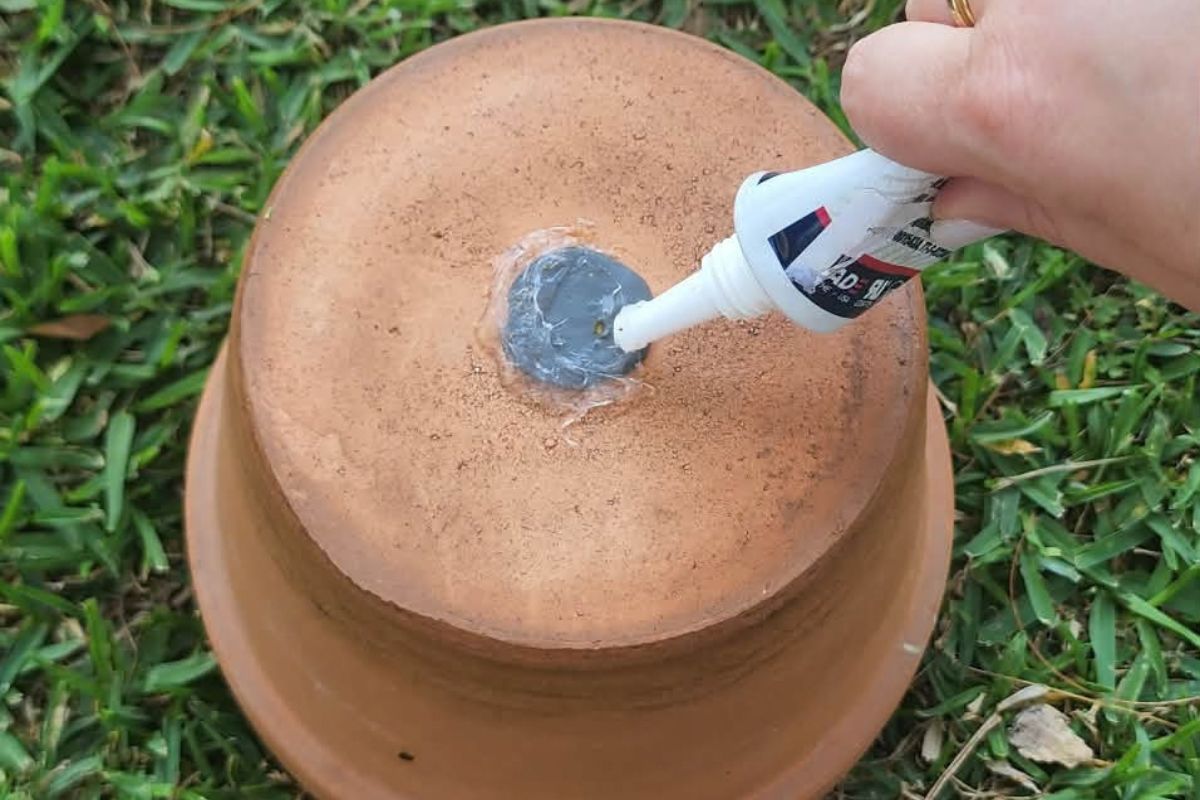
- Plug the drainage hole: Make sure the pot is completely dry, otherwise the sealant may not adhere properly. Press a small amount of Blu Tack firmly into the drainage hole from the underside of the pot. Push it in until it sits relatively flush with the base rather than forming a large dome. This just gives the silicone something to sit on.
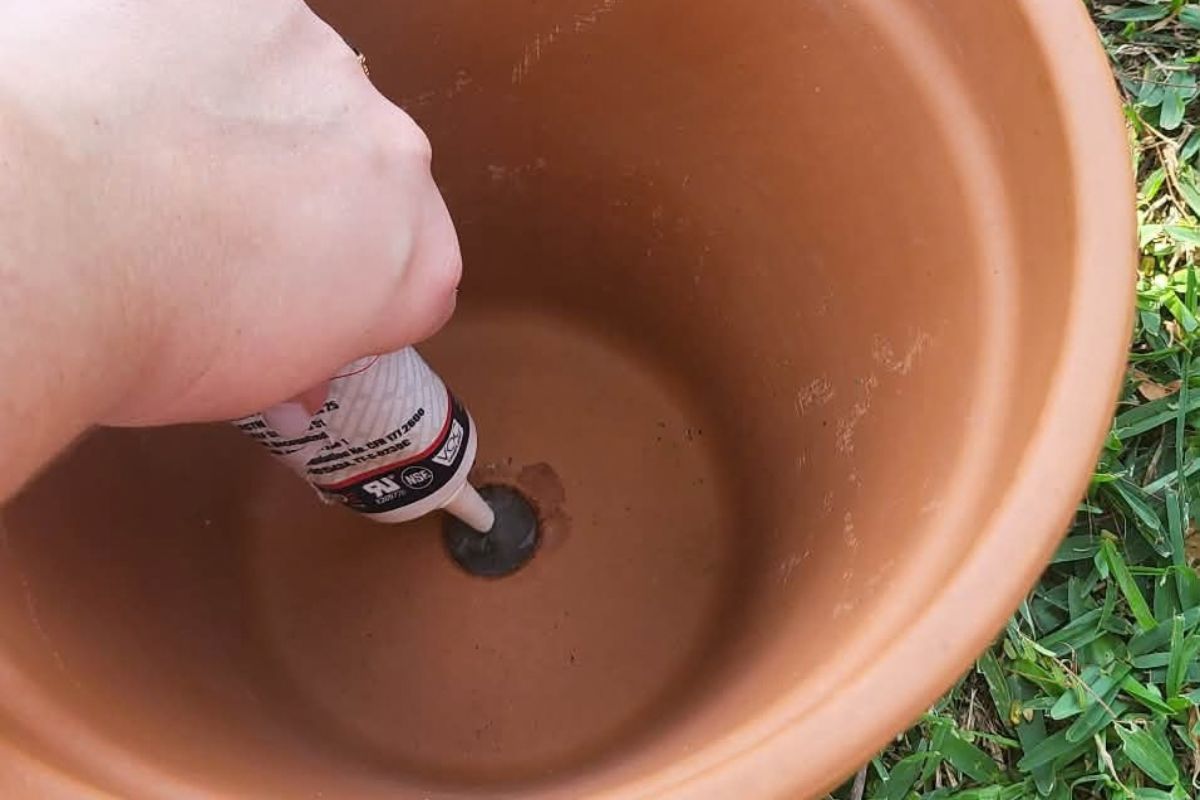
- Apply the silicone: Cover the Blu Tack plug with silicone sealant, extending it slightly onto the surrounding terracotta to create a watertight seal.
- Check the coverage: Make sure the drainage hole and Blu Tack are completely covered, with no obvious gaps around the edges.
- Leave it to cure: Allow the silicone to cure completely before filling the pot with water. Curing times vary between products, so follow the instructions on the packaging.
Don't rush this step. It's much easier to wait for the silicone to cure properly than to dig the olla back out of the garden because the seal has failed.
Testing The Seal
Once the silicone has fully cured, test the pot before burying it.
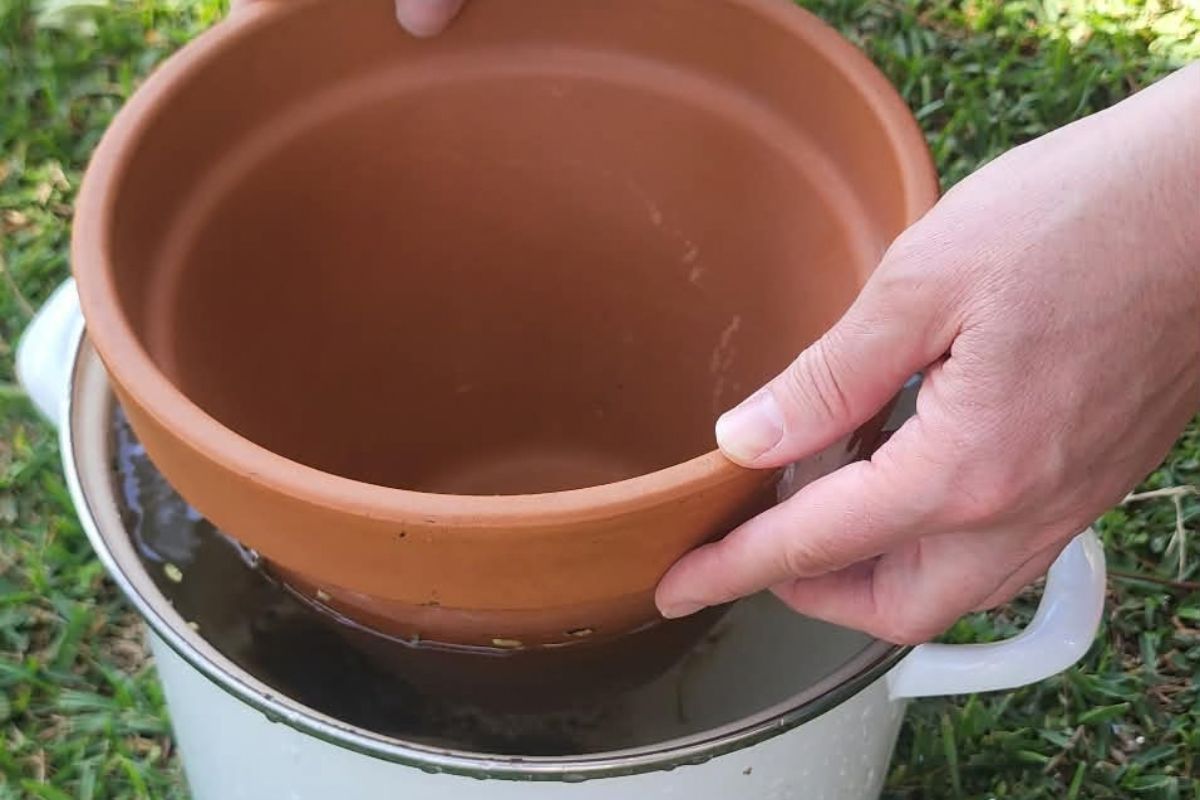
Place the terracotta pot in a bucket or tub of water and check for leaks around the sealed drainage hole. The terracotta itself will absorb water, but there shouldn't be a steady stream or obvious leak coming from the base.
If the seal leaks, let the pot dry, remove the failed seal and repeat the process.
Soaking the pot at this stage also prepares it for installation. Dry terracotta initially absorbs some of the water itself, so pre-soaking saturates the clay, meaning that once the olla is filled in the garden, water can start moving into the surrounding soil rather than being absorbed by the dry pot first.
Installing Your Olla
Choose where you want the olla before you start digging. Ideally, it should sit close to the plants you want it to water rather than at the edge of the garden bed.
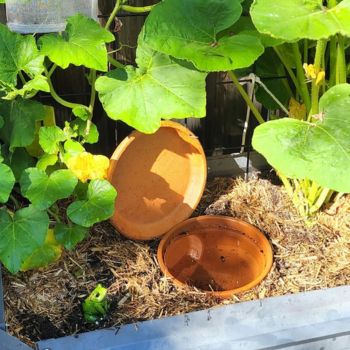
Dig a hole deep enough that the pot sits underground, leaving the rim slightly above soil level so it's easy to find, fill and cover.
Place the olla in the hole and backfill firmly around it. The soil should be in direct contact with the terracotta walls, without large air pockets. This allows moisture to move from the pot into the surrounding soil.
For larger garden beds, one small olla may not provide enough coverage. You may need several pots spaced throughout the bed, particularly if you're growing thirsty summer crops such as tomatoes, cucumbers, zucchini or pumpkins.
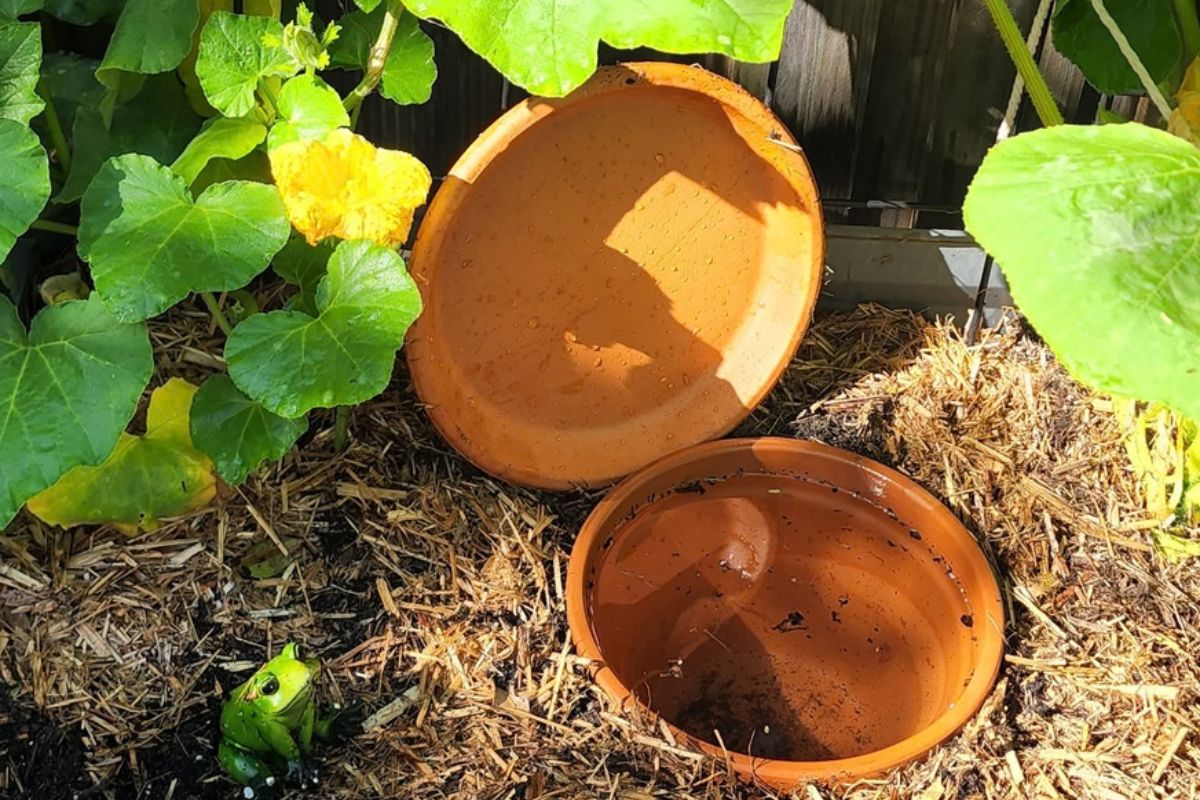
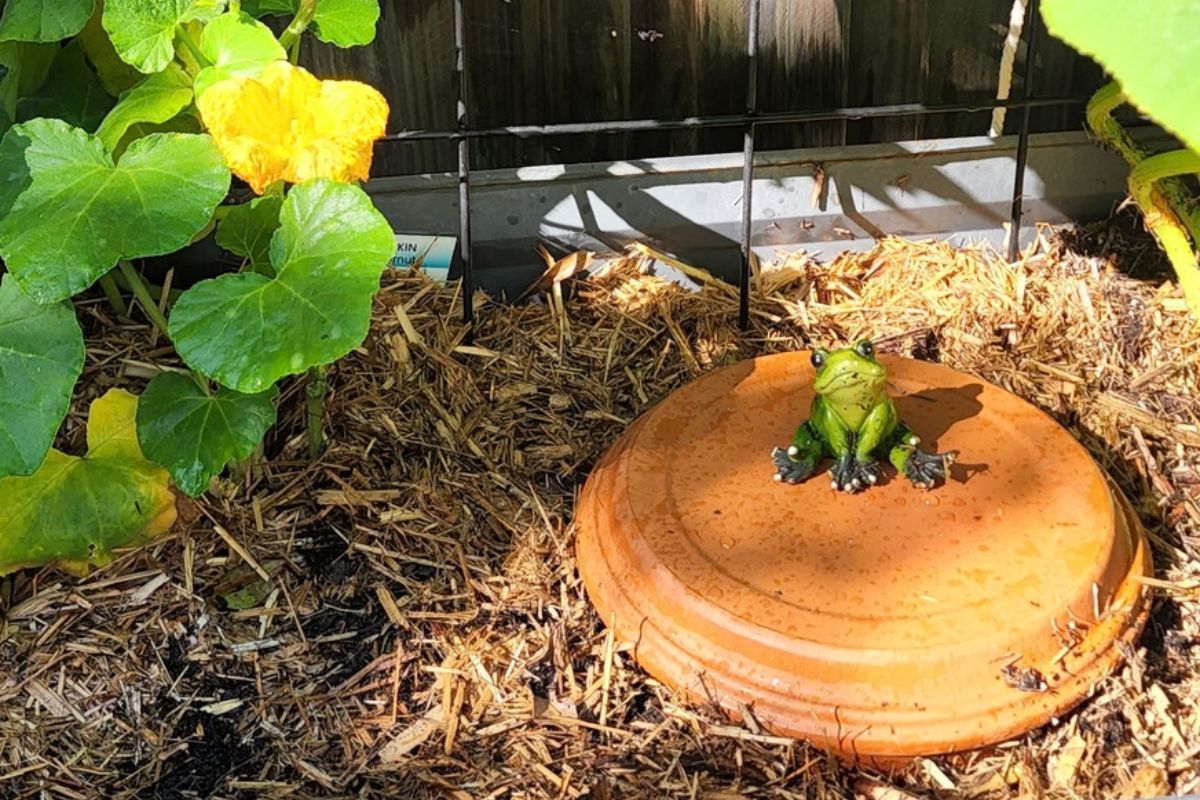
Once the olla is in position, fill it with water and place the terracotta saucer over the opening. Keeping it covered helps reduce evaporation, keeps dirt and leaves out and stops mosquitoes from accessing the water.
How Long Will An Olla Stay Full?
There's no universal answer.
An olla might hold water for several days in one garden and empty much faster in another. Weather, soil type, the size and thickness of the terracotta pot, and how much water nearby plants are using can all make a difference.
A garden bed in full summer sun will also have different water needs from one getting afternoon shade, while a bed packed with mature tomato plants is likely to use more water than one holding a few small herbs.
If you're planning to rely on an olla while you're away, don't install it the afternoon before you leave and hope for the best. Test it beforehand.
Fill the olla completely and check the water level at roughly the same time each day for several days. This will give you a good idea of how quickly it empties in your garden.
A trial run is particularly worthwhile before a summer holiday, when a few extremely hot days can make a big difference to how quickly your garden uses water.
Once it's set up, an olla is about as low-maintenance as garden infrastructure gets. Bury it, fill it, and check the water level occasionally.
Article & Photography by Julia Lewis