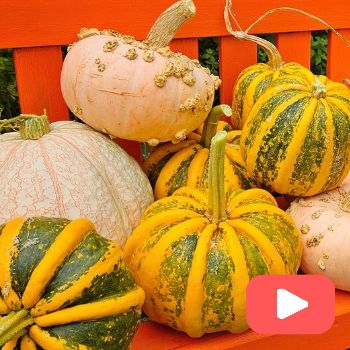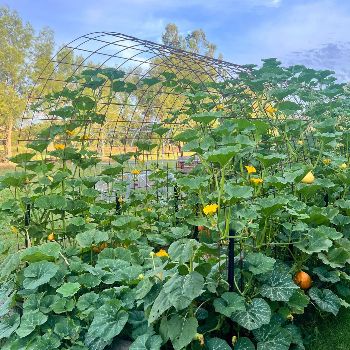

If you have ever spent five minutes scrolling through a social media gardening group, you know that few topics spark as much confusion and debate as the humble pumpkin. Every single spring and summer, the same posts pop up:
- “Why does my immature butternut have stripes?”
- “Is it a hybrid?”
- “My zucchini grew huge and yellow. Did it cross-pollinate with a pumpkin?”
- “Can I plant a Kent right next to a Butternut without getting Kent-shaped Butternuts?”
The world of cucurbit growing is packed with gardening folklore. Fortunately, once you understand a little bit of plant botany, much of the mystery disappears. Whether you call them pumpkins, squashes, marrows, or zucchinis, these garden favourites all belong to the same wonderful family.
In this comprehensive guide, we are going to unpack what is really in a name, bust the biggest cross-pollination myth in gardening, break down the four main species you need to know, and walk step-by-step through hand-pollination, curing, and saving seeds that grow true-to-type year after year.
.jpg)
What’s In A Name?
All pumpkins, squashes, zucchinis, courgettes, patty pans, and marrows belong to the botanical family Cucurbitaceae (commonly known as cucurbits) and the genus Cucurbita.
Depending on where you live in the world, people use vastly different terms for the exact same vegetable:
- Australia & New Zealand: We tend to call almost all hard-skinned, mature winter squashes “pumpkins.” A Butternut is a Butternut Pumpkin, a Kent is a Jap/Kent Pumpkin, and a Jarrahdale is a Blue Pumpkin.
- North America: The word “pumpkin” is generally reserved for round, orange varieties (like Jack-o’-lanterns or field pumpkins). Almost everything else is called a “squash.” Butternut is Butternut Squash, Acorn is Acorn Squash, and so on.
- UK & Europe: Soft-skinned summer squashes are often referred to as courgettes or marrows (when left to grow extra-large).
(1).jpg)
To keep things simple in the garden, it helps to group them by how we eat them:
- Summer Squashes: Harvested while immature, soft-skinned, and eaten entirely (e.g. Zucchini, Patty Pan, Kamo Kamo, usually Cucurbita pepo varieties).
- Winter Squashes / Pumpkins: Left on the vine until fully mature, developing a hard outer rind that allows them to be stored for months (e.g. Butternut, Kent, Hubbard, Queensland Blue).
.jpg)
.jpg)
Busting The Big Cross-Pollination Myth
Let’s tackle the single biggest misconception on social media: the belief that cross-pollination changes the look or taste of this year’s fruit.
Here is the plain botanical truth: Cross-pollination affects the seeds you save for next year, not the appearance, shape, or flavour of the fruit growing on the plant this season.
The flesh and skin of a pumpkin or zucchini are produced entirely by the mother plant’s genetic tissue. Even if a bee takes pollen from a dark green zucchini and deposits it onto another compatible variety such as a Spaghetti Squash, the resulting fruit will look, taste, and appear like a Spaghetti Squash. The genetic mix-up only exists inside the embryonic seeds tucked away in the centre of that fruit.
If you scoop out those cross-pollinated seeds, dry them, plant them next spring, and grow a new vine: that is when you will see a strange, mystery hybrid fruit.
When people post photos online claiming their plant cross-pollinated in real-time, they are usually seeing one of three normal things:
- Immature Fruit: Immature Butternuts frequently have green stripes and pale patterns before they ripen to a uniform buff-orange.
- Overripe Summer Squash: A zucchini left on the vine too long will swell, turn yellow, orange, or dark striped, and develop a hard rind. It hasn’t turned into a pumpkin; it’s just an overgrown zucchini!
- Volunteer Composting Plants: A random seedling sprouted from compost that was already a hybrid seed from last year’s cross.
.jpg)
Germination & Soil Temperature
Pumpkins and squashes are warm-season sun lovers. Attempting to plant them out too early in cold spring soil is the number one reason seeds rot in the ground.
- Ideal Germination Temp: Cucurbit seeds germinate best when soil temperatures are consistently above 22°C (ideally between 22°C and 30°C).
- Minimum Temp: They will struggle or fail to germinate entirely in soil temperatures lower than 16°C.
If your local spring starts off cold and wet, start your seeds indoors on a heat mat and don’t plant outside until after your last frost.
.jpg)
The Mystery Of “Pumpkin Volunteers”
We have all experienced it: you spread a fresh layer of homemade compost over a garden bed, and two weeks later, an army of vigorous, healthy pumpkin seedlings pops up completely uninvited. These are known as volunteer pumpkins.
Cucurbit seeds are large, tough, and protected by a hard outer coat (the testa). During a typical backyard composting process, temperatures rarely get high enough for long enough to destroy the viability of these seeds. They sit dormant in your compost pile until you spread it onto your warm garden beds. The moment they hit moist soil and warm sunshine, up they come!
While volunteers are fun, free, and often incredibly vigorous, keep in mind that they may not be true-to-type.
.jpg)
Botanical Species: What Can Cross With What?
If you want to save your own seeds and keep varieties true-to-type without complicated equipment, you need to look past the common names and check the botanical species.
Within the Cucurbita genus, there are four primary species commonly grown in home gardens. As a general rule: varieties within the same species will readily cross-pollinate with each other, but varieties from different species rarely cross naturally in a backyard setting.
1. Cucurbita maxima
- Popular Varieties: Hubbard, Turban, Banana, Triamble, Jarrahdale, Queensland Blue, Atlantic Giant.
- Plant Traits: Leaves are often large, soft, kidney-shaped, and barely lobed. They are generally soft to the touch rather than prickly. The stems attached to the fruit are round and spongy, turning thick and corky as the fruit matures.
- Best For: Rinds are usually thick, making maxima types the best choice for long-term winter storage.
.jpg)
.jpg)
2. Cucurbita moschata
- Popular Varieties: Butternut, Long Island Cheese, Kent (Jap), Gramma, Tromboncino.
- Plant Traits: Leaves are rounded, shallowly lobed, soft and hairy (not prickly), and frequently display distinct silver or white mottling along the leaf veins. Fruit skin matures to a characteristic tan, buff, or muted orange colour.
- Best For: Excellent heat tolerance, flesh is sweet, smooth, and ideal for roasts and soups.
.jpg)
.jpg)
3. Cucurbita pepo
- Popular Varieties: Zucchini, Patty Pan, Spaghetti Squash, Acorn Squash, Jack-o’-lantern pumpkins, Decorative Gourds, Cocozelle.
- Plant Traits: Leaves are often deeply lobed, triangular, rigid, and distinctly prickly or rough to the touch. Vines are often more compact or bush-forming (especially zucchinis).
- Best For: Quick-growing summer abundance. High variety in shape, size, and colour.
.jpg)
.jpg)
4. Cucurbita argyrosperma
- Popular Varieties: Silver-seeded gourds and Cushaw squashes.
- Plant Traits: The least common species in home gardens. Vigorous vines with large, rounded, shallowly lobed leaves. Rinds are generally smooth without deep furrows.
The Home Gardener’s Rule of Thumb
Because interspecific crosses (e.g. a C. pepo crossing with a C. moschata) are extremely rare without specialised laboratory intervention, you can safely grow one variety from each of the four species in the same garden at the same time without them crossing.
For example, you can grow a Zucchini (C. pepo), a Butternut (C. moschata), and a Queensland Blue (C. maxima) side by side. They should not cross-pollinate each other, and the seed saved from all three should be true-to-type next year!
.jpg)
Understanding Flowers & Pollination
Cucurbits are monoecious, meaning a single plant produces separate male and female flowers.
In a typical garden setting, we require insects like bees to take that pollen from the male flower to the female flower to fertilise it so that the fruit begins to develop.
Hand pollination is a great way of ensuring you get lots of fruit from your plant, particularly if you have noticed a decrease in bee and insect activity this season. Cucurbit flowers are large and yellow, so they are easy to spot, and male and female flowers are easy to distinguish from one another.
Male vs. Female Flowers
- Male Flowers: Usually appear first. They sit on high, slender stems. Inside the petals, there is a single central column (the stamen) covered in dusty yellow pollen.
- Female Flowers: Sit closer to the main vine on shorter stems. They are instantly recognisable by the swollen miniature fruit (the ovary) sitting directly behind the base of the yellow petals. Inside the flower, you will see a multi-lobed stigma.
(1).jpg) Left: Female Flower & Right: Male Flower
Left: Female Flower & Right: Male Flower
Pollination Issues
Cucurbit flowers typically open around sunrise and are only open until the afternoon. If you are an early morning waterer or have an automated sprinkler system, you may accidentally be washing the pollen away before the flowers have a chance to be fertilised. It is best to water at ground level around the root zone.
Why Are There Only Male Flowers Early in the Season?
It is completely normal for a young vine to produce dozens of male flowers for a week or two before a single female flower appears.
Female flowers require a huge amount of energy and water to transform into fully formed fruit. The plant naturally waits until it has developed a large canopy of leaves to support fruit production before releasing female flowers. Producing early male flowers attracts local bees and pollinators to the patch, establishing a routine food source so that when female flowers finally open, pollinators are already visiting.
Tip: If you notice an abundance of male flowers opening a couple of days before your female flowers are ready, pick the males, place their stems in a small glass of water, and store them in the fridge for 1 to 2 days. The pollen will stay viable until your female flowers open and allow you an opportunity to hand-pollinate.
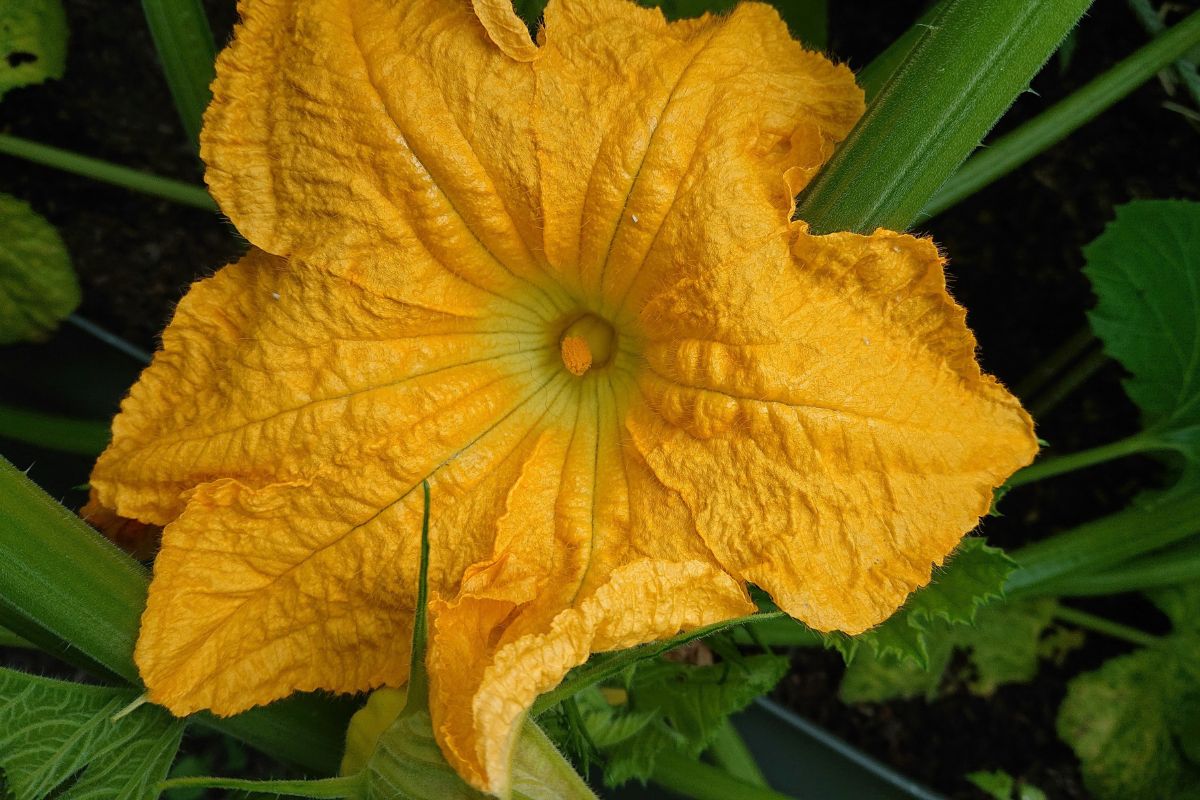 Above: Male Flower
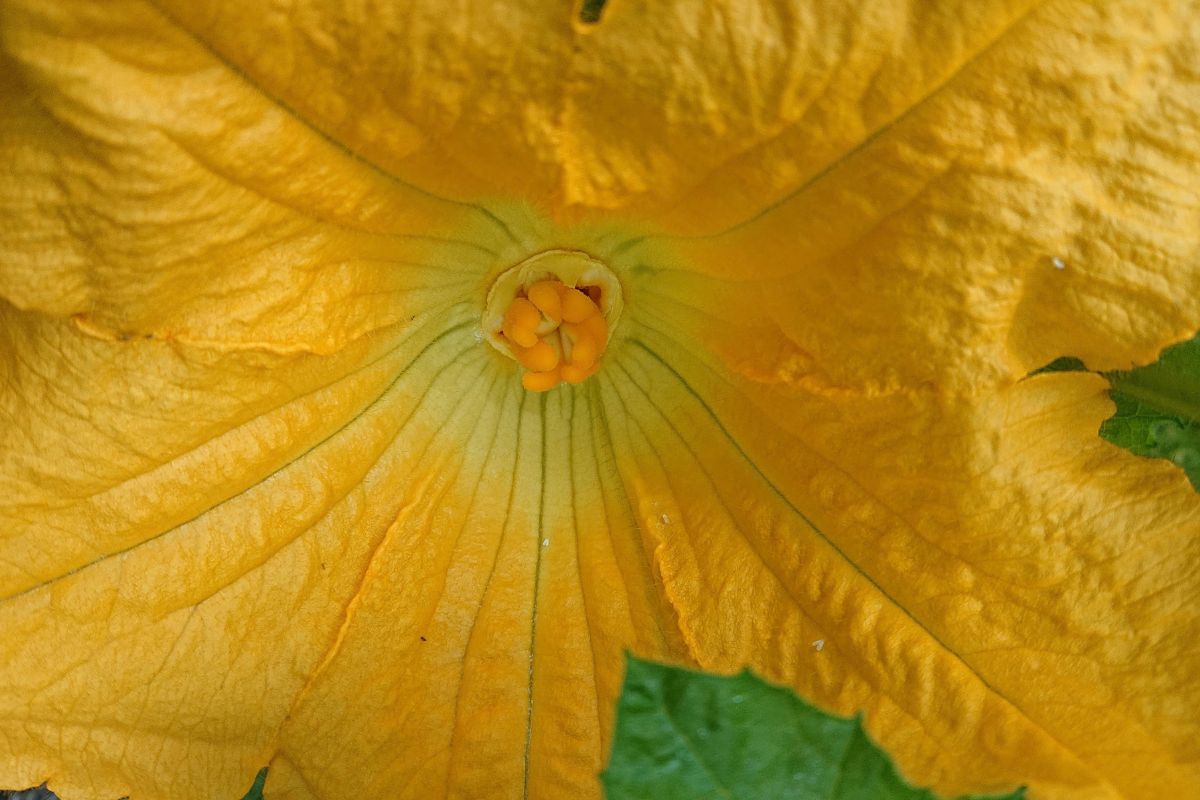 Above: Female Flower
Step-by-Step Hand Pollination
If you have noticed low bee activity, or if you want to save pure seeds while growing two varieties of the same species in a small backyard, hand pollination is simple, reliable, and effective.
Simply remove the male flowers and gently apply the pollen from the stamen onto the pistil/stigma (the central part) of the open female flower. You can use any male flowers from the same species (i.e. you can use C. pepo on another C. pepo; if you’re not planning to save the seed from the fruit, it doesn’t matter). As an example, if you have a Patty Pan squash with lots of male flowers open and a dark green zucchini with no male flowers and an open female flower, then you can use those flowers to pollinate each other without impacting your harvest, as they are compatible.
Seed Saving: From Vine to Storage
Saving high-quality seeds that are true-to-type requires patience. To save Cucurbita seeds, the fruit must reach maturity. For large pumpkins, this is basically the stage you would harvest for eating, but with Patty Pan squash and zucchini, the fruit needs to be grown past when you would usually harvest for consumption, staying on the plant until the skin is hard enough that it can’t be pierced with a fingernail.
Pro Tip: For backyard growers, leave the last couple of fruits to mature on the vine so you can collect enough seed for next season. With zucchini and squash, the more you pick, the more they produce, so when you stop picking, you will slow production, which is why you don’t want to do it at the start of the season.
Saving Seed True-to-Type
The isolation distance recommended for most cucurbit varieties is between 250 and 800 metres, meaning if you are growing two varieties from the one species, they are likely to cross-pollinate if planted closer. If you don’t have the room in your backyard patch to successfully isolate your variety, then you can do this manually by following these steps:
Ideally for seed saving, you would have a minimum of 5 plants of the same variety to maintain genetic diversity, but more plants are better where space allows.
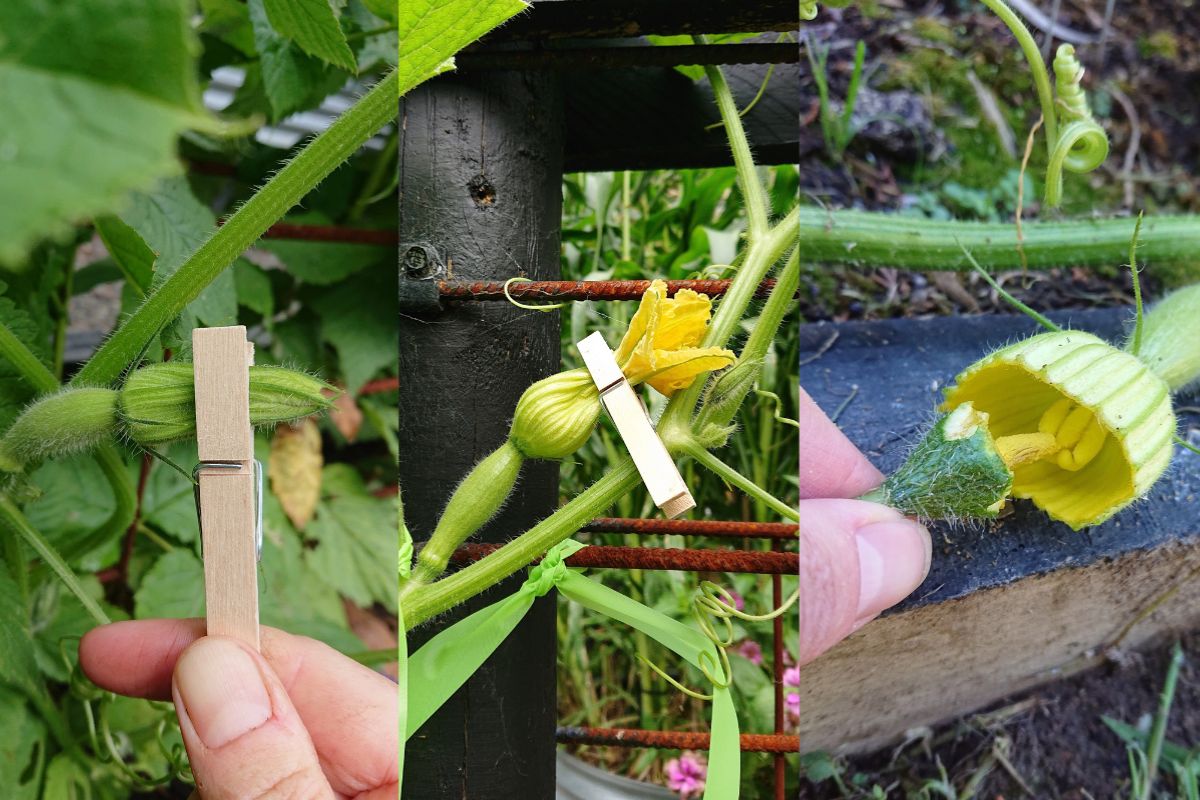
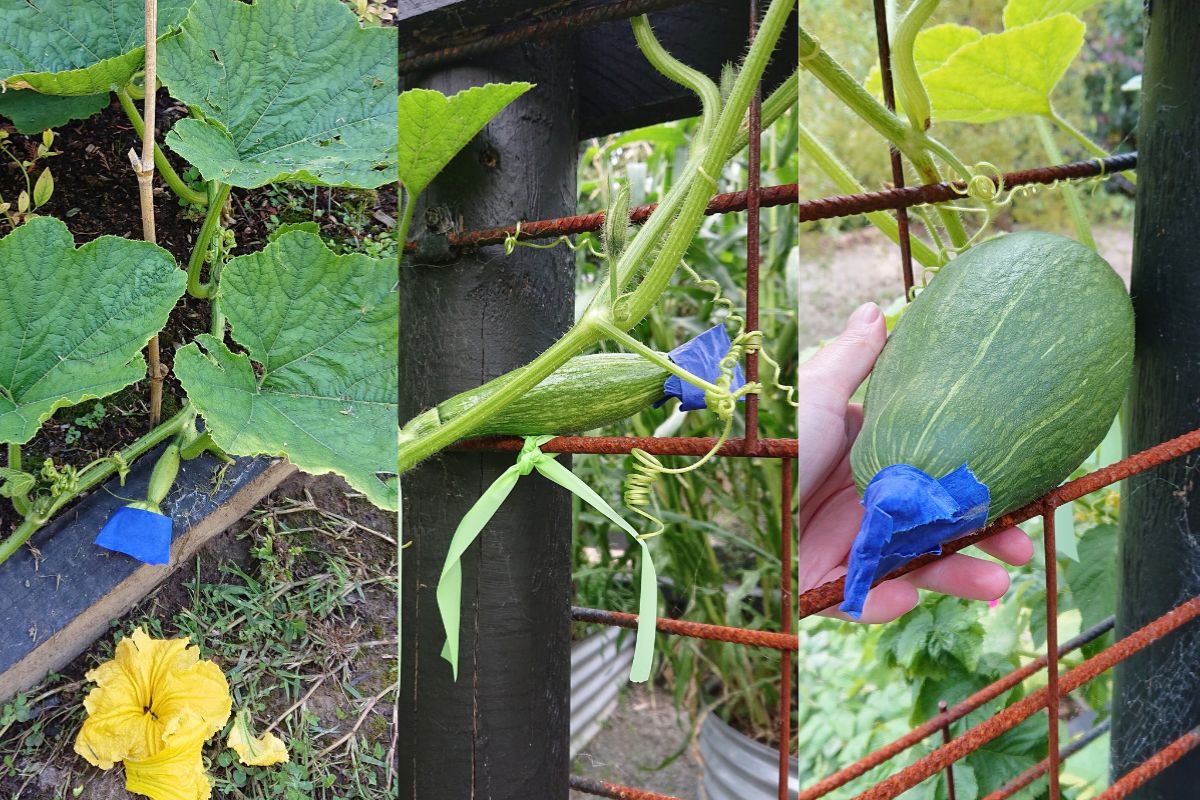
- Spot the Flowers at Dusk: The evening before flowers open, they will look plump and show a bright yellow tinge at the tips. Select the female flowers you want to pollinate and two or three male flowers on the same variety.
- Peg: Gently peg the chosen flowers closed using a laundry peg just behind the tip of the petals on both male and female flowers so bees and other insects cannot enter the flower at sunrise.
- Pollinate in the Morning: The following morning you will see the tip of the flower open on the other side of the peg. Snip the isolated male flowers off the vine. Carefully peel back their yellow petals to expose the pollen-covered stamen.
- Apply Pollen: Remove the peg from your female flower and trim off the section of the flower on the outside of the peg. Gently roll and rub the male stamen across all lobes of the central female stigma. Using two male flowers per female flower ensures thorough pollination.
- Reseal & Mark: Tape the female flower petals shut again so insects cannot enter afterwards. Tie a bright piece of flagging tape loosely around the stem near the female flower or place a stake nearby so you know which fruit was hand-pollinated when it comes time to harvest for seed!
- Wait: The flower end will then drop off over the next few days, and if pollination is successful, you should start to see the fruit develop and swell.
Curing Your Pumpkins
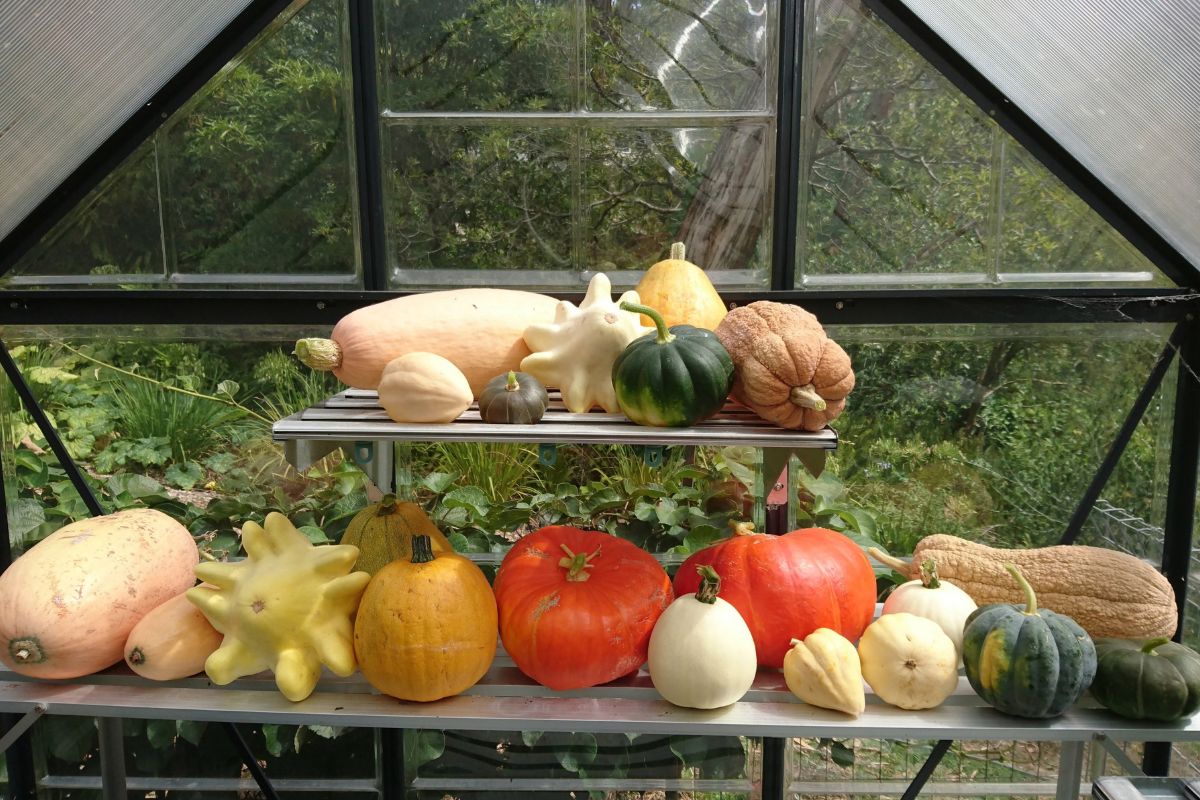
All types of pumpkin benefit from curing after harvest to ensure the fruit and seeds are mature. Curing is usually done indoors where pests are no longer an issue.
- Clean: Gently wipe the outside skin with a mild 1:10 dilution of white vinegar and water. This helps to reduce mould spores and surface bacteria, preventing rot and extending shelf life.
- Store Warm: Place the pumpkin in a warm spot (around 20°C) with good airflow for 2 weeks. Placing fruit on an elevated cake cooling rack on a laundry bench works brilliantly.
- Rotate: Turn the fruit a quarter-turn every few days towards sunlight (ensuring the fruit doesn’t get sunburnt). Always lift pumpkins from the base with clean hands. Never carry them by the stem!
Your pumpkin has finished ripening when the skin is uniform in colour, the rind is completely hard, and the stem is woody.
They are now ready for seed saving, eating, or storing for eating later. Storing pumpkins is best done in a dark, well-ventilated space at around 10–15°C, ideally elevated off the ground and not touching each other. Storing on their sides can increase lifespan as it prevents moisture from pooling around the stem. Maxima varieties are often the best for storage, lasting up to 6 months.
Seed Extraction & Storage
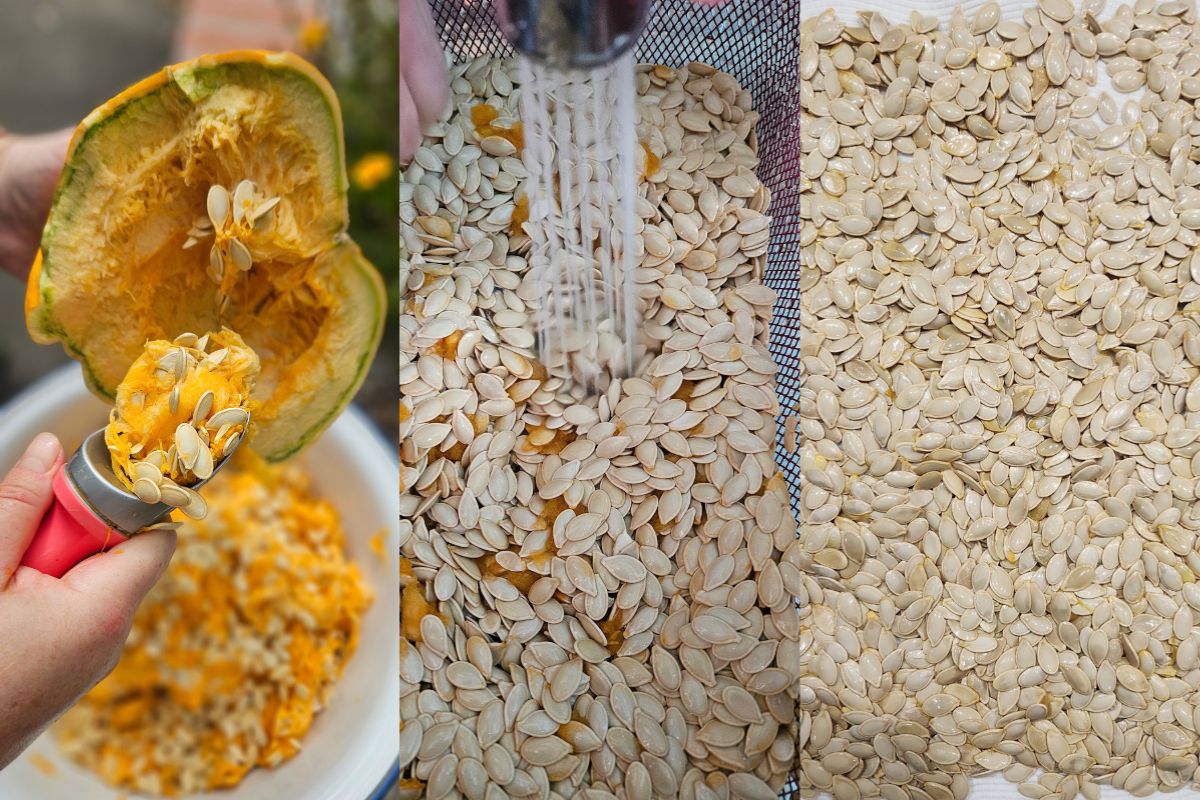
For seed saving, once you have split the Cucurbita in half, you can use an ice cream scoop to scoop out the seeds. Discard any seeds that have been damaged or cut. Run the seeds under gentle cool water, massaging them free of the plant membrane. A vegetable strainer or a wide-gauge sieve works great here.
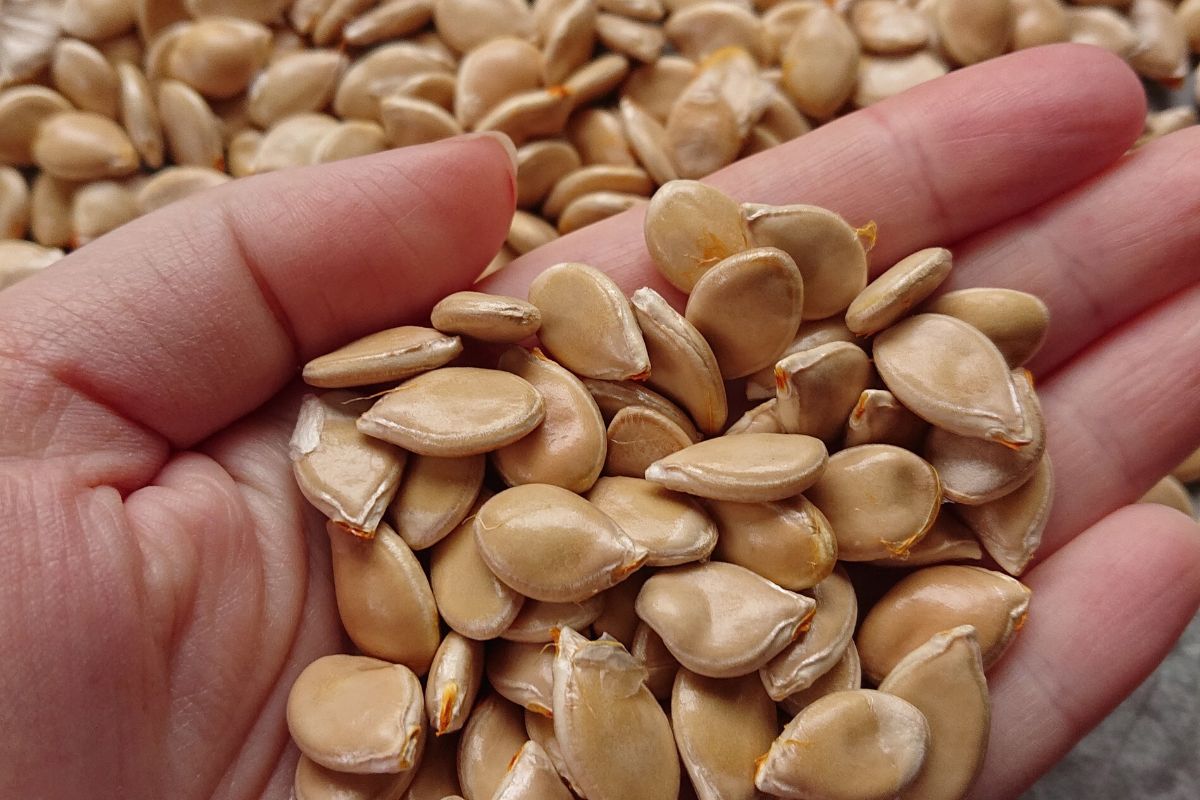
Once the seeds are free and rinsed, lay them out on a tea towel to dry, making sure you spread them out, so they dry evenly. Leave them in a well-ventilated place to dry thoroughly (around 3 weeks) before storing in a cool, dark location (such as a desk drawer, pantry, or cupboard).
Properly stored pumpkin and squash seeds can remain viable for up to 6 years!
Article & photography by Nat Buttenshaw