
Time, money and hope are all invested when you plant a tree or a new selection of vegetables in your garden. The old saying that you wouldn’t put a $50 tree in a $5 hole holds true every time. Good soil, compost, fertiliser and your valuable time all go into giving that new plant its best possible start.
Yet, that hard work can be ruined in less time than it took to dig the hole by hungry, inquisitive animals, big and small. As guardians of the garden, it’s up to us to outsmart them and protect our precious plants.
Row Covers
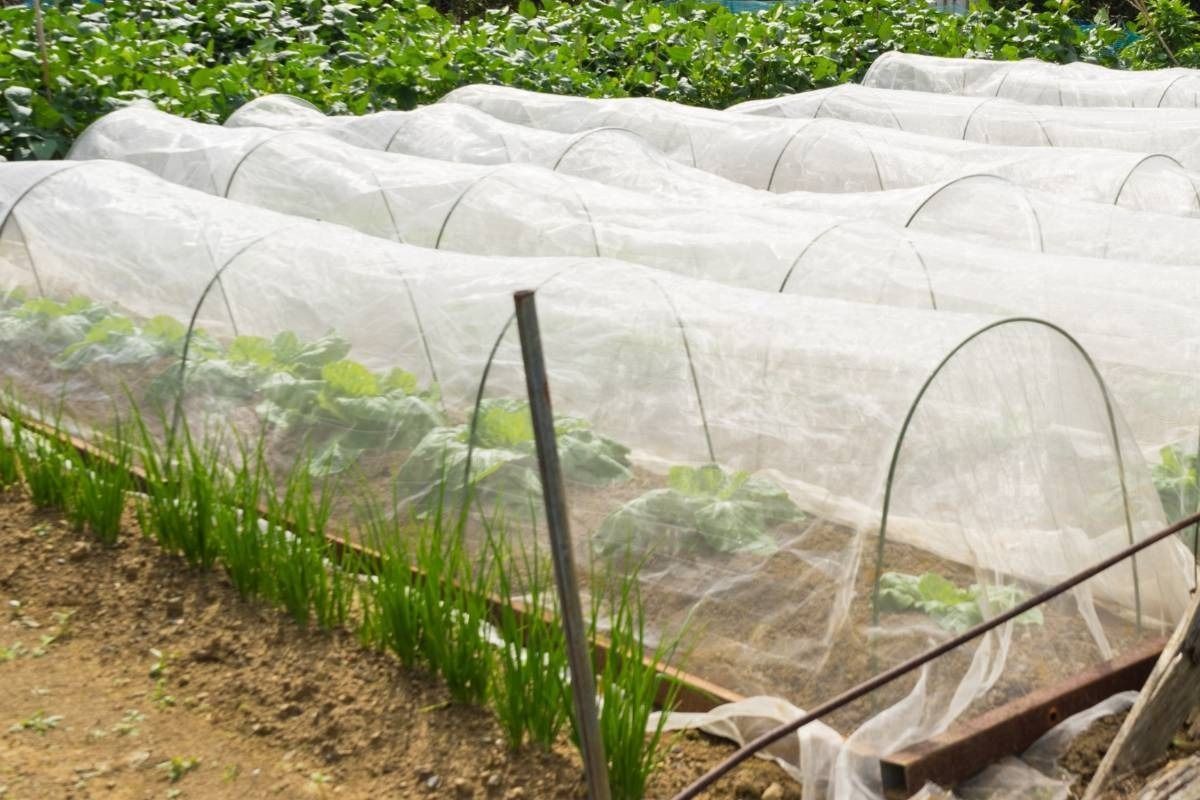
Whether you are trying to protect your veggies from hungry insects and chewing bugs, a blazing hot sun, or raging winds, a row cover can protect the produce you have worked so hard to grow.
Tools And Materials Required
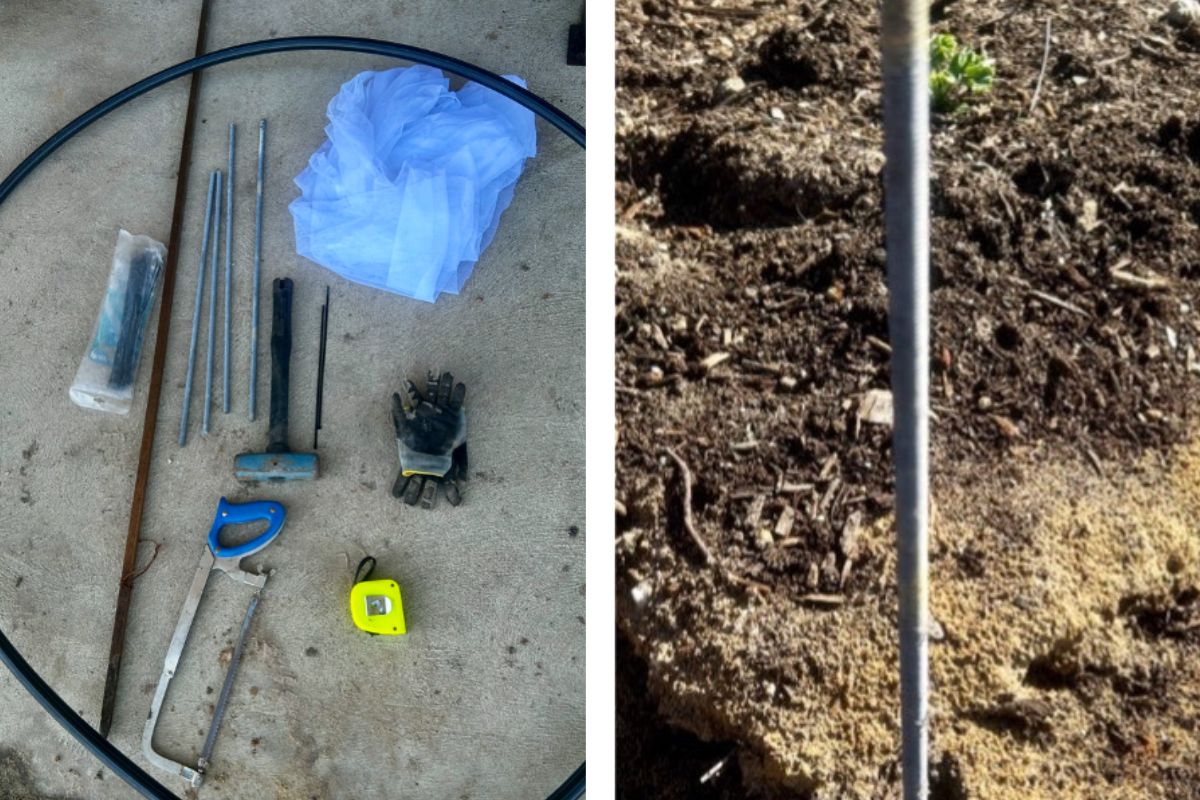
- Protective Gear: Gloves and safety glasses.
- Tools: A tape measure, a mallet or hammer, hacksaw and a pair of scissors.
- Metal Rods or Rebar: Short lengths of rebar or heavy-duty metal stakes driven into the soil to anchor your hoops firmly in place. Just as long as your pipe fits over it.
- Poly Pipe: Flexible poly pipe cut into equal lengths. This forms the curved hoops or loops over your garden bed
- Ridge Support Stake: A long wooden stake or thin pipe run horizontally across the top of your hoops to tie the structure together.
- Cable Ties: Used to secure the horizontal support stake firmly to your poly pipe hoops
- Netting or Fleece: Your choice of insect exclusion netting, bird netting, shade cloth or garden fleece depending on your climate.
- Bricks or Timber Weights: Heavy objects like bricks, pavers, or logs to weigh down the edges of the netting so pests can’t crawl underneath.
Secure The Foundation Rods
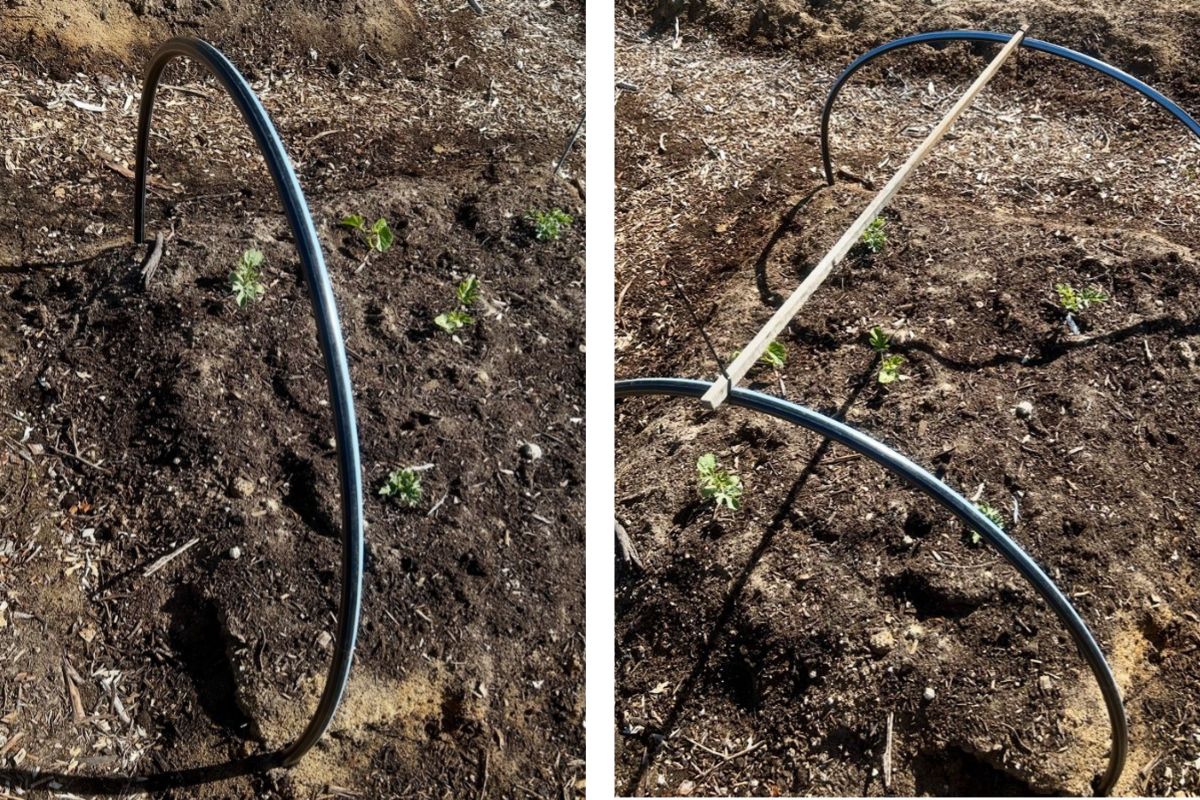
Start by hammering your metal rods or rebar into the ground along the edges of your bed. For a standard square or rectangular garden bed, drive one rod into the ground on each corner, leaving plenty of the stake exposed above the soil line.
Form Your Poly Pipe Hoops
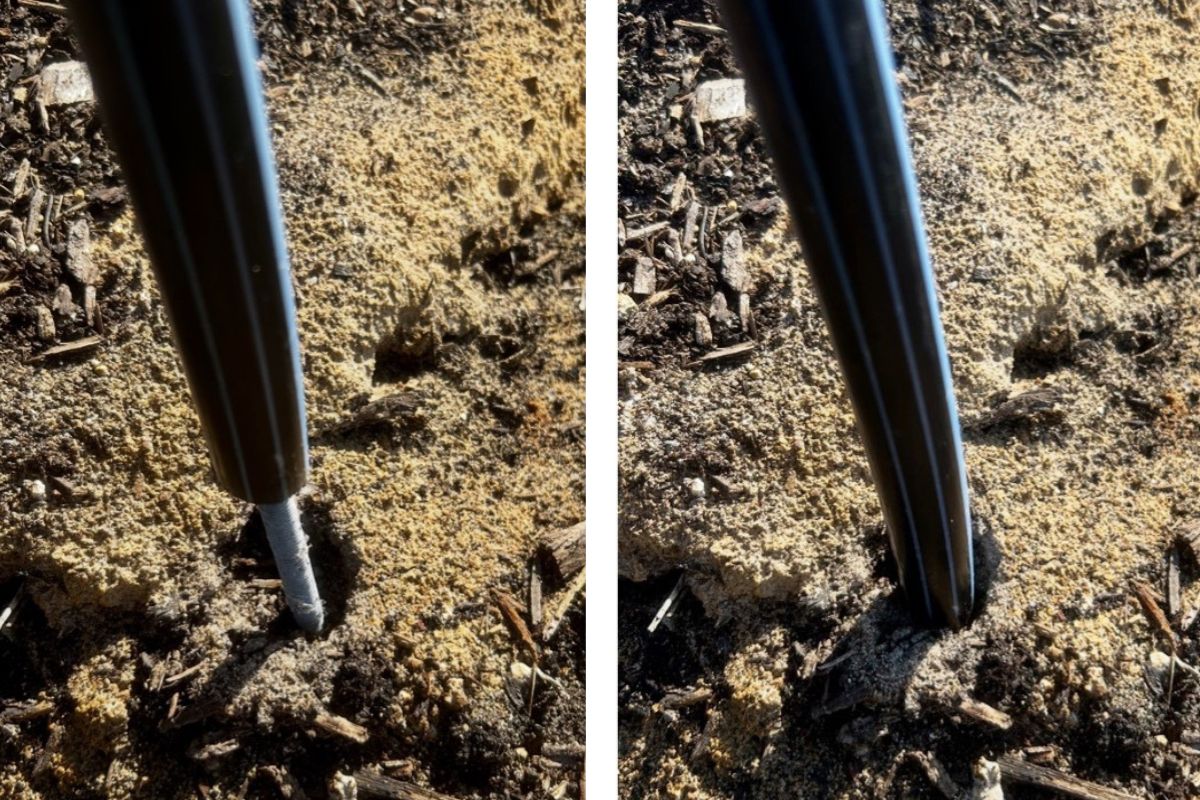
Slip one end of the poly pipe over a rod, bend it over the bed and measure how long you need. If you are planning on having taller plants, you will need to make the arc of the pipe higher. Cut your poly pipe into equal lengths using a hacksaw.
Slide both ends of the pipe over the metal foundation rods and push them down firmly until they touch ground level. This completes your first hoop loop.
Space out the additional loops, repeating the process along the length of your garden bed. To ensure the tunnel remains sturdy, space your hoops roughly 1.5 metres apart.
Add A Spine For Extra Strength
To prevent the tunnel from wobbling or collapsing inward under heavy wind, place a long horizontal wooden stake or pipe right along the top centre of your loops. Secure it tightly to each hoop using cable ties.
Drape Your Netting And Seal The Perimeter
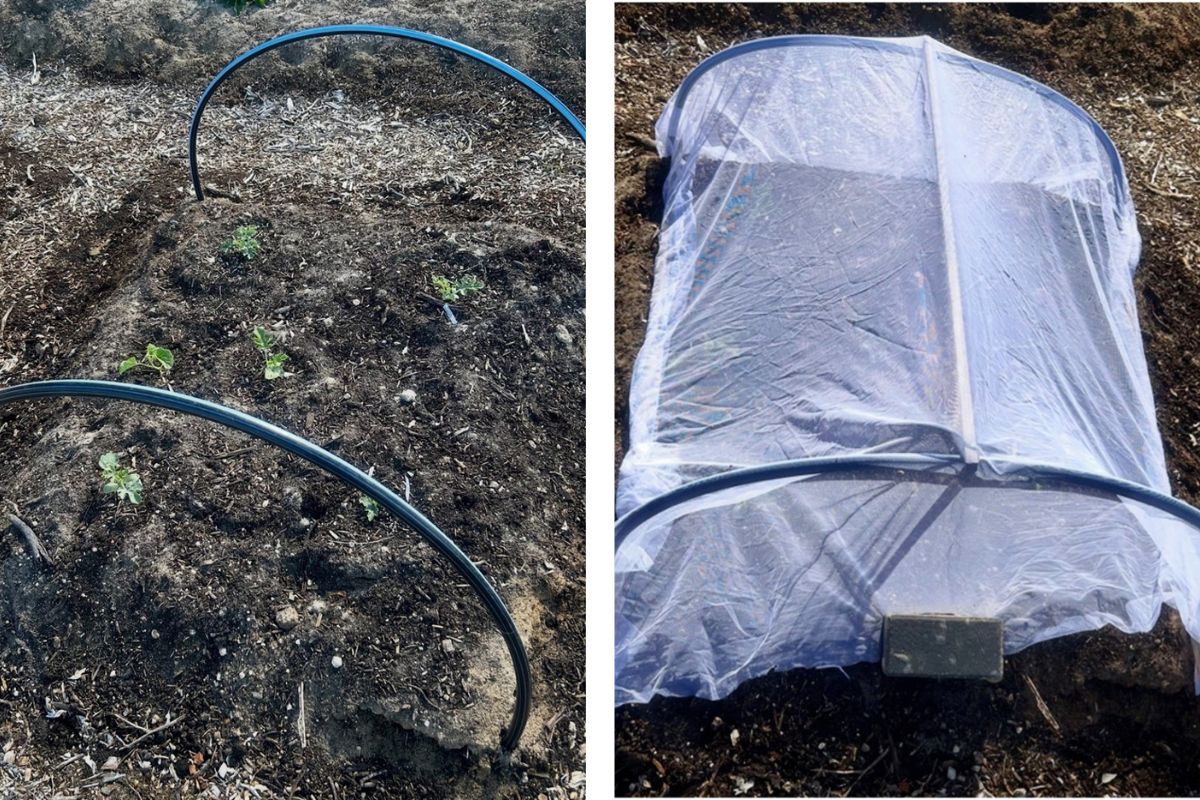
Gently cover the completed structure with your netting, mesh, or fleece. Pull it taut so it doesn’t sag onto your growing plants but leave enough excess fabric pooling on the ground along all sides.
Pin the sides and ends of the netting completely flat against the soil using bricks, pavers, lengths of wood or netting pegs. This ensures a tight seal so creeping or flying insects can’t find a way inside.
Alternative Protection Options
Depending on what you are growing, a row cover tunnel might not always be the perfect fit.
If you are looking at protecting large fruit on trees, try the Fruit Protection Bags.
If you prefer a simpler setup without manually measuring out loose netting, you can opt for Insect Exclusion Netting, which comes in convenient pre-cut sizes to drop straight over your frames.
Tree Surrounds
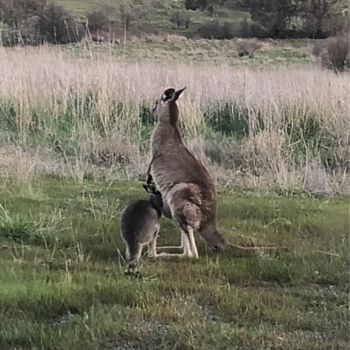
The first step is understanding exactly what we are protecting our precious, newly planted trees from. Kangaroos, rabbits or livestock can debark and nibble a small sapling down to the ground in minutes or even rip a newly planted tree straight out of the soil in seconds.
The strength of your tree surrounds depends entirely on the severity of your local threat.
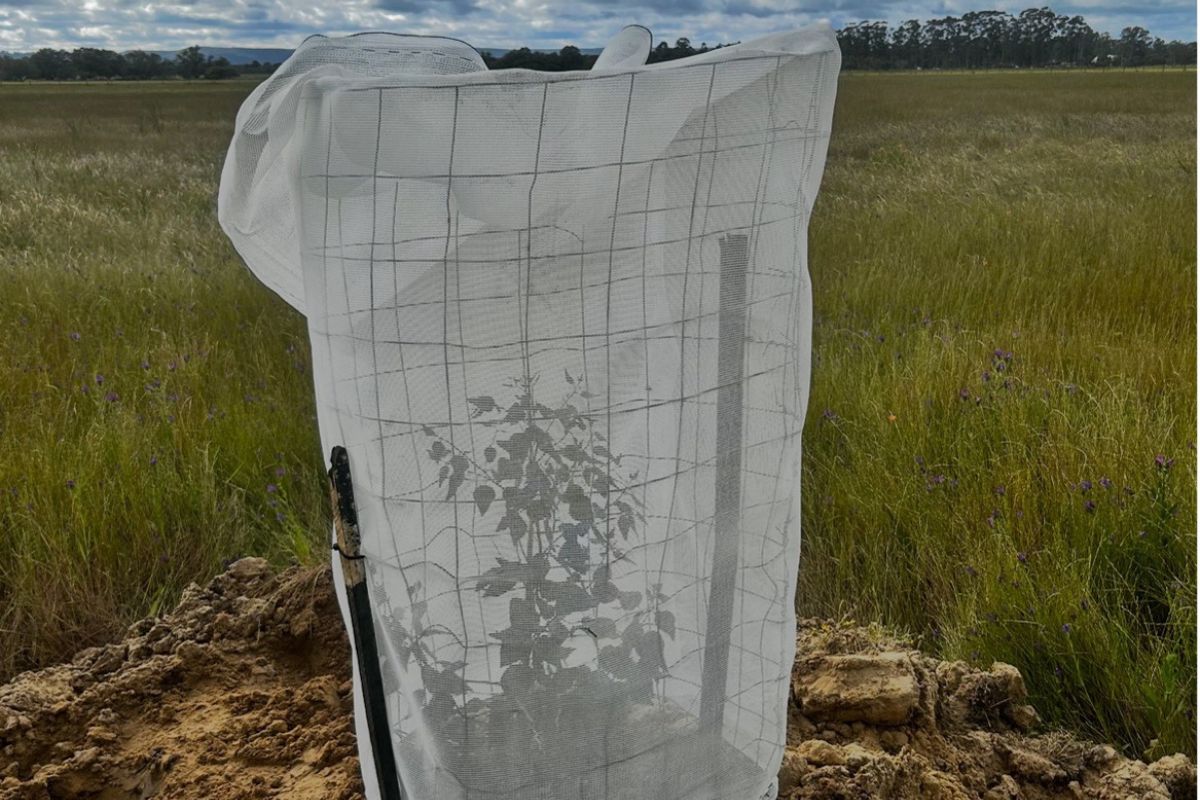
For the small tree pictured below, kangaroos and sheep are the main concerns.
Tools And Materials Required
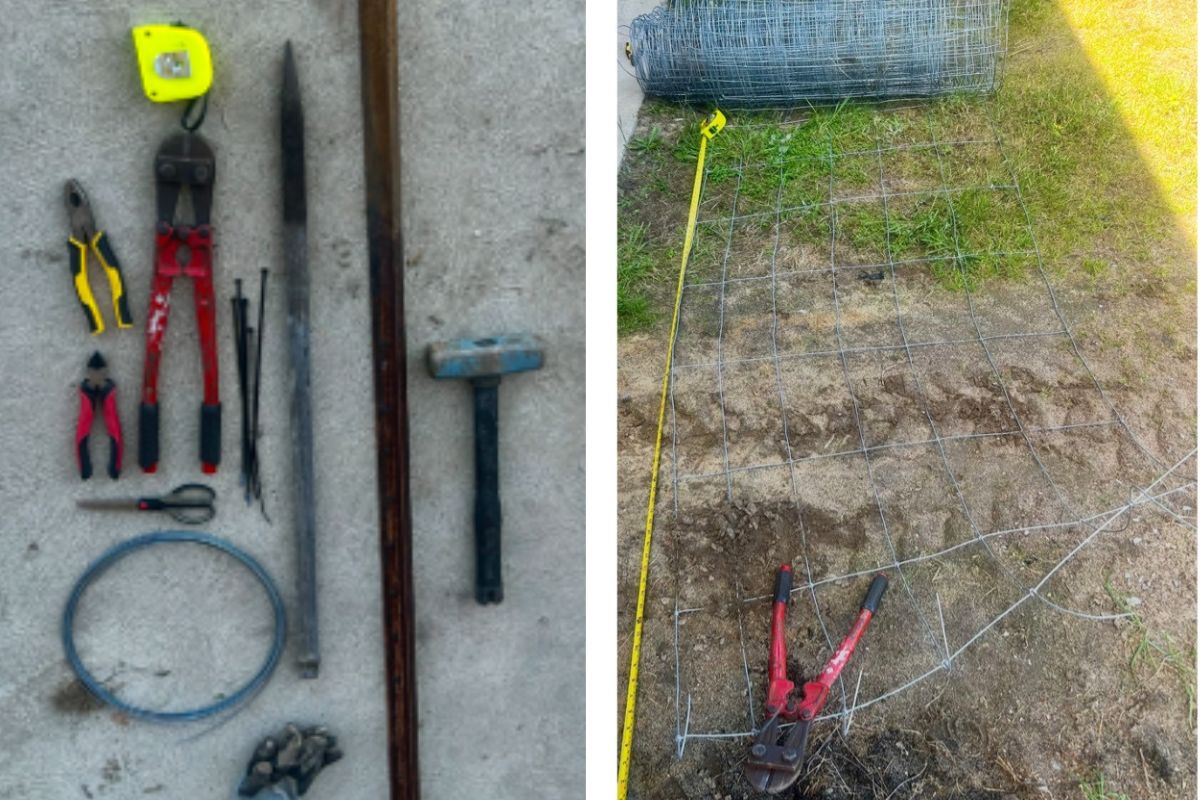
- Safety Gear: Gloves, safety glasses, a small sledgehammer (or post driver), pliers and/or wire cutters depending on the gauge of the wire. Pliers are handy to bend any sharp edges inwards, scissors, cable ties (you can buy biodegradable cable ties), tape measure.
- Fencing Mesh: Heavy-duty fencing mesh panels work best for sheep and kangaroos (available at local hardware stores for smaller projects). For larger projects, buy a bulk roll from an agricultural or farm fencing supplier (you can use it for other projects like trellising around your garden). For smaller pests like rabbits or chickens, scaled down chicken wire or small-gauge wire works.
- Twitching Wire: Thin, soft tie wire sold in rolls, used for twisting and securing your mesh together. Cable ties may be an easier alternative, although standard plastic ones do degrade in the sun, you can get biodegradable cable ties now too.
- Shade Cloth: Used to wrap around the wire structure for climate and wind protection. (I have used a 70% shade cloth, it’s a hot climate in WA), you can choose different UV % ratings and colours depending on your climate and what is available in your area.
- Star Pickets: Heavy-duty steel post to anchor the tree guard. These come in different lengths, depending on your tree height, (180cm posts are used in this example).
- Wooden Stakes: Used to anchor the tree guard. While you can use two star pickets, a wooden stake placed opposite a single star picket is a cheaper alternative if you are planting many trees. They work well to anchor the wire mesh down. (75cm stakes are used in this example).
Measure And Cut The Mesh
To get started, gather your supplies and measure out your roll of wire mesh. Secure one end with something heavy so it doesn’t spring back or ask a friend for a hand. Aim for at least 2 metres of the wire per piece to give the tree plenty of room in the ring to grow.
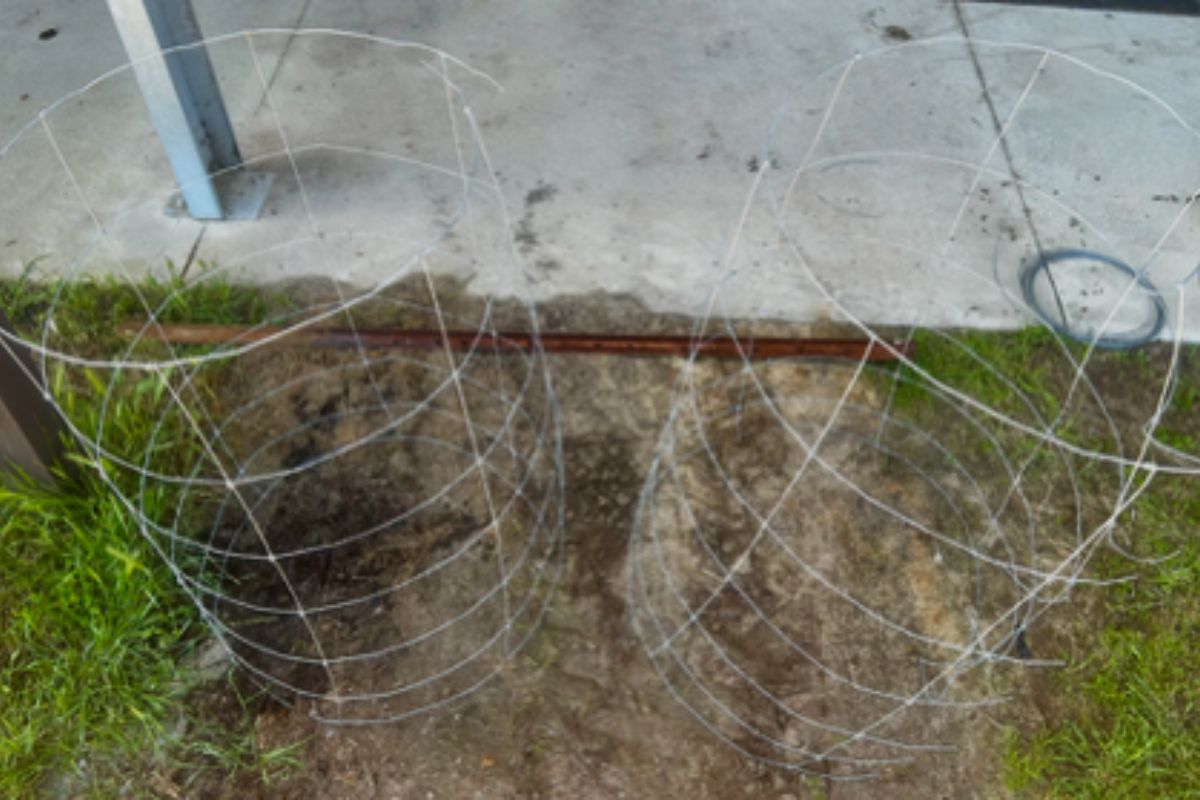
Roll Mesh Into Circles
Take note of your wire orientation, the wire used here has larger squares at the top and smaller squares at the bottom. Roll your two cut lengths of wire mesh into circular rings.
Twitch The Rings Closed
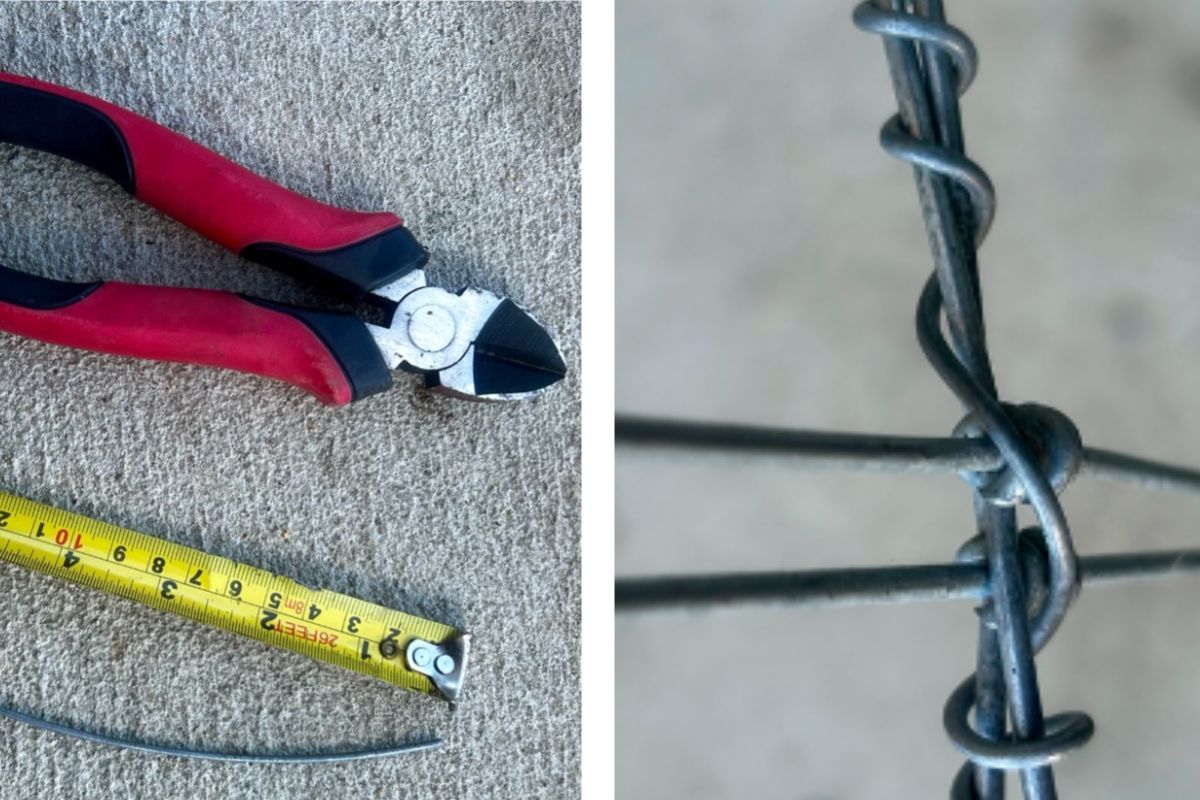
Cut two pieces of twitching wire about 15cm long. Use your pliers to twist them through both ends of each mesh ring to close the circle, as shown below. Wind one end clockwise and the other anticlockwise; it gives the join more strength.
Stack For Extra Height
Depending on the height of your wire and the size of your tree, you may need to stack your mesh. If your wire is short, push the top ring slightly inside the bottom ring, so at least one row of squares is doubled up.
This gives the structure more height and strength. Twitch the two stacked rings securely together.
Measure And Cut The Shade Cloth
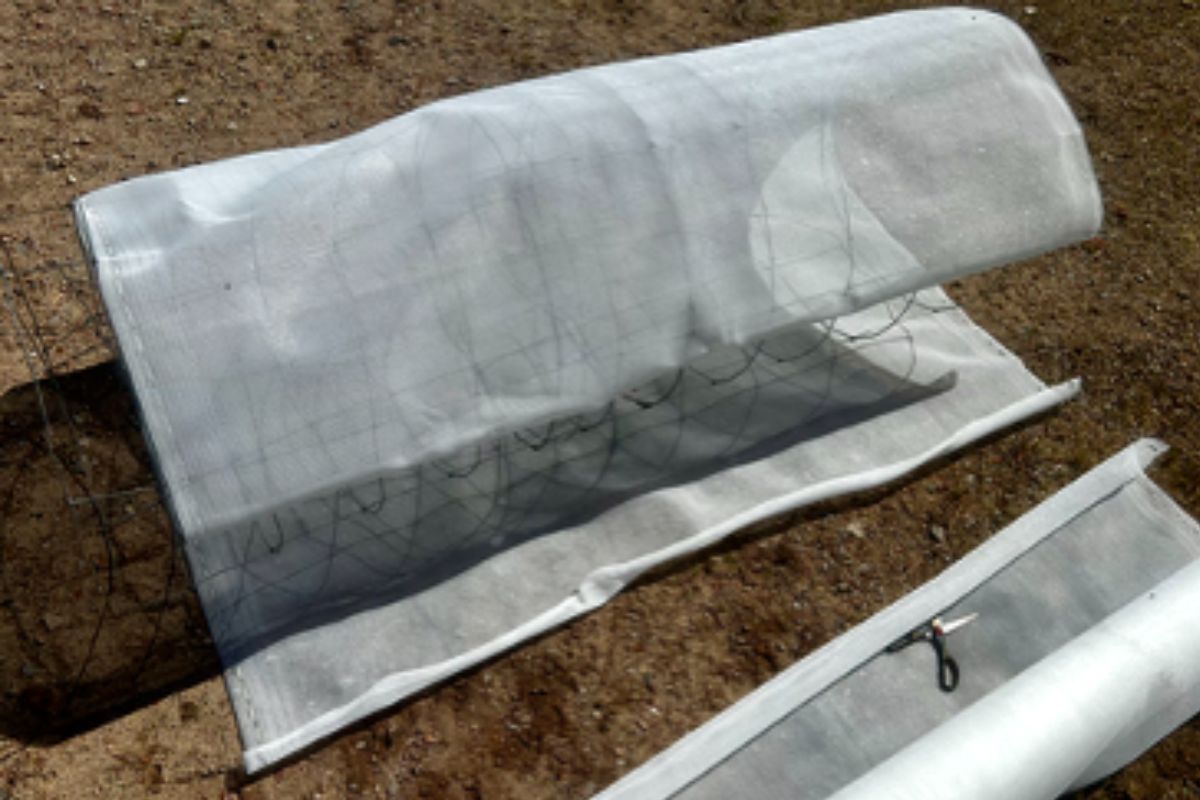
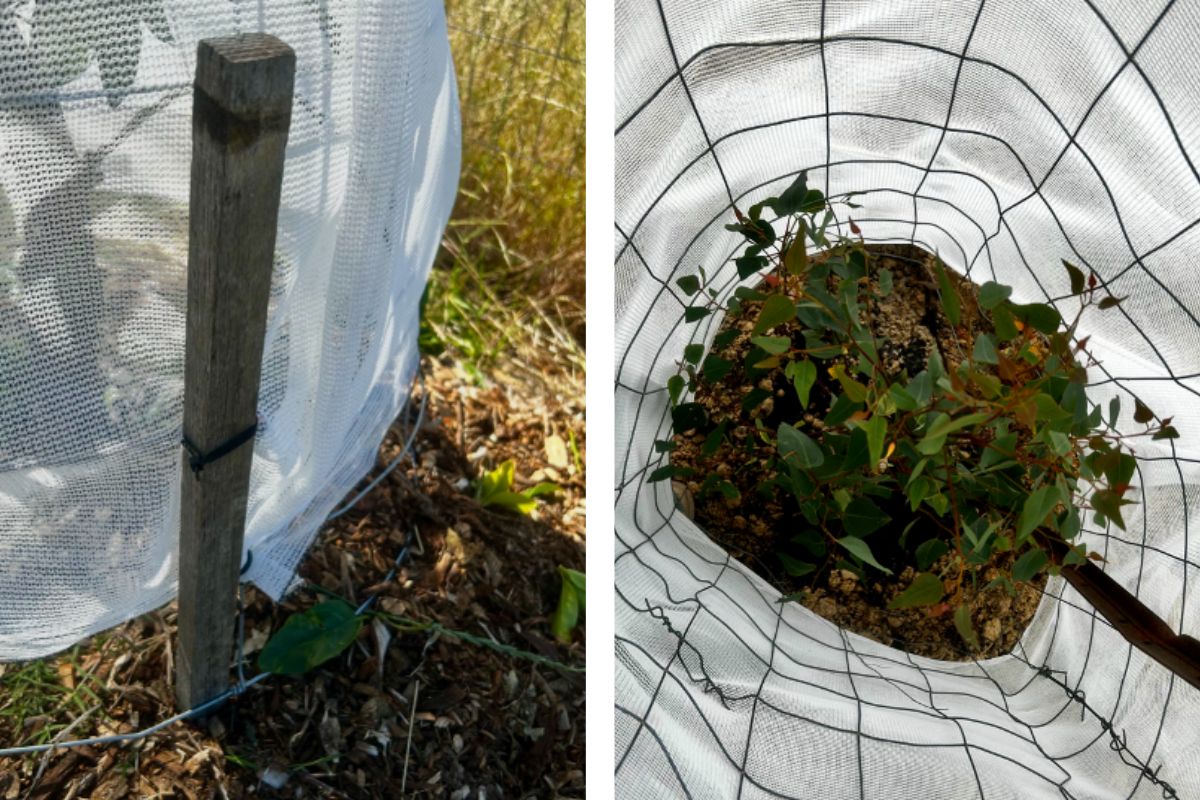
Roll out your shade cloth on the ground and lay the wire frame on top to measure it before cutting. Make sure the shade cloth sits up just a little bit from the bottom of your wire ring. In hot climates, this bottom air gap allows for good air flow, so you don’t accidentally cook your tree!
It doesn’t matter that there is extra cloth at the top, that can be tucked down into the ring once upright around the tree.
Tie The Cloth To The Frame
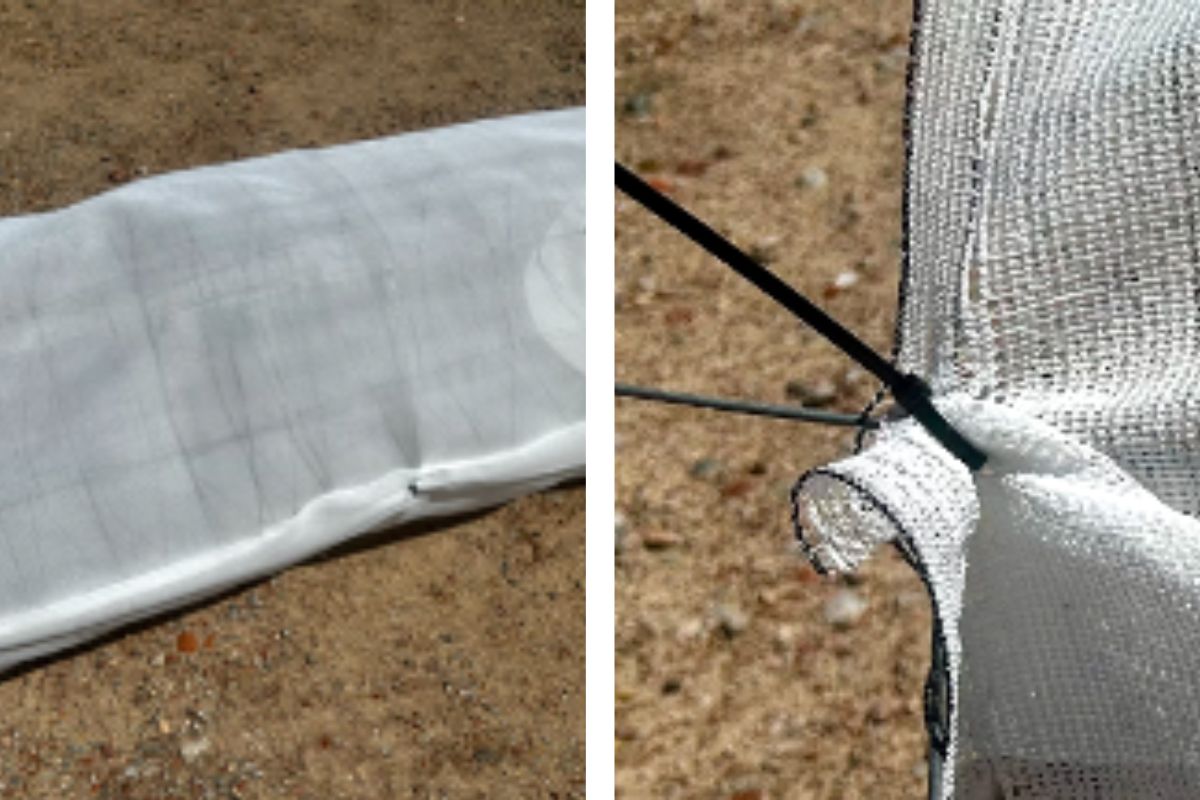
Attach the shade cloth to the wire frame by pushing your cable ties through the cloth and around the wire mesh to secure it in place. Use at least three cable ties along the seam.
Position And Secure The Guard
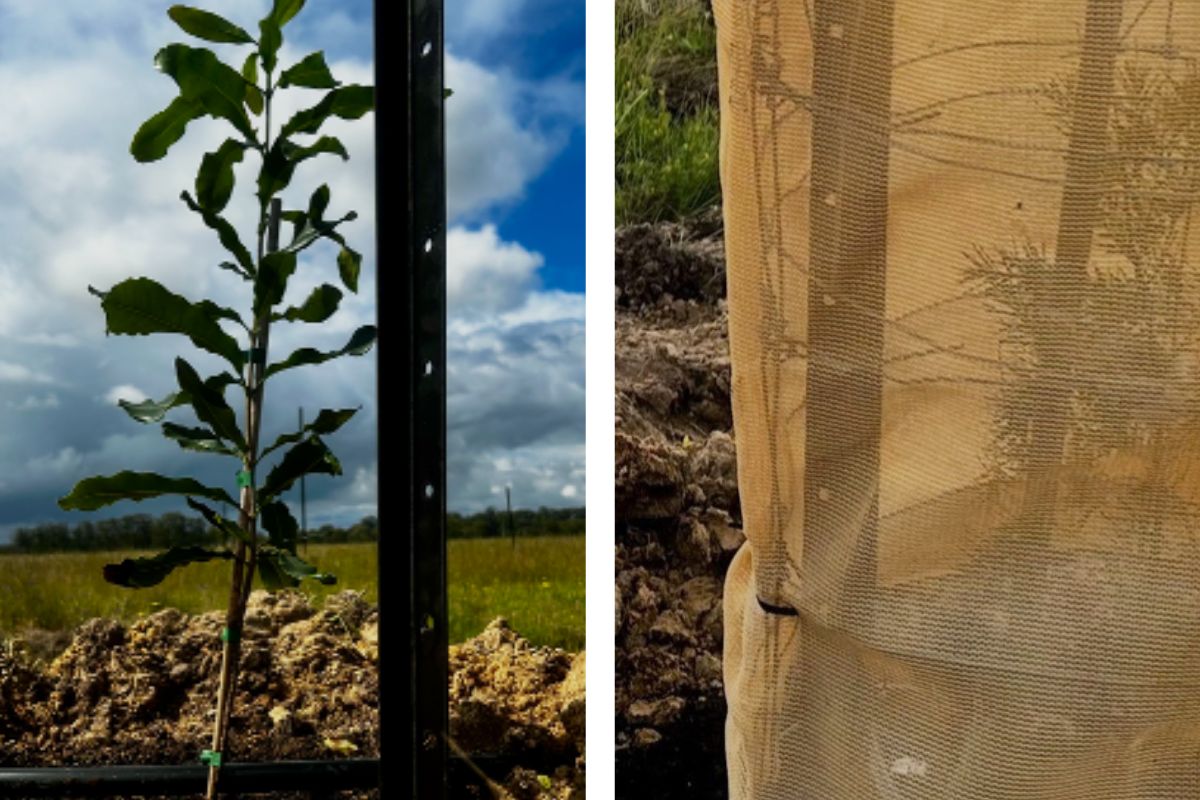
When driving your star picket into the ground, take care not to damage your tree’s root ball. Put the post on the side of the tree that receives the strongest winds, this gives the structure much better support. Just make sure the holes on the picket post face outward so they are easy to access.
Place your completed tree surround right over your sapling and your driven star picket post. Secure the guard to the picket using at least two cable ties pushed through the holes of the picket post, through the shade cloth, and around the wire mesh.
Anchor, Tuck And Relax
Drive your wooden stake into the ground on the opposite side of the star picket, passing it through one of the bottom squares of mesh. Secure it tightly with a cable tie woven through the shade cloth, mesh, and stake.
Tuck any excess shade cloth neatly into the top of the ring. Trim any excess length of cable ties to neaten everything up.
Now you can relax knowing your tree is safe from large, hungry animals. As a bonus, your tree is now perfectly insulated against frosty nights and harsh, drying winds, giving your garden investment plenty of time to thrive.
Note: This tree surround was made from different wire I had lying around.
Article & Photographs by Natalea Erskine